Why Your Garage Door Won't Open: A Practical Troubleshooting Guide
Urgent, practical troubleshooting for why your garage door won't open, with safe checks, diagnostics, and proven fixes. Identify power, sensor, and mechanical issues quickly and decide when to call a pro to prevent injury or damage.

Most garage doors fail to open due to power or sensor issues, or a jammed track. Start with the simplest checks: verify the opener is powered and reset, test the wall switch and remote, then inspect the safety sensors and track for obstructions. If none of these work, call a professional for a safe, thorough fix.
Quick Overview: Common Causes
The reasons why garage door won't open often come down to four broad categories: power and control electronics, safety sensors, mechanical binding, and remote or keypad signals. When you observe the symptom "reasons why garage door won't open", you should categorize the issue before taking action. According to GarageDoorAdjust, in 2026 the most frequent culprits are a dead opener or lack of power, misaligned safety sensors, a jammed track or worn rollers, and a failing wall switch. Understanding these top causes helps you diagnose quickly and avoid unnecessary parts replacement. Begin with the simplest checks first: verify there is power to the opener and that the door is not physically blocked. If the door operates manually, the issue is most likely electronic or sensor-related, not a failed spring. Throughout this guide, GarageDoorAdjust emphasizes safety, proper testing, and documented steps to prevent future outages.
Safety First: What Not To Do
Safety should drive every troubleshooting decision. Never attempt to adjust torsion springs or any high-tension components without proper training. Always unplug the opener before inspecting electrical components or wiring. Wear eye protection and gloves when handling metal parts, and keep children and pets away from the door during tests. If you smell burning plastic or hear unusual grinding, stop immediately and disconnect power. Do not bypass safety sensors or tape over them to force the door open—these sensors are designed to prevent injury. If you're unsure at any point, call a licensed professional.
Diagnostic Flow You Can Follow
This diagnostic flow guides you from symptom to solution without jumping to complex fixes. Start with the most common, easily verifiable causes and move toward more involved checks:
-
Symptom: Door won't move when pressing the remote or wall switch.
-
Diagnosis: Power supply or control signals could be at fault.
-
Solution: Check the outlet, test with a different device, and reset the opener.
-
Symptom: Door responds intermittently or only when activated manually.
-
Diagnosis: Sensor alignment or wiring issue may be present.
-
Solution: Clean and align photoelectric sensors; verify wiring connections.
-
Symptom: Door stalls mid-way or makes grinding sounds.
-
Diagnosis: Track binding, misaligned rollers, or worn cables could be the culprit.
-
Solution: Clear obstructions, lubricate moving parts, and inspect roller condition.
-
Symptom: Door opens only partway or stalls at the top.
-
Diagnosis: Spring balance or torsion issues may be involved (dangerous).
-
Solution: Stop and contact a pro for spring inspection or replacement.
If this flow doesn't resolve the issue, escalate to a professional before attempting further disassembly. Regular maintenance and timely sensor checks reduce future failures.
Step-by-Step Fixes for the Most Common Cause
Here is a practical, safe sequence for the most common problem—power/sensor related issues—designed to be followed in order:
- Power check and reset
- Ensure the opener is plugged into a live outlet. Check the circuit breaker and reset the outlet if it has a reset button. Then perform a full reset of the opener by unplugging for 60 seconds and plugging back in.
- Tip: If the outlet is controlled by a switch, verify that switch is ON and not tripped.
- Remote, keypad, and wall switch test
- Use the wall button first; if that works but the remote doesn't, replace the remote batteries and re-pair it with the receiver. If the keypad fails, reprogram it according to the model’s instructions.
- Tip: Keep a spare battery on hand and replace the main battery in your remote at least twice a year.
- Safety sensors inspection
- Look at the safety sensors near the bottom of the tracks. Clean the lenses with a soft cloth; ensure the LED indicators show proper alignment. If one sensor is misaligned, gently adjust until it’s steady and the beam is continuous.
- Tip: Avoid leaning metal objects in front of the sensor while testing.
- Track and hardware check
- Inspect the track for obstructions; clear debris and apply a light silicone-based lubricant to the rollers and hinges. Do not over-lubricate belts or pulleys. If the door still sticks, the rollers may be worn and need replacement.
- Tip: Tighten loose mounting bolts to reduce wobble.
- Manual release and re-test
- With the power off, pull the manual release handle to disengage the door from the opener. Manually lift to about halfway; the door should stay in place if the springs are balanced. If it falls, contact a pro—this can indicate a balance or spring issue.
- Tip: Reconnect the opener after testing, then retry via remote and wall switch.
- Reset and reprogram the opener
- If the door now responds, perform a full reset of the opener motor and reprogram remotes or keypads to ensure consistent operation.
- Tip: Document the new programming steps and keep a simple guide near the control panel.
- When to call a professional
- If you encounter high-tension springs, track damage, or if the door's balance feels off after testing manual operation, stop and call a licensed technician. Do not attempt spring work yourself—those components store dangerous energy.
- Time saver: Schedule a safety inspection after any fix to ensure long-term reliability.
Estimated total time: 45-60 minutes depending on the complexity of the issue.
Prevention: Maintenance to Avoid Future Failures
Regular maintenance is the best defense against future outages. Create a simple routine that takes 15-20 minutes each month:
- Inspect and clean sensors, tracks, and hinges; remove debris and dust buildup.
- Check the balance by lifting manually and ensuring the door stays put when released.
- Lubricate tracks and moving parts with a silicone-based lubricant every 6-12 months.
- Test safety features and notification systems; replace aging remotes and update firmware if applicable.
- Schedule annual professional inspections for torsion springs, cables, and opener gears.
Keeping a maintenance log helps you spot trends and plan replacements before a failure occurs. The routine also reduces noise, improves opening speed, and extends the life of your system. The GarageDoorAdjust team recommends aligning your maintenance schedule with seasonal changes, as temperature and humidity can affect component wear and performance.
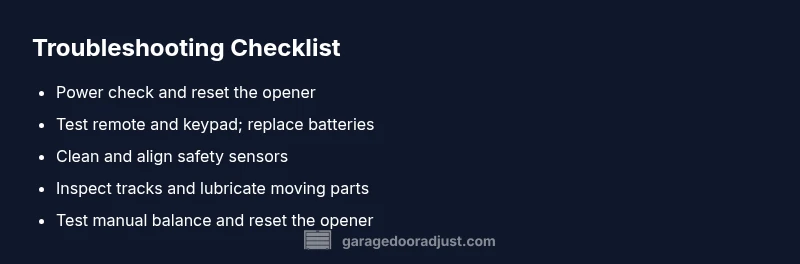
Steps
Estimated time: 45-60 minutes
- 1
Check power & reset
Verify the opener is powered and reset: unplug for 60 seconds, then plug back in and test the door with the wall switch.
Tip: A dedicated power strip near the outlet can help isolate the source. - 2
Test the remote and keypad
Test the remote and keypad; replace batteries and re-pair if needed. Ensure the wall switch works as a fallback test.
Tip: If the wall switch works, the issue is likely with the remote signal. - 3
Inspect safety sensors
Check the lens for dirt; straighten any bent sensor mounts and verify the LED indicators show a solid beam.
Tip: Do not bypass sensors; misalignment can cause injury. - 4
Examine tracks & hardware
Look for obstruction, bent tracks, or loose mounting bolts. Remove debris and lubricate with silicone spray on rollers.
Tip: Avoid petroleum-based lubricants on plastic parts. - 5
Test manual balance
With the opener disengaged, lift the door halfway. It should stay put; if it drops, your springs or balance needs evaluation.
Tip: Never try to adjust springs yourself. - 6
Reset/reprogram the opener
Reconnect power and reprogram remotes/keypads as needed; confirm operation via all control methods.
Tip: Keep a written note of the new codes.
Diagnosis: Garage door won't open or respond to controls
Possible Causes
- highPower issue or dead outlet
- mediumFaulty remote or keypad signal
- mediumBlocked track or misaligned sensors
- lowWorn or seized mechanical parts (tracks/rollers)
Fixes
- easyCheck outlet, circuit breaker, and perform a power reset on the opener
- easyTest and re-pair remote, replace batteries, and reprogram keypad
- easyClean and realign safety sensors; clear obstructions from the track
- mediumInspect and lubricate moving parts; tighten/adjust tracks and rollers as needed
- hardIf springs, cables, or motor components show wear or tension issues, contact a professional
Got Questions?
What are the most common reasons a garage door won’t open?
Power issues, sensor misalignment, and track obstructions are the top three culprits. Start with power, then sensors and track checks before considering springs or motors.
The most common causes are power, sensor, and track problems. Start with power, then check the sensors and track, before moving to more involved parts.
How do I test safety sensors without risking injury?
Clean the sensor lenses, verify alignment, and perform a simple cross-beam test by placing a small obstacle in front of one sensor. If the door stops, align properly or replace faulty sensors.
Clean and align the sensors, then test with a small obstacle to see if the door stops correctly.
Can a dead remote battery stop the door from opening?
Yes. Replace remote batteries and re-pair them with the opener. If the wall switch works but the remote does not, the issue is remote-related.
A dead remote battery can stop the door from opening; replace it and re-pair if needed.
When should I manually open the door during a power outage?
Use the manual release only if you must move the door and you cannot restore power. Reconnect after, then test all controls.
Only use the manual release if you must move the door and power is out; reconnect and test afterward.
Is it safe to adjust tracks or rollers myself?
Basic alignment and clearing obstructions can be done safely, but avoid adjusting springs or cables. If in doubt, call a pro.
You can handle simple track alignment, but don't touch springs; call a pro if unsure.
What maintenance can prevent future failures?
Regular cleaning of sensors, lubrication of moving parts, and annual professional inspections keep the system reliable and reduce downtime.
Regular cleanings, lubrication, and yearly inspections prevent future failures.
Quick Summary
- Start with power and control checks to identify quick fixes.
- Never bypass safety sensors or springs—these protect you.
- Manual balance testing helps reveal hidden issues.
- Call a pro for springs, cables, or motor problems.
- Regular maintenance reduces future outages.