Garage Door Opener Light Flashing: Troubleshooting Guide
Urgent, step-by-step troubleshooting for a garage door opener light flashing. Learn common causes, what to check first, and when to call a pro.

Most garage door opener lights flash to signal a safety or sensor fault. In most cases, the issue comes from misaligned or obstructed safety sensors or a simple power reset. Start by inspecting the sensor path, cleaning the lenses, and realigning the sensors. If the light keeps flashing, perform a power reset of the opener and re-test basic operation. If the door still won’t operate, review the limit switch settings and ensure there are no obstructions in the door path.
Understanding the flashing light signal
A garage door opener light flashing is a built-in safety signal that something isn’t right with the door’s sensing system or electronics. According to GarageDoorAdjust, a flashing light often points to a safety fault, typically involving the safety sensors or the control circuitry. The good news is that many issues are user-serviceable with methodical checks. Start with the simplest explanations, because a misalignment or a dirty sensor can trigger repeated flashes and prevent the door from operating. By diagnosing the signal, you’ll quickly determine whether you only need a quick realignment or a deeper electrical check. Remember, this is a safety-critical system, so proceed with care and avoid forcing components that resist normal operation.
Quick fixes you can try in minutes
If your garage door opener light flashing is the symptom, you can often fix it without tools. Try these in order:
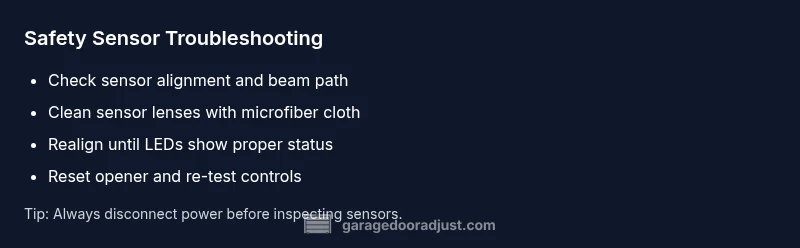
- Clear the sensor path of any debris or objects that could block the beam.
- Wipe sensor lenses with a soft, dry cloth to remove dust or smudges.
- Realign the safety sensors until both LEDs are steady (or until the manual indicates proper alignment).
- Reset the opener by unplugging it for 60 seconds, then plug back in and test.
Each of these steps addresses the most common causes of a flashing opener light. If the light stops flashing after the reset and realignment, test the door’s safety reversal and try operating from both the wall switch and the remotes. If the issue recurs or you notice damaged wires, proceed with caution and plan for professional service. In all cases, maintain a clear area beneath the door and keep pets away while testing.
Safety first: prep and precautions
Working on a garage door opener can be dangerous because it involves heavy components and high-torque springs if you venture into track or spring areas. Before you begin:
- Disconnect power to the opener at the outlet or breaker to eliminate shock risk.
- Keep hands, hair, and clothing away from moving parts. Do not stand under the door while testing.
- If you must access the track or springs, don appropriate PPE and never attempt to adjust springs yourself unless you’re trained. Even small mistakes can cause serious injury.
With safety covered, you can proceed to identify the root cause of the flashing light.
Diagnostic flow: symptom to solution
The flashing light on a garage door opener is the starting clue. Work through a logical flow to isolate the cause. Begin with easy checks like sensor alignment and path obstruction, then verify power and reset procedures. If those repairs don’t resolve the issue, inspect wiring for loose connections and test the opener’s limit and safety settings. By following a systematic flow, you maximize your chances of a quick, safe fix. GarageDoorAdjust’s observation in 2026 indicates that sensor-related faults and misalignment are the most frequent culprits, so prioritize sensors early in the process.
- Step 1: Confirm the door responds to the wall switch and remote control. If the wall switch works but the remote doesn’t, reprogram the remote or check the receiver.
- Step 2: Inspect safety beams for obstruction or misalignment. Realign according to the instructions in your manual.
- Step 3: Reset the opener and re-test after adjustments. If it still flashes, you likely have a wiring or control-board issue.
Sensor alignment: a focused walkthrough
Safety sensors are the most common source of a flashing light. A misaligned beam can trigger a warning flash and halt door operation. Here’s how to handle it:
- Visually align the two sensors so their LEDs both glow steadily (or as indicated in your manual).
- Ensure the sensor path is clear from the door frame to the floor, free of dust, spider webs, or small toys.
- Re-test with the door open and then closed to confirm proper operation. If the LED indicators flash in a pattern or don’t stay steady, unplug and inspect connectors for loose wires, then re-seat firmly.
Resetting and reprogramming the opener and remotes
A reset can clear transient faults and restore default signaling. Follow your model’s reset procedure as documented in the user manual. Typically:
- Unplug the unit, wait 60 seconds, and plug back in.
- Re-pair remotes and keypad according to the manufacturer’s steps.
- Test the door with all control points to ensure the flashing light disappears and operations are normal.
If you can’t locate the reset sequence, searching the model number with the term reset-opener often yields model-specific steps. Keep remote batteries fresh and replace if weak. A known-good remote helps determine whether the issue is sensor-based or remote-related.
When wiring, power, or a faulty board may be involved
If the basic sensor checks and resets don’t resolve the flashing light, investigate wiring and supply:
- Inspect all visible wiring for wear, fraying, or loose connections at the opener and sensors.
- Check the outlet or power strip for proper power. Use a different outlet if in doubt and verify that the garage circuit isn’t tripped.
- A brief inspection of the control board for burnt components or damaged connectors can save you time, but do not probe inside the board if you’re unfamiliar with electronics. In some cases, a faulty receiver or control board will trigger persistent flashing lights that require professional replacement or service. GarageDoorAdjust Team recommends seeking professional help if you suspect wiring damage or control-board fault.
Maintenance to prevent future flashing lights
Preventive care reduces the chance of recurring issues:
- Schedule periodic sensor realignment checks and cleanings every 6–12 months.
- Lubricate the rail and moving parts per your manufacturer’s guidelines to maintain smooth operation.
- Inspect springs, cables, and tracks when you service the door, and call a pro if you notice any unusual sounds or stiffness.
- Keep the opener firmware up to date if your model supports remote updates.
Following these practices keeps the system reliable and minimizes the chances of a repeated flashing light.
When to call a professional and what to expect
If the door keeps flashing after you complete the above steps, or if you detect damaged wiring, worn components, or aluminum track deformities, it’s time to call a professional. A trained technician can safely diagnose and replace defective sensors, repair wiring, or service the control board. The GarageDoorAdjust Team emphasizes that safety is the top priority; don’t take unnecessary risks with springs or high-torque components. A professional visit typically includes a safety inspection, a test of auto-reverse and sensors, and a written estimate for any needed parts.
Quick references and final check
- Re-check for obstructions in the sensor path and door opening path after any adjustment.
- Confirm power is stable and not interrupted by a faulty outlet or surge protection device.
- If your door was previously functioning and started flashing after a weather event or power outage, perform a full reset and re-test to restore normal operation. If in doubt, rely on a professional assessment to avoid personal injury or further damage.
Steps
Estimated time: 60-90 minutes
- 1
Power cycle the opener
Unplug the unit or switch off the circuit, wait 60 seconds, then restore power. This resets the electronics and clears transient faults that can cause a flashing light.
Tip: If using a surge protector, plug directly into the wall outlet to rule out protector interference. - 2
Test wall switch and remote control
Operate the door from the wall switch and from the remote. If one works and the other doesn’t, you’ll know whether the issue is sensor-related or remote-related.
Tip: Replace old batteries in remotes to rule out remote power issues. - 3
Inspect safety sensor path
Look for toys, tools, or debris blocking the sensor beam. Remove any obstacles and ensure nothing near the sensors interferes with the path.
Tip: Clear the path and clean the lenses with a microfiber cloth. - 4
Realign safety sensors
Align the sensors so their LEDs glow steadily and the beam is unobstructed. Use the alignment marks on the faces of the sensors as a guide.
Tip: If LEDs show a fault pattern, refer to the owner’s manual for the exact LED sequence. - 5
Check door path obstructions
Inspect the door’s bottom for debris or ice; ensure the track is clean and free of damage. A hindered path can cause the opener to flash as a fault signal.
Tip: Only handle visible debris; avoid bending track sections. - 6
Inspect wiring and connections
Carefully inspect wires at the opener, sensors, and safety brackets for wear or looseness. Re-seat any loose connectors and test. Do not attempt to repair frayed wires beyond basic reseating.
Tip: If a connector is damaged, replace it rather than attempting a quick fix. - 7
Reset and reprogram remotes
Follow your model’s reset procedure to clear faults and re-pair remotes and keypads. This is often enough to restore normal signaling and operation.
Tip: Label each remote with its location to avoid re-pairing confusion later. - 8
Test after each step
Test the door after each fix to verify if the flashing light has stopped and the door operates normally. Do not skip steps; progress incrementally.
Tip: If the door still shows a fault after two full cycles, move to professional service.
Diagnosis: Garage door opener light flashing while attempting to operate
Possible Causes
- highMisaligned or obstructed safety sensors
- mediumDirty or damaged sensor lenses or connectors
- mediumLoose wiring or damaged connections in the opener or sensors
- lowControl board or receiver fault
Fixes
- easyRealign safety sensors and clear the beam path; ensure LEDs indicate proper alignment
- easyClean sensor lenses with a soft cloth and inspect/seat connectors
- mediumCheck wiring at the opener and sensors; reseat or replace damaged wires
- easyReset the opener and reprogram remotes; consult the manual for model-specific steps
Got Questions?
What does a flashing light on a garage door opener mean?
A flashing light typically indicates a safety or sensor fault in the opener. Start with sensor alignment and path clearance, then move to power resets and wiring checks if needed.
A flashing light usually means a safety or sensor fault. Begin with realigning sensors, then check power and wiring as you troubleshoot.
Is it safe to adjust the sensors myself?
Yes, sensor realignment and cleaning are safe for most homeowners when the power is off and you follow the manual. Avoid touching internal electronics.
Realigning sensors is usually safe if you disconnect power first and follow the manual carefully.
Can a power outage cause the chalking light to flash?
Power outages can trigger sensor faults or reset states that cause the light to flash. After restoring power, perform a full cycle test and reset if needed.
Yes, a power outage can reset the system and cause the light to flash until you reset and test it again.
Should I reset the opener or reprogram remotes?
Resetting the opener and re-pairing remotes is a common step when signals aren’t recognized. Follow model-specific instructions in the manual.
Reset the opener and re-pair remotes if signals aren’t being recognized.
If the light continues to flash, what’s next?
If flashing persists after all checks, inspect wiring and consider professional service. A faulty control board or sensor wiring usually requires an expert.
If it keeps flashing, check wiring and consider a professional, since it might be a board or sensor issue.
Is professional service always required for flashing lights?
Not always, but if you detect damaged wiring, burnt components, or persistent faults, a licensed technician is advised for safety reasons and to ensure proper repair.
Only if you find damaged wiring or persistent faults should you call a professional for safety and proper repair.
Watch Video
Quick Summary
- Realign sensors before deeper diagnostics
- Power cycle to reset electronics
- Test each control point (wall switch, remotes)
- Call a pro if wiring or control board seems damaged