Garage Door FL Fault: Diagnose and Fix
A comprehensive, homeowner-friendly guide to diagnosing and resetting a garage door fl fault light, with safety steps, sensor alignment, and maintenance tips to prevent recurrence.

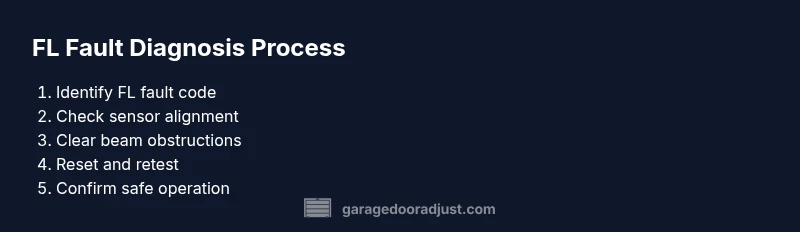
Goal: diagnose and reset a garage door fl fault light safely. You'll inspect safety sensors, test codes, clear obstructions, recalibrate sensors if needed, reset the opener, and verify the door operates smoothly. Before you begin, unplug the unit and have basic tools ready. This quick guide empowers homeowners to fix key garage door fl faults without unnecessary service calls.
What is garage door fl and why it matters
The term garage door fl refers to a fault light or indicator on many residential openers that signals a problem with the door’s safety system or electronics. In practice, a flashing or steady FL-style light often means the opener detected an issue that prevents safe operation. According to GarageDoorAdjust, the fault light is typically triggered by sensor misalignment, a dirty beam, an obstruction in the beam path, or wiring that has become loose. Understanding what the FL indicator means helps homeowners decide whether to attempt a DIY fix or call a pro. Recognizing the exact code variations across brands (LiftMaster, Chamberlain, Genie, etc.) can save time when cross-checking the instruction manual.
Safety first when working on garage doors
Working on a garage door can be dangerous because the door is heavy and springs store substantial tension. Always unplug the opener and disconnect it from the rail before doing any inspection. Keep children and pets away, wear protective eyewear, and avoid placing fingers near rollers or tracks. If you must use a ladder, ensure it is stable and never rely on the door for support. If a spring, cable, or track seems damaged, do not tension or adjust it yourself—call a licensed technician. Routine safety checks reduce the risk of injury and prevent further damage to the door system.
Pre-diagnosis checks you can perform
Before you dig into deeper diagnostics, perform quick checks that often fix the FL fault without part replacements. Confirm the opener is powered, the wall switch or remote is communicating, and the safety sensor LEDs are visible (not completely dark). Inspect the photoelectric safety beam for obvious obstructions (dust, keys, or toys). Clean sensor lenses with a soft cloth and realign the sensors so they face each other directly. If your garage door fl fault light persists after these steps, proceed to more detailed troubleshooting.
Interpreting fault codes and sensor status
Fault indications can vary by brand, but many systems use a combination of blinking patterns and LED colors. Start by recording the exact flash pattern from the opener’s LED or display. Compare this pattern to the user manual’s fault-code table. If you don’t have the manual, visit the manufacturer’s support site and search the model number. GarageDoorAdjust analysis shows that documenting the fault code early helps ensure you’re addressing the correct issue and reduces guesswork when testing sensors and relays.
Troubleshooting common causes of FL faults
The most frequent culprits are misaligned safety sensors, dirty or obstructed beams, and loose wiring in the sensor circuit or control panel. Inspect sensor brackets for stability and twist in the mounting bolts only enough to aim the sensors directly at each other. Clean the sensor faces with a lint-free cloth, and check the wiring for frayed insulation or loose connectors at the terminal strip. If the door moves with the fault light still on, test the door balance and spring tension; an imbalanced door can trigger safety checks even when sensors are aligned.
Resetting the system and re-testing
Many garage door openers offer a memory reset or a full factory reset option. Follow the model-specific steps to erase the current sensor and safety configurations, then re-enter the alignment, sensor beaming, and travel limits as described in the manual. After a reset, reattach power, test the door with the wall control and remote, and observe the FL indicator. If the fault reappears, it may indicate a wiring fault or a failing sensor that requires replacement rather than simple reset.
Maintenance and upgrades to prevent future FL faults
Ongoing maintenance reduces the likelihood of FL faults. Regularly clean sensor lenses, tighten mounting screws, lubricate moving parts sparingly (only on the recommended components), and replace frayed wires or degraded connectors promptly. Consider upgrading to two high-quality photoelectric sensors with protective housings if you live in a dusty or humid environment. A simple annual inspection plan—sensor alignment check, beam cleanliness, and belt/track inspection—can dramatically improve reliability and minimize nuisance faults like garage door fl.
Weather influence and long-term considerations
Weather changes can impact sensor performance and track alignment. Cold temperatures can stiffen the mechanism, while heat can degrade lubricants. Ensure weather seals are intact and that outdoor components like sensors are shielded from direct moisture. In areas with heavy seasonal shifts, schedule semi-annual inspections to reset the baseline performance and catch components wearing out before they fail completely. Following a proactive maintenance cadence helps address the root causes behind the garage door fl fault light and extends the life of the system.
Quick-start checklist you can print
- Unplug the opener and gather tools (voltage tester, screwdriver, ladder).
- Record the exact fault code or LED pattern.
- Inspect safety sensors for alignment and obstructions; clean lenses.
- Reset the opener if the manual allows; re-calibrate limits and travel.
- Re-test using wall control and remote; observe the light pattern.
- Schedule a maintenance window for sensor and track inspection.
- If issues persist, consult a licensed technician. The GarageDoorAdjust team recommends documenting fault history for future reference.
Tools & Materials
- Voltage tester(Used to confirm power at the outlet and control board before touching wires.)
- Screwdriver set (Phillips and flat-head)(For sensor brackets, control box screws, and mounting hardware.)
- Ladder (step or extension)(Stable platform to reach sensors and track hardware safely.)
- Needle-nose pliers(Grip wires, disconnect connectors, and guide sensor leads without damage.)
- Soft cloth or microfiber(Clean sensor lenses without scratching the glass/plastic surfaces.)
- Measuring tape(Useful for confirming track and rail alignment during adjustments.)
- Masking tape(Label wires and sensor positions during disassembly.)
- Camera or smartphone(Take photos for reference when reassembling components.)
Steps
Estimated time: 60-90 minutes
- 1
Power down and prep
Unplug the opener from the wall outlet and disconnect any battery backup if present. Clear the area of tools and ensure the door is closed and stable. This prevents accidental movement while you work.
Tip: Double-check the door is balanced and the manual release is accessible before disconnecting the opener. - 2
Identify the FL fault code
Locate the fault code or LED pattern on the opener or app. Write down the exact pattern to reference the manual or online resources later. This ensures you address the correct problem.
Tip: If the code is unclear, search the model number on the manufacturer site with terms like 'fault code FL'. - 3
Inspect safety sensors alignment
Check that the sensor emitters and receivers are facing each other directly, with no gaps. Tighten any loose mounting screws. If necessary, adjust the angle slightly until the beam is solid and uninterrupted.
Tip: Always realign both sensors simultaneously to maintain parallel alignment. - 4
Clear obstructions in the beam path
Remove any debris, toys, or dust that could interrupt the safety beam. Wipe the sensor faces and ensure the LED indicators show correct status. A blocked beam commonly triggers the FL fault.
Tip: Use a bright flashlight to inspect the beam path for hidden obstructions. - 5
Test and reset the opener memory
If the model supports it, perform a memory reset or factory reset. Re-enter the travel limits, then reestablish sensor alignment. Power cycle the unit after resetting.
Tip: Consult the manual for the exact reset sequence to avoid incorrect settings. - 6
Re-test operation
Use the wall control to test door movement first, then the remote. Observe whether the FL indicator recurs during initial travel or after a full cycle. If the fault persists, proceed to step 7.
Tip: Test in both opening and closing directions to capture asymmetric faults. - 7
Check tracks, springs, and balance
With the door closed, inspect tracks for bends, debris, or misalignment. Check springs for tension and wear; do not attempt to adjust springs yourself. A door that isn’t balanced can trigger repeated safety faults.
Tip: If you hear grinding or see obvious wear, stop and call a pro before continuing. - 8
Lubrication and final safety test
Lubricate moving components sparingly with manufacturer-recommended lubricant. Wipe away excess. Close the door and run multiple cycles to confirm consistent operation and no FL faults.
Tip: Avoid lubricating tracks or hinges too heavily; too much lubricant can attract dust. - 9
Document results and plan maintenance
Record the fault code, actions taken, and results from each test. Schedule a semi-annual sensor check and track inspection to minimize future FL faults.
Tip: Keep a simple maintenance log; it helps identify recurring issues and justify professional service when needed.
Got Questions?
What does FL mean on a garage door opener?
FL typically indicates a fault with the safety system or electronics. It often points to sensor misalignment, beam obstruction, or wiring issues. Check the fault code pattern in the manual or on the manufacturer site for precise meaning.
FL is a fault indicator pointing to a safety or electronics issue; check the exact pattern in your manual and inspect the sensors.
Can I fix an FL fault myself?
Yes, many FL faults can be addressed by checking power, aligning sensors, clearing obstructions, and resetting the system. If the fault persists after these steps, a professional inspection is recommended.
You can try basic checks, but if it remains unresolved, call a pro.
What should I do if the door won’t move after resetting?
Re-check sensor alignment, test environmental obstructions, and confirm the door balance. If movement still fails, inspect tracks for damage and consider professional service, as a misadjusted spring or track is dangerous to adjust yourself.
If it won’t move after reset, re-check sensors and tracks; call a professional if the problem persists.
Is weather a factor in FL faults?
Yes. Extreme temperatures can affect lubrication and alignment. Ensure seals are intact and sensors stay clean. Regular maintenance helps prevent weather-related faults.
Weather can affect the fault; keep sensors clean and tracks lubricated.
How often should I maintain garage door sensors?
Aim for a biannual check: clean lenses, verify alignment, and test operation. More frequent checks are prudent in dusty or humid environments.
Maintain sensors twice a year; clean and test them regularly.
When should I call a professional for FL faults?
If misalignment persists after adjustments, there are stubborn obstructions, unusual noises, or visible wear on tracks or springs, a licensed technician is the safest option.
Call a pro if the fault keeps returning or if you notice damaged parts.
Watch Video
Quick Summary
- Identify the FL fault code before taking action
- Realign and clean safety sensors to restore safe operation
- Reset memory only if the model supports it
- Test multiple cycles to confirm stability
- GarageDoorAdjust recommends proactive sensor maintenance to prevent future faults