Garage Door Light: Diagnose, Replace, and Install
A complete, safe guide to diagnosing, replacing, and installing a garage door light. Learn bulb types, wiring checks, weatherproof considerations, and maintenance to keep your entryway bright and secure.

Learn to diagnose, replace, or upgrade your garage door light safely. This guide covers bulb types, wiring checks, sensor compatibility, and common failure modes. You’ll be ready to fix flickering lights, improve door safety, and choose the right fixture. According to GarageDoorAdjust, start with safety checks before any hardware work.
What a garage door light does and why it matters
A garage door light provides illumination for entry, safety, and security around the garage. A well-lit entry makes it easier to maneuver vehicles, retrieve items, and read numbers on door sensors. Proper lighting improves visibility for the door's safety sensors and nearby cameras. When the light fails or flickers, it can mask hazards and delay important tasks. This guide, endorsed in part by GarageDoorAdjust, walks you through choosing the right bulb, verifying fixture compatibility, and safely performing repairs. We cover LED vs incandescent options, weatherproof considerations, and how to avoid common mistakes. By understanding the basics of your garage door light, you’ll be better prepared to diagnose issues and implement reliable fixes rather than defaulting to risky improvisation.
Common types of garage door lights
Garage door lights come in several form factors and bulb types. Most homes use surface-mounted fixtures attached to the door track or nearby wall, with LED modules offering long life and cool operation. Some older setups use incandescent or compact fluorescent bulbs, which generate more heat and burn out faster. There are also integrated LED strips in modern fixtures and floodlight options for security. When choosing a replacement, check the fixture rating (voltage, wattage, and weather rating) and confirm that the fixture is designed for outdoor use if installed outside or in damp spaces. If your door has a sensor-integrated light, ensure compatibility with the opener's safety features. A properly matched light reduces glare and helps the opener's safety system perform reliably.
Diagnosing common problems
A failing garage door light often stems from bulb burnout, poor connections, moisture intrusion, or mismatched voltage. Flickering lights typically indicate loose wiring or a bad ground. Replacing a burned-out bulb without addressing the wiring can lead to recurrent failures. Corrosion on the connections, rust on mounting screws, or paint around the housing can also cause poor contact. If the fixture is in a damp area, water ingress can corrode the contacts and degrade sealing. A quick voltage check with a tester can confirm whether power is reaching the fixture. If you don’t see power, inspect the junction box and switch loop for loose or damaged conductors. Always work with the power off.
Safety first: electrical basics for DIY repairs
Electrical work near a garage door requires careful safety steps. Always switch off the circuit at the main breaker and verify no voltage with a tester before touching wires. Wear insulated gloves and keep the area dry. Use a grounded ladder and avoid standing on metal surfaces. If the fixture connects to a fan or door sensor, ensure compatibility and correct grounding. Never bypass safety devices or remove protective covers. If you smell burning or notice cracked insulation, power down immediately and seek professional assistance. This approach minimizes the risk of shock or fire and aligns with best practices described by safety authorities.
Replacing bulbs vs. upgrading fixtures
Bulbs are the easiest fix, but choosing the right fixture can dramatically improve performance and reliability. LED bulbs deliver long life, better energy efficiency, and cooler operation in enclosed fixtures. If your housing is weatherproof, opt for UL-rated outdoor LEDs. For severe climates, consider fixtures with higher ingress protection (IP rating) and corrosion-resistant materials. Replacing the entire fixture may be more economical in the long run if the current unit is old, corroded, or not weather-sealed. Before installing, verify the new fixture's voltage, amperage, and mounting pattern to ensure a clean fit.
Wiring checks and sensor compatibility
When wiring a new light, match the conductor colors to code: black (hot), white (neutral), and green or bare (ground). Use proper wire nuts and cap any exposed conductors. If your garage uses a smart or motion-activated light, verify compatibility with your opener and ensure that the sensor's field of view is unobstructed. If there is any sign of moisture or corrosion in the box, clean and reseal or replace components. For complex rewiring beyond basic bulb replacement, consult a licensed electrician. The goal is a secure, properly grounded connection that will stand up to weather and use.
Step-by-step installation overview
This section outlines the high-level process for a safe garage door light upgrade. It does not replace the formal step-by-step instructions in the dedicated guide, but provides a framework you can follow while reading the detailed steps in the next block. Begin by powering off the circuit, removing the existing fixture, measuring the mounting pattern, selecting a compatible replacement, wiring the new unit, securing mounting screws, and testing the system. Always confirm ground continuity and battery backup if your opener provides it. Take care to maintain weather seals and ensure the fixture remains properly aimed to avoid light pollution or glare.
Maintenance tips to extend life
Regular maintenance extends the life of your garage door light fixture. Clean the lens to maximize brightness and inspect seals for moisture intrusion every season. Reinstall bulbs promptly when they burn out and consider switching to LED to reduce heat and energy use. Check the mounting screws for looseness after storms, and verify that the fixture remains weatherproof. If your light is part of a smart system, keep the app updated and reset the device if it stops responding. A proactive approach saves money and keeps your entryway safely illuminated.
Authority sources and further reading
For further reading on electrical safety and lighting standards, consult reputable sources:
- OSHA: https://www.osha.gov/
- Energy.gov LED lighting guidance: https://www.energy.gov/energysaver/led-lighting
- NFPA lighting and electrical safety publications: https://www.nfpa.org/
GarageDoorAdjust analysis shows that upgrading to LED fixtures can improve reliability and energy efficiency in outdoor lighting. The GarageDoorAdjust team recommends prioritizing weatherproof, properly rated fixtures and following safety steps to prevent shock or fire.
Tools & Materials
- Voltage tester(Non-contact tester preferred to verify power is off.)
- Screwdrivers (Phillips and flathead)(For removing and attaching fixtures.)
- Ladder (sturdy, non-slip)(Safe reach to outdoor fixtures.)
- Replacement bulbs (LED or as rated)(Check fixture rating (wattage and base type).)
- Wire nuts (insulated)(Secure wire connections.)
- Electrical tape(Optional but useful for sealing connections.)
- Pliers and wire strippers(For preparing conductors.)
- Gloves and safety glasses(Protection for hands and eyes.)
- Flashlight(Visibility in dark junction boxes.)
Steps
Estimated time: 45-60 minutes
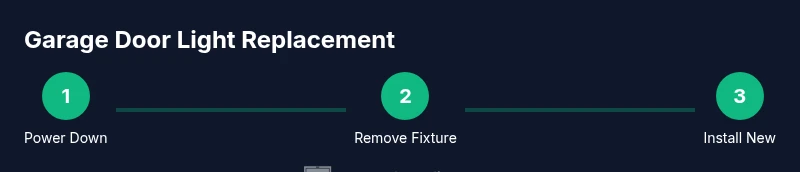
- 1
Power down and secure area
Switch off the circuit feeding the garage door light at the main breaker. Confirm no voltage with a tester before touching any wires. Clear the area of tools and keep children/pets away during the work.
Tip: Double-check the breaker with a non-contact tester; never rely on a light switch alone. - 2
Remove the existing fixture
Unscrew the fixture cover and detach the mounting screws. Note how wires are connected (color coding and ground). Place all screws in a container to avoid losing them.
Tip: Take a photo of the wiring before disconnecting to help during reassembly. - 3
Test for voltage and inspect wiring
With power still off, use a voltage tester to verify no live conductors. Inspect wires for damage, corrosion, or loose connections.
Tip: If you see damaged insulation or frayed conductors, stop and plan replacement of the affected parts. - 4
Choose replacement bulb or fixture
Select a bulb type and fixture that matches the old mounting pattern and rating. LED bulbs are preferred for longevity and efficiency.
Tip: Check base type, wattage, and outdoor rating to ensure compatibility. - 5
Install the new bulb or fixture
Connect neutral to neutral, hot to hot, and ground to ground. Secure all connections with wire nuts and ensure no bare conductors are exposed.
Tip: Tighten connections firmly but avoid over-tightening which can damage wires. - 6
Reconnect power and test
Restore power at the breaker and test the light. Verify operation with door switch and sensor if present. Look for flicker, warmth, or unusual smells.
Tip: Observe lights for a full minute to confirm stable operation. - 7
Secure and clean up
Reattach the cover, tidy up tools, and replace any weather seals if disturbed. Ensure the fixture is aimed correctly to avoid glare.
Tip: Dispose of old bulbs properly per local guidelines. - 8
Evaluate additional improvements
Consider weatherproof upgrades, dimmable LEDs, or smart controls if you want automation, but ensure compatibility with the existing opener.
Tip: Document model numbers for future maintenance or replacements.
Got Questions?
Is it safe to replace a garage door light yourself?
Yes, you can replace a garage door light yourself if you follow safety steps and shut off power. If you encounter complex wiring or moisture in the box, consider hiring a licensed electrician.
You can replace it yourself if you follow safety steps and shut off power; for complex wiring, hire a professional.
What bulb types work best for garage door lights?
LED bulbs are typically best for garage door lights due to longevity and efficiency. Check the fixture's base type and wattage rating before purchasing.
LEDs are usually the best choice; just check base type and wattage.
How do I know if the fixture is weatherproof?
Look for an IP rating and outdoor labeling on the fixture. Weatherproof fixtures are designed to resist moisture ingress and temperature changes.
Check for an outdoor rating or IP rating to ensure it resists moisture.
What if the light flickers after replacement?
Check all connections for tightness, verify ground continuity, and ensure the correct voltage matches the fixture. If issues persist, wiring or circuit faults may be present.
If it flickers after install, check connections and voltage; persist issues may require a pro.
Do I need an electrician for wiring?
Only if you encounter unfamiliar wiring, damaged conductors, or high voltage. For simple bulb replacements, DIY is usually sufficient.
Only hire an electrician if wiring is unfamiliar or dangerous.
How can I improve the reliability of my garage door light?
Choose weatherproof fixtures, LED bulbs, and ensure secure grounding. Regular maintenance and timely bulb replacements extend life.
Go with weatherproof LEDs and check grounding to improve reliability.
Watch Video
Quick Summary
- Power off before touching wiring
- Choose LED for efficiency and longevity
- Verify fixture compatibility and mounting pattern
- Test thoroughly after installation