How to Replace a Garage Door Opener Light Bulb
Learn how to safely replace your garage door opener light bulb, choose the right bulb type, and troubleshoot if the light won’t come on. A practical, step-by-step guide focused on safety and reliability for homeowners.

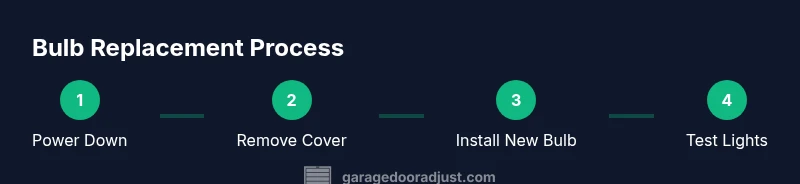
Goal: safely replace a garage door opener light bulb and restore operation. Start by confirming the bulb type in your opener manual, power down the unit, remove the old bulb, and install a matching replacement (LED recommended). Reassemble, then test from wall control and the remote. If it stays dark, inspect the socket and wiring for corrosion or loose connections.
Safety First: Power, Tools, and Prep
Safety is the foundation of any bulb replacement. According to GarageDoorAdjust, start by cutting power to the opener at the outlet or disconnecting the power source to prevent the door from moving unexpectedly. Wear eye protection and gloves to guard against sharp edges on the housing or lens. Set up a stable ladder tall enough to reach the opener without standing on shelves or boxes. Gather the replacement bulb and a basic toolkit in advance. This prep reduces last‑minute trips and keeps the work area tidy. If you’re unsure about any step, pause and consult the owner’s manual or a professional. A careful, methodical approach minimizes risks and protects the door’s electrical components.
Understanding the Light in Your Opener
Garage door openers use a dedicated light to illuminate the floor beneath a moving door, improving safety and visibility in dim garages. The bulb type is determined by the fixture base and the enclosure around the socket. In most models you’ll encounter a standard screw base (often E26 or E26-adaptable) or a smaller candlebase (E12). LED bulbs are common today for their long life and low heat, but you’ll want one rated for enclosed fixtures. If the opener’s label specifies a wattage or base type, use that as your baseline. Always verify that the bulb is certified for indoor use and suitable for enclosed fixtures. If you’re unsure, check the model number on the opener and look up the exact bulb specification before buying a replacement.
Identifying the Right Bulb for Your Opener
Start by removing the existing bulb and inspecting the base. If you can’t tell the base type, compare it to common shapes at a hardware store or consult the manual. Look for a bulb that fits an enclosed fixture and is labeled for indoor use. If you want to save energy and reduce replacement frequency, choose an LED bulb with a similar brightness level and a color temperature that suits your garage—cool white for clearer visibility, or warm white if you prefer a softer look. When selecting a replacement, avoid bulbs with specialty bases unless the model explicitly supports them. If the opener lacks a label or the manual is missing, you can often locate the exact bulb type by using the model number online.
By choosing the right bulb, you’ll minimize heat buildup, prevent repetitive replacements, and keep the opener’s electronics safe.
Troubleshooting Common Issues When the Bulb Won’t Light
If the bulb still won’t light after replacement, start with the basics: confirm the opener is powered and the light switch or feature is enabled. Clean any corrosion from the socket contacts and reseat the bulb firmly without overtightening. A loose connection is a frequent cause of intermittent light. If you notice flickering, the socket itself may be worn or damaged and could require replacement. In some cases, the built‑in light circuit may share power with other components; a malfunction elsewhere in the opener could affect lighting. When in doubt, consult the manufacturer’s troubleshooting guide and verify you’re using a bulb rated for enclosed fixtures.
If the issue persists after these steps, it may indicate a more complex electrical fault or a failing socket; contact a qualified technician for a safe inspection.
Energy Efficiency, Safety, and Longevity Tips
LED bulbs offer longer life and greater energy efficiency than traditional incandescent bulbs, and they tolerate frequent on/off cycles better. Ensure the bulb is designed for enclosed fixtures and compatible with the fixture’s heat dissipation requirements. Avoid using bulbs that protrude or make contact with moving parts. Keep the lens and fixture clean to prevent heat buildup and ensure maximum light output. For safety, never bypass protective covers or attempt to bypass the opener’s safety features to reduce load. By prioritizing LED options and proper enclosure-rated bulbs, you’ll enhance reliability and reduce maintenance over time.
Maintenance and When to Consider Replacing the Fixture
Regular checks help prevent unexpected darkness. If you notice frequent bulb failures, inspect the socket for corrosion or discoloration; this can indicate moisture ingress or a compromised connection. In humid or dusty garages, enclosure seals can degrade, compromising bulb life. If you encounter repeated failures within a short period, it may be more economical long‑term to replace the fixture or consult the opener’s service manual for a socket replacement procedure. Remember, the light is part of the opener’s safety system: a reliable bulb supports safe operation and reduces the risk of trips or collisions during door movement.
Tools & Materials
- Replacement light bulb (LED recommended)(Base type should match socket (e.g., E26 or E12). Ensure bulb is rated for enclosed fixtures.)
- Voltage tester or multimeter(Use to confirm power is OFF before handling components.)
- Screwdriver set (as needed)(Phillips or flathead depending on housing screws)
- Ladder or stable step stool(Position so you can reach the opener lens safely without overreaching)
- Soft cloth and isopropyl alcohol(Clean socket contacts gently if corrosion is present)
Steps
Estimated time: Estimated total time: 15-25 minutes
- 1
Power down the opener
Unplug the opener from its outlet or switch off the circuit breaker feeding the unit. Use a voltage tester to confirm no power is present before touching any components.
Tip: Always lock out power where possible to avoid accidental re-energizing. - 2
Remove the lens or light cover
Carefully pry off the outer lens or remove screws securing the light cover. Support the cover to prevent dropping it on the floor or door.
Tip: Do not force the cover; if it resists, check for additional screws or clips. - 3
Extract the old bulb
Gently grasp and unscrew or pull out the old bulb from the socket. If it’s hot, wait for it to cool before handling.
Tip: Avoid twisting too hard; bulb bases can strip or crack on older fixtures. - 4
Inspect socket and contacts
Examine the socket for corrosion, melted plastic, or bent contacts. Clean with a soft cloth and isopropyl alcohol if needed.
Tip: If contacts look damaged, avoid using the socket and seek professional replacement. - 5
Choose and prepare the replacement bulb
Select an LED bulb with the correct base and enclosure rating. Remove packaging and handle by the glass, not the metal base if possible.
Tip: Make sure the replacement is rated for enclosed fixtures and for operation in the fixture’s temperature range. - 6
Install the new bulb
Gently insert or screw in the new bulb until snug, not over-tight. Reattach the lens or cover securely.
Tip: If the bulb doesn’t sit evenly, recheck the socket alignment before replacing the cover. - 7
Restore power and test
Reconnect power and test the opener light using both the wall control and a remote. Verify the light comes on and stays steady.
Tip: If the light flickers, power off and inspect socket connections again before testing. - 8
Document and monitor
Note the bulb type and replacement date for future maintenance. Observe light performance over the next few cycles.
Tip: Keep a small log near the opener for quick reference.
Got Questions?
What bulb base does my garage door opener use?
Most openers use an E26 or E12 base. Check the manual or inspect the existing bulb to identify the base type before purchasing a replacement.
Most openers use a standard E26 or candle-style E12 base. Check the current bulb or model manual to confirm before buying.
Can I use any LED bulb in my opener?
LED bulbs are generally compatible if rated for enclosed fixtures and the correct base. Verify the fixture is rated for indoor use and for enclosed operation.
Yes, you can usually use an LED bulb if it’s rated for enclosed fixtures and the right base.
Why won’t the light turn on after replacement?
Confirm power is on, ensure the bulb is seated properly, and check for socket corrosion. If the socket is damaged, replacement may be needed.
Make sure power is on, the bulb sits firmly, and the socket isn’t corroded. If it looks damaged, you may need a socket replacement.
Is it safe to replace the bulb with the opener powered?
No. Always cut power first to avoid moving parts or unexpected door movement during replacement.
No. Always disconnect power before changing the bulb.
How long do garage opener bulbs typically last?
LED bulbs last longer than incandescent options, reducing the frequency of replacements and maintenance.
LED bulbs usually last longer than incandescent ones, so you’ll replace them less often.
When should I replace the entire fixture instead of the bulb?
If the socket or housing shows signs of wear, corrosion, or heat damage, replacing the fixture may be more reliable than swapping bulbs.
If the socket or housing looks damaged or overheated, replace the fixture rather than just the bulb.
Watch Video
Quick Summary
- Power down before inspecting any fixture.
- Choose an enclosed-rated LED bulb for reliability.
- Inspect the socket for corrosion and clean gently if needed.
- Test with multiple controls to confirm proper operation.
- Keep a simple maintenance log for future bulb changes.