Garage Door Light Globes: A Step-by-Step Replacement Guide
Comprehensive, safety-focused guide to choosing, replacing, and maintaining garage door light globes. Learn bulb types, compatibility, tools, and post-install checks to keep your garage entry bright and secure.

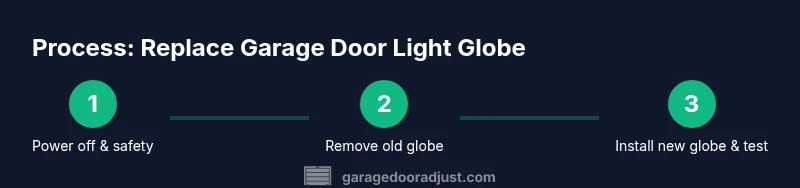
Goal: safely diagnose and replace garage door light globes and verify fixture integrity. This how-to focuses on identifying the correct bulb type, isolating power, removing the old globe, installing a replacement, and testing the fixture. Before you begin, assemble gloves, a sturdy ladder, the right replacement bulb for your fixture, a flashlight, and a clean cloth. Follow the step-by-step process to complete the replacement with minimal risk and reliable lighting for your garage door area.
Why garage door light globes matter for safety and visibility
According to GarageDoorAdjust, having reliable lighting around your garage door isn't just about convenience; it enhances security and safety for entering and exiting after dark. The right bulbs improve door sensor performance, reduce tripping hazards, and help you spot issues like loose wiring or moisture intrusion at the fixture. In this guide, we focus on garage door light globes, common fixture types, and how to choose a bulb that suits climate, voltage, and fixture design. Understanding these basics helps homeowners avoid leaks, moisture buildup, and early bulb burnout, while keeping the entry area well lit.
Types of light globes used in garage fixtures
Garage door light globes come in several styles. LED bulbs are energy-efficient, last longer, and emit less heat; incandescent and halogen bulbs may be brighter but burn hotter and wear out faster. Some fixtures use compact fluorescents (CFLs) or integrated LED modules. Check your fixture for base type (e.g., standard screw-in or pin-based), wattage limits, and whether it’s rated for damp or wet locations. Selecting the right bulb helps reduce maintenance and ensure even illumination around the door.
Safety considerations and compatibility
Never replace a bulb with the power on. Always switch off at the breaker or unplug the opener if appropriate, and confirm no voltage is present with a tester. Wear PPE, and keep tools away from the door’s moving parts. Verify the bulb’s wattage rating and the fixture’s weatherproof rating; improper bulbs can cause overheating or moisture intrusion.
Troubleshooting common issues and signs of wear
If the light flickers or stays off after replacement, re-seat the bulb and inspect the socket for corrosion or damaged wiring. Check for moisture or condensation inside the fixture, which can short circuits and reduce life. If you notice frequent burnout, consider upgrading to a moisture-rated LED module or sealing the fixture more effectively.
Maintenance and longevity tips for garage door light globes
Regularly clean the glass cover to maintain brightness and inspect the fixture for signs of water intrusion. Use LED bulbs where possible to reduce heat, save energy, and extend bulb life. Replace seals or gaskets if you see gaps or wear, and schedule a light fixture check every 12-18 months to prevent outages.
Tools & Materials
- Ladder (stable, tall enough to reach the fixture)(Place on level ground; have someone hold base if needed)
- Insulated gloves(Prevent finger oils and protect from sharp edges)
- Safety glasses(Protect eyes from glass shards or debris)
- Replacement bulbs compatible with your fixture (LED recommended)(Check base type and wattage rating)
- Screwdriver ( Phillips or flathead, as needed)(For fixtures that have screws in the cover)
- Flashlight(Bright beam to inspect fixture interior)
- Microfiber cloth(Wipe glass cover and remove fingerprints)
- Voltage tester(Optional for additional safety)
Steps
Estimated time: 20-40 minutes
- 1
Power off and prepare safety
Turn off power at the circuit breaker or unplug the opener if applicable; verify no voltage is present using a tester before touching the bulb. Position your ladder on stable ground and clear the area.
Tip: Always test for voltage before touching any electrical component. - 2
Access the fixture safely
Move the ladder into place and remove any cover or diffuser to expose the bulb. Keep hands dry and avoid leaning on the door.
Tip: Have a helper hold the ladder if you’re reaching high. - 3
Remove the old bulb
Grip the bulb gently, rotate counterclockwise until it disengages, and set it aside in a safe location. Do not use excessive force, as glass can shatter.
Tip: Wear gloves and avoid touching the glass surface with bare hands. - 4
Inspect the socket and housing
Check for corrosion, loose wires, or moisture. If you see damage, stop and consider replacing defective components or consulting a professional.
Tip: If moisture is present, seal or replace the fixture before re-installing a bulb. - 5
Install the new bulb
Insert the correct bulb type and base, then twist gently until snug. Do not overtighten, which can crack the glass or strip the base.
Tip: LED bulbs are recommended for longevity and cooler operation. - 6
Restore power and test
Turn the power back on and test the light. Check for stable operation and even illumination. Re-secure any covers and clean fingerprints from the glass.
Tip: If flickering, re-seat the bulb or try a new replacement.
Got Questions?
What bulb types are best for garage door light globes?
LED bulbs are generally best for garage door fixtures due to longevity and low heat. If you use enclosed fixtures, choose LED or other low-heat options rated for damp locations. Always match base type and wattage rating.
LED bulbs are usually the best choice for garage door fixtures because they last longer and stay cooler.
How do I know which wattage to use?
Check the fixture’s label or the bulb packaging for the maximum wattage. Do not exceed this rating, as overloading can cause overheating and damage.
Always use a bulb within the fixture's wattage rating.
What should I do if the bulb won’t come loose?
Gently try to rotate in the direction of removal while applying even pressure. If it still won’t budge, power off and use a cloth to grip the base, then tilt slightly to avoid breaking the glass.
If it’s stuck, power off and try again with a cloth grip; don’t force it.
Is it safe to replace bulbs with the door open?
If you can reach the fixture safely and there’s no risk of the door moving, you may replace with the door open. However, keep children and pets away and avoid leaning on the door.
Only replace bulbs if you can do so safely and keep the area clear.
How often should garage door light globes be replaced?
Replacement frequency depends on bulb type and environment. LED bulbs last several years, while incandescent bulbs may burn out sooner in damp or dusty garages.
LEDs usually last longer, but check for moisture and dust buildup.
Can I replace the bulb without removing the housing?
Some fixtures allow bulb replacement without removing the housing, but others require opening the cover. Follow the fixture’s manual and avoid prying or forcing parts.
Often you can replace the bulb without removing the whole housing, but check your fixture.
Watch Video
Quick Summary
- Power off before handling any fixture
- Use the correct bulb type and base
- Inspect the socket for damage during replacement
- Test the fixture after installation
- Maintain seals to prevent moisture-related issues