Blinking Light on Garage Door Opener: Troubleshooting Guide
Urgent guide to diagnose and fix a blinking light on a garage door opener. Learn safe steps, common causes, and prevention tips to restore reliable operation.

The blinking light on your garage door opener usually signals a fault or misalignment. Start with the basics: check power at the outlet and wall switch, verify the remote battery, and inspect safety sensors. If those don’t clear it, reset the opener and test the limit switches. If the issue persists, consider professional help.
Understanding the blinking light on garage door opener
If you notice the blinking light on garage door opener, it’s signalling a fault that needs attention. This indicator is a built-in warning designed to prevent unsafe operation. In most homes, the root causes fall into three broad categories: power issues, misaligned or obstructed safety sensors, and problems with the remote receiver or control board. By following a structured diagnostic approach, homeowners can identify the likely culprit without risking injury or door damage. Throughout this guide,GarageDoorAdjust emphasizes safe, incremental steps to restore reliable operation while minimizing repeat issues. The blinking light on garage door opener serves as your first clue that a fault exists and needs a verified fix.
Quick checks you can safely perform
Before diving into deeper troubleshooting, perform these safe checks:
- Verify the opener is powered: test the outlet with another device, inspect the power cord for damage, and reset the circuit breaker if needed. Power issues are the most common cause of a blinking light on garage door opener and are quick to rule in or out.
- Check the wall button and remote batteries: replace the remote battery and try the wall switch to see if the symptom changes.
- Inspect safety sensors: look for dirt on the sensor lenses, misalignment, or objects blocking the beam path. Clean lenses gently and reposition sensors so they face each other directly.
- Look for physical obstructions in tracks or hinges: clear debris and ensure rails are properly aligned. A jammed door can trigger the fault indicator and a blinking light.
- Listen for unusual noises during a test cycle: grinding sounds or a stalled motor suggest mechanical binding that requires different steps or professional service.
Common blinking patterns and their meanings
Not all blinking patterns carry the same meaning, but many patterns point to similar root causes:
- A single blink repeated at a steady interval often indicates a sensor or power issue rather than a motor fault.
- Rapid, irregular blinking may signal an overload condition or a failing control board.
- A slow, long blink could suggest a reset is needed or a miscommunication between the opener and the remote.
Interpreting the pattern helps you decide which area to tackle first, but always follow the diagnostic flow for accuracy. Remember, the goal is to reset conditions safely and confirm functional operation after each step.
Diagnostic flow overview
Diagnostic flow from symptom to solution keeps you on track and minimizes unnecessary disassembly. Start with the simplest checks and progress to more involved fixes as needed:
- Symptom: Blinking light on garage door opener when attempting operation.
- Diagnosis: Power issue, sensor alignment problem, or receiver/controller fault.
- Solution: Power cycle, sensor realignment, or reset/remote re-pairing; escalate to professional service if unresolved.
This section aligns with the GarageDoorAdjust Analysis, 2026, which shows that sensor alignment and power issues account for the majority of blinking-light faults. A structured flow helps you isolate and fix the root cause efficiently.
Step-by-step fix for the most common cause: sensor misalignment
The most frequent reason for a blinking light is misaligned safety sensors. Here’s a focused fix that you can perform safely:
- Realign sensors: locate both safety sensors near the bottom of each door track. Ensure both lenses are clean and straight, with clear line of sight between them. Adjust the brackets so the LEDs face each other and remain steady when aligned.
- Clear obstructions: remove any cobwebs, dust, packages, or toys that may block the beam path.
- Test after alignment: plug the unit back in, or reset the system if needed, and perform a test cycle. The indicator light should stop blinking if alignment is the primary issue.
If the blinking persists after proper alignment, proceed to the next diagnostic steps rather than forcing operation.
Safety, prevention, and when to call a pro
Safety cannot be overstated when working on doors and openers. Always disconnect power before touching electrical components and avoid standing under a moving door. Use manufacturer-approved lubricants and follow the manual for service procedures. To prevent recurrence:
- Schedule routine maintenance every 6–12 months, including sensor checks and lubrication.
- Keep sensors clean and aligned; replace damaged sensors promptly.
- Re-test after any part replacement or reprogramming to ensure reliable operation.
If you encounter persistent blinking after following the steps above, or if you notice frayed wires, burning smells, or unusual noises, call a licensed technician. The GarageDoorAdjust team emphasizes professional evaluation when electrical faults or mechanical binding occur.
Quick prevention tips to avoid future issues
- Keep the opener area clear of dust and moisture to reduce sensor and electronics corrosion.
- Use the manual’s recommended lubricants and apply sparingly to moving parts like tracks and rollers.
- Replace batteries in remotes and keypads regularly to prevent send/receive issues.
- Test the entire cycle monthly to catch issues before they escalate.
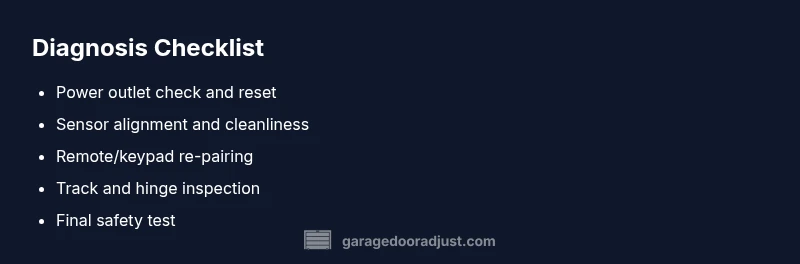
Steps
Estimated time: 60-90 minutes
- 1
Power cycle the opener
Unplug the unit or switch off the circuit breaker for at least 60 seconds, then plug back in and test with the wall control. This clears minor electronic glitches that can trigger a false fault indicator.
Tip: Label the outlet or breaker so you don’t confuse it with other circuits. - 2
Check safety sensors
Inspect each sensor for dirt, misalignment, or visible damage. Clean the lens with a soft cloth and adjust brackets until the LEDs face each other and stay steady during a test.
Tip: Use a flashlight to verify a straight line between sensors. - 3
Reset/learn the opener
Perform the model-specific reset or learn operation to re-establish remote and keypad communication. After reset, re-pair devices as described in the manual and test full cycle.
Tip: Consult the user guide for the exact duration and sequence; different models vary. - 4
Test remotes and keypad
Try the wall switch, remote, and keypad from different distances. If the remote doesn’t respond reliably, replace the battery and reprogram it if needed.
Tip: Keep remotes away from other wireless devices during testing to avoid interference. - 5
Inspect tracks and hardware
Look for bends, obstructions, or lubrication build-up that could impede movement. Clear debris and lubricate per the manufacturer’s recommendations.
Tip: Avoid over-lubricating; too much lubricant attracts dust and worsens sticking. - 6
Final test and maintenance
Run a complete door cycle, listening for unusual noises and watching for abrupt movements. If all tests pass, schedule periodic maintenance to prevent recurrence.
Tip: Set a maintenance reminder every 6–12 months.
Diagnosis: Door won’t move and the opener blinks or enters fault mode
Possible Causes
- highPower issue (outlet, cord, breaker)
- highSafety sensor misalignment or obstruction
- mediumRemote/receiver pairing issue
- lowControl board or motor fault
Fixes
- easyTest outlet with another device; reset the circuit; perform a power-cycle on the opener by unplugging for 60 seconds
- easyRealign safety sensors, clean lenses, and remove obstructions; verify LEDs indicate proper alignment
- mediumRe-pair or reprogram the remote and keypad; test from multiple distances
- hardIf the issue remains, schedule professional inspection for possible motor or control-board faults
Got Questions?
What does the blinking light mean on my garage door opener?
Blinking indicators usually signal a fault in power, sensors, or the receiver. Start with basic checks and progress through the troubleshooting steps.
A blinking light typically means a fault in power, sensors, or the receiver. Begin with simple checks and proceed through the steps.
Can I reset the opener to stop blinking?
Yes. Unplug the unit for about 60 seconds and plug back in, then test. If blinking continues, work through sensor and remote checks.
You can reset by unplugging for a moment, then testing again.
What if the sensors are misaligned?
Realign both safety sensors so the beams are clear and direct. Clean lenses and remove obstructions, then re-test the door.
Realign the sensors and test again.
Is blinking dangerous?
Not inherently dangerous, but it indicates a fault that could cause unexpected door movement. Do not force operation and get it checked.
It's not dangerous by itself, but fix it before operating the door again.
When should I call a professional?
If blinking persists after basic troubleshooting or you hear grinding or smell burning, contact a licensed technician for assessment.
If it keeps blinking after trying these steps, or you hear odd noises, call a pro.
Watch Video
Quick Summary
- Test power first to rule out obvious faults
- Realign safety sensors to fix most blinking issues
- Reset and re-test remotes after sensor work
- Call a pro if unresolved after steps