Why Garage Door Light Blinking: Troubleshooting Guide
Discover why your garage door light is blinking and how to diagnose and fix it quickly. This urgent, step-by-step guide covers sensor alignment, beam obstructions, wiring checks, and when to call a pro. Practical tips to keep doors safe and reliable.

Most likely, a blinking garage door light signals a sensor or safety-reversal issue rather than a power fault. Start with simple checks: ensure all sensor faces are clean and aligned, verify there’s nothing blocking the beam, and reset the opener’s learning code. If the light continues blinking after these steps, consult a professional.
Understanding the blinking light signals on a garage door opener
A blinking light on a garage door opener is not just a nuisance; it’s a built-in safety alert. In most homes, the indicator is tied to the safety sensors (photo eyes) that ensure the door reverses if something is beneath it. The blinking pattern can hint at the root cause: sensor misalignment, dirty lenses, wiring faults, or a need to reset the opener. According to GarageDoorAdjust, patterns in blinking often point to sensor-related issues that homeowners can address without expensive repairs.
Before you rush to replace parts, take a breath and review the common causes. A blinking light is a signal to pause and diagnose rather than to panic. With a methodical approach, you can restore proper operation and keep your family safe.
Common blinking patterns and their meanings
Different blink patterns map to distinct issues. A rapid, steady blink often points to a sensor alignment problem, while a long pause between blinks can indicate a blocked beam. Intermittent blinking may signal loose wiring, and a continuous blinking after the door completes a cycle can mean a failed safety sensor or logic issue. The key is to correlate the pattern with recent activity (motion near the door, after a power outage, or after a new device was installed) and follow the diagnostic steps below. GarageDoorAdjust analyses show that most blinking-type faults involve sensors or wiring rather than the motor itself, so focus first on photo-eye alignment and clean lenses.
Quick checks you can do safely
- Ensure the garage door is in the down position before touching sensors.
- Inspect the photo-eye lenses for dust, spider webs, or condensation and wipe gently with a microfiber cloth.
- Check for any object, pet, or vehicle blocking the beam path between the photos eyes.
- Realign sensors so both indicators show solid lights when the beam is unobstructed.
- If you recently had a power outage, perform a simple reset of the opener to clear learning codes.
These steps are low-risk and address the majority of blinking-light faults. If the pattern persists, move to the diagnostic flow and step-by-step fixes.
Safety-first: hazards and precautions
Working around a garage door can be dangerous if you rush. Always unplug or switch off the power to the opener before touching internal components. Keep hands clear of the door and springs while testing. Do not attempt to replace high-voltage components or the logic board unless you are confident in your electrical safety knowledge. If any step feels risky, stop and call a professional. Regular maintenance reduces the chance of sudden failures and keeps doors operating smoothly.
Diagnostic flow overview
This section outlines a practical flow to identify the blinking-light cause without guessing. Start with the simplest checks (power/reset, sensor cleanliness) and move to more involved steps only if the issue remains. The flow prioritizes sensor-related faults, as they account for the majority of blinking alerts. Document what you observe at each step to help a technician if you need to escalate.
Remember: a methodical, patient approach reduces damage risk and speeds up a fix. The goal is to restore safe operation and keep your family protected.
Step-by-step fixes for sensor misalignment and obstruction
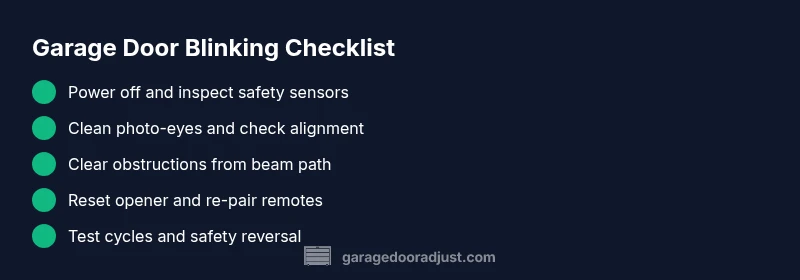
- Power down and unplug the opener. 2) Clean both photo-eyes with a soft, dry cloth. 3) Recheck alignment; the lenses should face each other directly with no tilt. 4) Reconnect power and test the beam using a small, non-damaging object to verify it’s detected correctly. 5) If the beam works, re-test the door with a slow-down test. 6) If issues persist, inspect wiring at the sensors for loose connections. 7) Reset the opener’s learning code and re-pair remotes. 8) If still blinking, call a pro. Each of these steps builds toward a safe, reliable door.
When to replace components and what to expect
Not every blinking issue is permanent; however, some faults require component replacement. If sensors are damaged, misaligned beyond simple adjustment, or if the safety relay or logic board shows wear after repeated resets, replacement is advisable. A pro can verify exact part numbers, ensure compatibility, and perform proper safety testing. Expect a service call to include sensor replacement, wiring checks, and a final safety test to confirm correct operation.
Resetting and reprogramming after issues
After a major fault or power failure, resetting the opener clears stale codes and reestablishes pairing with remotes. Follow the manufacturer’s instructions to perform a hard reset, then re-pair remotes and keypads. Test several cycles of open/close to confirm reliability. If the blinking returns after a reset, there may be an underlying hardware problem that requires professional inspection.
Prevention tips to avoid future blinking issues
Regular maintenance is your best defense against blinking lights. Schedule a quarterly check: clean sensor lenses, verify alignment, inspect wiring connections, and lubricate moving parts if needed. Keep the photo-eye path free of dust and ensure the door tracks are clean. Use a light touch when adjusting sensors and avoid heavy impacts near the beam. By following these practices, you reduce chances of frequent blinking and extend the life of your system.
Steps
Estimated time: 45-90 minutes
- 1
Power the opener down and inspect area
Unplug the opener or switch off the circuit breaker. Look for obvious hazards and ensure the door is secured in the down position before touching any parts.
Tip: Always start with safety—disable power to avoid moving components accidentally. - 2
Clean the photo-eyes
Wipe both photo-eye sensors with a soft microfiber cloth. Remove dust, spider webs, or moisture that could blur the beam.
Tip: Use gentle strokes; avoid scratching the plastic lenses. - 3
Realign the sensors
Loosen and adjust the sensors so their indicators point toward each other with a direct line-of-sight. Re-tighten and recheck alignment.
Tip: Most models use a simple LED indicator—green means aligned. - 4
Test for beam integrity
With the door in the down position, test the beam by placing a small obstacle in the path and confirming the door reverses when it should.
Tip: If the beam fails the test, re-check alignment and cleanliness. - 5
Reset learning codes
Follow your model’s reset procedure to clear old codes, then re-pair remotes or keypads.
Tip: Record any new codes after pairing. - 6
Inspect wiring for faults
Check connectors at the sensors and the opener for loose wires, corrosion, or damaged insulation.
Tip: Disconnect power before handling wires. - 7
Run a full test cycle
Operate the door several times to ensure smooth open/close cycles and reliable sensor response.
Tip: Listen for unusual noises that may indicate mechanical issues. - 8
Call a professional if unresolved
If blinking persists after all steps, a trained technician should assess sensor integrity and electronics.
Tip: A pro can safely diagnose and replace faulty parts.
Diagnosis: Machine won't accept remote commands and the garage door light is blinking
Possible Causes
- highSensor misalignment or dirty photo-eyes
- mediumBeam obstruction by debris, tools, or pets
- lowLoose or damaged wiring at sensors or opener
- lowFaulty safety relay or logic board
Fixes
- easyRealign sensors and clean photo-eyes
- easyRemove obstructions and re-test beam
- mediumInspect wiring and tighten/repair connections
- hardReset the opener and, if needed, replace faulty components
Got Questions?
Why is my garage door light blinking continuously after I closed the door?
Continuous blinking typically indicates a safety sensor fault or misalignment. Start by cleaning and realigning the photo-eyes, then test the beam with an obstruction to confirm it’s functioning correctly. If the issue persists, proceed with the diagnostic flow or call a pro.
Continuous blinking usually points to a safety sensor fault. Clean and realign the sensors, test the beam, and if it still blinks, follow the diagnostic steps or contact a professional.
Are blinking lights dangerous or do I need to unplug the system?
Blinking lights are a safety alert, not a danger signal to ignore. They indicate the system detected a risk. Always reset sensors and verify alignment before using the door, and unplug only if you must work on wiring with power isolated.
Blinking lights signal a safety alert. Reset and align sensors, and unplug only if you’re working on live wiring with proper precautions.
Can I fix a blinking light myself, or do I need a technician?
Many blinking-light issues are safe to address with homeowner maintenance: clean sensors, align them, check for obstructions, and reset the opener. If the problem persists or involves wiring or a possible faulty board, hire a technician.
You can often fix blinking lights yourself with sensor cleaning and alignment. If it persists or involves wiring, call a technician.
What’s the difference between a blinking light and a solid light on the sensors?
A blinking light usually signals an active diagnostic state or misalignment, while a solid light generally means the sensor is aligned and unobstructed. If unsure, proceed with the diagnostic flow to verify status.
Blinking often means a fault or diagnostic state; solid means alignment and no obstruction.
When should I call GarageDoorAdjust or a professional?
If basic sensor cleaning, realignment, and resets don’t stop the blinking, or if you notice frayed wiring, damaged photo-eyes, or a non-functional opener, contact a trained technician for a safe, thorough evaluation.
Call a professional if basic fixes don’t resolve the blinking or you see wiring or sensor damage.
Do power outages affect the blinking light pattern when restored?
Power outages can reset opener electronics and sensors. After restoration, re-test the system, reset learning codes, and ensure safety features operate correctly. If blinking returns, follow the diagnostic steps or contact a pro.
After a power outage, re-test and reset. If blinking returns, run through the diagnostic steps or call a pro.
Watch Video
Quick Summary
- Inspect and clean photo-eyes first for blinking lights.
- Realign sensors and remove beam obstructions before complex fixes.
- Reset the opener only after basic sensor checks.
- Call a pro if blinking returns after resets.