Why Your Garage Door Has No Power: Troubleshooting Guide
Discover fast, safe fixes for when your garage door has no power. This expert guide from GarageDoorAdjust helps homeowners diagnose outlets, breakers, sensors, and wiring.

Most often, a garage door has no power due to a simple power source issue rather than a faulty opener. Start by confirming the outlet is live, the circuit breaker isn’t tripped, and the door receiver has power. If the power source checks pass but the door still won’t move, follow the diagnostic flow below to identify sensor, wiring, or control problems.
Why power failures happen with garage doors
Understanding why power failures happen with garage doors starts with simple checks. The phrase why garage door has no power describes a common homeowner concern. In most cases, the culprit is not a broken motor but a power source issue. The GarageDoorAdjust team notes that untangling the power question begins with verifying the outlet, circuit, and the door’s power connection. This is the fastest path to a solution because many no-power incidents resolve by restoring basic electrical supply or cutting a tripping circuit. If those basics check out yet the door remains unresponsive, you must move through a structured diagnostic flow to test the opener’s electronics, sensors, and wiring. This guide emphasizes practical steps homeowners can take safely, prioritizing immediate fixes and safety.
According to GarageDoorAdjust, most no-power issues begin with a simple power source check and a quick circuit test. By starting here, homeowners can rapidly determine whether the problem is electrical or mechanical. If the power path is clear, the deeper diagnostics focus on the opener’s electronics, safety sensors, and wiring. This approach saves time, reduces risk, and often restores function without a service call.
Safety first: power-down and precautions
Before you touch any components, switch off power to the opener at the house disconnect or circuit breaker. Wear eye protection and avoid standing on wet surfaces. Never bypass safety sensors or expose live terminals. If you’re unsure at any point, stop and consult a professional. This approach reduces the risk of electric shock and property damage while you troubleshoot.
Garage doors can involve live circuits and moving parts. Protect yourself by turning off power first and verifying that you are not working in a damp environment. If you smell burning, hear buzzing, or see arcing, shut down power immediately and call a professional.
Check outlets, breakers, and fuses
Start with the basics: confirm the outlet feeding the opener is live by plugging in a lamp or charger. Check the nearby circuit breaker or fuse box for tripped breakers or blown fuses; reset or replace as needed. If you have a GFCI outlet in a garage, press the reset button and test again. If the power returns, monitor the circuit for re-tripping, which indicates an overload or a fault somewhere in the system.
If the outlet tests as live but the opener remains inactive, the fault may lie in the breaker panel, a loose connection, or a fault within the garage wiring. Consider testing with a different device on the same circuit to rule out a circuit-level issue. If you cannot reset a tripped breaker, or you suspect wiring damage, it’s time to escalate to professional inspection.
Inspect the wall control and receiver
The wall control should illuminate or respond when pressed. If the control shows no light, swap in a fresh battery and re-pair with the receiver if applicable. Verify the wall control wiring at the back of the unit and confirm the receiver module is seated correctly. A loose connector can prevent power transfer even when the outlet is fine.
If the wall control still fails to activate the opener, test whether a reset or reprogramming is required for your model. Some systems require re-pairing after power interruptions. This helps distinguish a control issue from a main power problem.
Verify remote and battery status
Sometimes the remote is the source of frustration rather than the opener itself. Replace the remote battery and ensure it is correctly programmed. Note that some openers require a specific pairing with the wall control; consult your model’s manual if the remote still doesn’t wake the unit after a battery change. If multiple remotes fail, focus on the wall control and power supply rather than the remote.
Remote failures can mimic power issues but are often a signaling problem rather than a true power fault. Systematic testing helps confirm where the fault lies.
Sensor eyes and safety features
Modern doors stop for safety reasons if the photoelectric eyes detect an obstruction or misalignment. Inspect the sensors at the track ends: clean the lenses, test alignment, and use the opener’s test function if available. If the sensors stay misaligned, the opener may refuse to power accurately or stop midway. Correct alignment and clearance usually restore normal function.
Persistent sensor faults can appear as a power issue because the system won’t complete the run cycle. Keeping sensors aligned and clear reduces false positives and improves consistency in operation.
Wiring, connectors, and common failures
A loose wire, damaged insulation, or corroded terminal can interrupt power flow. With power off, inspect the main wiring from the outlet to the opener, and check for signs of wear, pinching, or heat damage. Look for burnt smells or melted insulation. If you identify damaged wiring, do not attempt a risky repair; contact a professional to rewire or replace the affected components.
Wiring faults are less common but can be serious. A professional assessment ensures safe handling and restores proper power delivery without creating new hazards.
When to call a professional
If after completing the checks you still have no power, or you see burning smells, sparking, or a buzzing sound, stop and call a licensed technician. Power-related garage door repairs can involve high voltage and torsion springs that require specialized training. The GarageDoorAdjust team recommends seeking help promptly to avoid injury and ensure the door is safe and compliant.
A professional can verify electrical integrity, motor health, and safety interlocks, plus ensure your system meets local codes. Early intervention often prevents costly damage later.
Prevention and maintenance to avoid future no-power issues
To minimize future power problems, perform quarterly inspections: test outlets, reset breakers, and confirm wall controls operate. Keep sensors clean and aligned, replace remote batteries on a schedule, and consider a surge-protected outlet or dedicated circuit for garage systems. Document any maintenance so you can track the door’s electrical health over time.
Regular maintenance reduces downtime and extends the life of the opener. A simple routine now saves bigger issues later.
Steps
Estimated time: 60-90 minutes
- 1
Verify power at the outlet
Test the outlet that powers the opener with a lamp or charger to confirm it’s live. If the outlet is dead, fix the outlet or circuit before continuing. If the outlet works, proceed to the breaker checks.
Tip: Use a second device on the same circuit to confirm the circuit is stable. - 2
Check circuit breakers and fuses
Locate the main panel and inspect for tripped breakers or blown fuses. Reset any tripped breakers fully to the off position, then back to on. If a breaker trips again, there may be an overload or a short somewhere in the circuit.
Tip: Do not reset a breaker repeatedly if it trips immediately; this could indicate a fault that needs professional assessment. - 3
Test wall control and receiver
Check if the wall control lights up when pressed. Replace its battery if needed and re-pair with the receiver. Inspect the wiring at the back of the unit and ensure the receiver module is seated correctly.
Tip: A loose connector is a common cause of no-power symptoms; reseat all accessible connectors firmly. - 4
Inspect remote and battery status
Swap in a fresh battery for any remote you’re using and verify it’s properly programmed. If multiple remotes fail, focus on the wall control and power path first before replacing remotes.
Tip: Keep remotes dry and store them away from intense heat sources to extend battery life. - 5
Check safety sensors and alignment
Inspect the photoelectric eyes at the track ends for dirt or misalignment. Clean lenses gently and adjust alignment until the safety light functions as intended. A misaligned sensor can halt the cycle and seem like a power issue.
Tip: Use the built-in test button if available to confirm proper sensor operation. - 6
Review wiring and connectors
With power off, inspect wires from the outlet to the opener for damaged insulation, pinching, or corrosion. Replace any damaged sections and tighten terminal screws. Damaged wiring is a safety hazard and should be handled by a pro.
Tip: Take photos before disconnecting anything to aid reassembly. - 7
Perform a controlled reset of the opener
Power down the opener for at least 60 seconds, then restore power and perform any required resets or re-pairing. Observe LED indicators to identify status codes and follow the owner’s manual guidance.
Tip: Note any blinking patterns; they map to specific fault codes in many models. - 8
Decide about professional help
If you still have no power or encounter burning smells, sparks, or abnormal noises, stop and call a licensed technician. A professional can safely diagnose electrical health, door balance, and safety interlocks.
Tip: Be ready to share the checks you performed and model information to speed the service.
Diagnosis: Garage door opener shows no power or response.
Possible Causes
- highPower source issue (outlet, circuit breaker, or GFCI)
- mediumFaulty wall control or opener receiver
- lowDamaged wiring or short in the control circuit
Fixes
- easyReset the breaker and test the outlet with a known good device
- easyReplace the wall control battery and re-pair the remote; verify wall switch works
- hardInspect wiring and control board (power off) and call a pro for repairs
Got Questions?
Why won't my garage door power on?
Power not turning on can stem from power sources, wall controls, or wiring issues. Start with outlet and breaker checks, then test the wall control and receiver. If needed, follow the diagnostic flow to identify sensor or wiring faults.
If your garage door won't power on, begin with power checks on outlets and breakers, then test the wall control. Follow the diagnostic flow to isolate sensor or wiring faults.
What should I check first if there is no power?
Begin with the outlet, then the circuit breaker, and finally the wall control as well as the receiver. If all basic checks fail, proceed through the diagnostic flow for deeper testing of sensors and wiring.
Start with the outlet, then the breaker, and the wall control. If those fail, go through the diagnostic flow for sensors and wiring.
Can a dead remote battery cause no power at the opener?
A dead remote battery can prevent remote operation, but it does not always indicate a true power failure at the opener. Check the outlet and breaker first, then test the wall control and wiring.
A dead battery can stop remote use, but it may not mean the opener has no power. Start with power checks then test controls and wiring.
Is a DIY fix safe for power-related garage door issues?
DIY fixes are safe for basic power checks if you avoid high-voltage components and torsion springs. If you encounter burning smells, sparks, or unexplainable trouble, stop and call a pro.
DIY safety is fine for basic checks, but avoid high-voltage areas. If you smell burning or see sparks, call a pro.
When should I replace the wall control?
Replace the wall control if it remains unresponsive after a fresh battery and re-pairing, or if it stops communicating with the opener consistently. Check compatibility with your model.
Replace the wall control if it stays unresponsive after fresh battery and re-pairing.
Will a power outage damage my garage door opener permanently?
A typical power outage does not permanently damage the opener, but it can disrupt settings and sensors. After power is restored, run through the diagnostic flow to ensure everything functions correctly.
Usually power outages don’t permanently damage the opener, but check the system after power returns.
Watch Video
Quick Summary
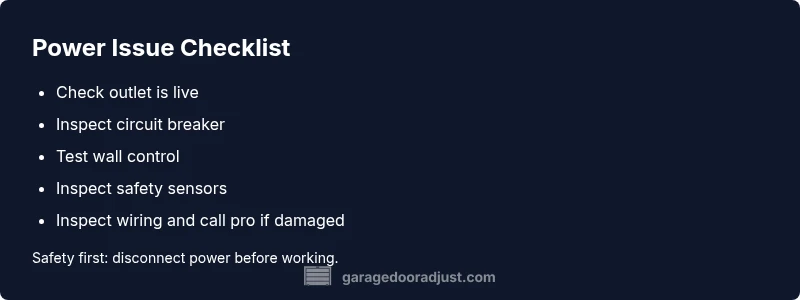
- Start with simple power checks before deep diagnostics
- Follow the diagnostic flow to isolate the fault
- Call a pro if high-voltage or spring work is involved
- Regular maintenance reduces future no-power issues