When to Replace a Garage Door Motor: A Homeowner Guide
Learn how to diagnose garage door motor issues, weigh repair vs replacement, and safely replace or upgrade your opener motor. Practical steps, cost considerations, and maintenance tips for homeowners troubleshooting garage doors.

According to GarageDoorAdjust, plan a motor replacement when the door stalls, moves slowly, or the opener struggles to lift a loaded door. Before deciding, verify safety sensors, track alignment, and basic maintenance. If you notice a burning smell or persistent grinding after troubleshooting, replacement is usually the most cost-effective option.
Understanding how garage door motors fail and what it means for replacement decisions
A garage door motor powers the movement of your door by driving a trolley along a track. Motors fail for several reasons, including worn gear sets, burnt windings, or a stretched drive belt. When the motor struggles, overheats, or grinds, it's a signal that the motor's internal components are worn or damaged. In many cases, symptoms mimic problems with safety sensors, limit switches, or the rail alignment, so a careful diagnostic is essential before deciding to replace.
Common failure signs include: a sluggish lift that never reaches the full height, a door that stops mid‑travel, or a loud grinding or whirring noise during operation. You might also notice a burning smell or a tripping circuit breaker, which could indicate an electrical fault. If the door is still under warranty, a service call may be the first step, since some motor failures are covered.
Before committing to a replacement, perform a quick check: ensure safety sensors are aligned and unobstructed, verify the door tracks are clean and lubricated, and confirm the opener's limit and force settings are correctly calibrated. Sometimes a repair or sensor alignment resolves symptoms without replacing the motor.
Signs replacement is more cost-effective than repair
When a motor is aging or repeatedly failing, the cumulative cost of parts, labor, and repeated service calls can approach or exceed the cost of a full replacement. Consider the expected lifespan of the motor and the opener, the availability of spare parts, and the potential for hidden damage to gears or the drive system. GarageDoorAdjust analysis shows that homeowners who assess overall condition and future durability often find replacement provides better long-term reliability and fewer interruptions.
Additionally, keep in mind the age and usage of your door. A high-use system in a busy garage is more prone to wear, making replacement a proactive choice rather than a reactive one. If the door springs, tracks, or cables are also worn, replacing the motor without addressing these components may lead to premature failure of the new unit.
Evaluating motor types and compatibility
Motors come in several types and sizes, and compatibility with your door depends on horsepower (HP), voltage, drive type (belt vs chain), and whether the system is AC or DC powered. A higher HP motor can lift heavier doors with less strain but may draw more power and be noisier. DC motors offer smoother starts and more controllable speed, while AC models are typically simpler and rugged. When replacing, ensure the new motor matches the door's weight, track configuration, and rail size, and check compatibility with safety sensors and smart features if you use them.
Consider also the control wiring and the logic of your opener. If you have a popular brand, staying within the same family of motors can simplify installation and warranty coverage. Your installer or the motor manufacturer’s guide can confirm compatible model numbers and mounting hardware.
Safety considerations before replacing a motor
Replacing a garage door motor involves high-torque components and electrical connections that pose serious risk if mishandled. Always disconnect power at the main breaker or disconnect switch before starting any work. Use a sturdy ladder, wear protective gloves, and have a second person available to assist with heavy equipment. Do not attempt to work on the drive system if any part shows signs of damage or if the door is not properly balanced.
Additionally, ensure the door is fully supported and cannot fall during the process. If you encounter frayed cables, bent tracks, or broken springs, stop and consult a professional. Safety systems like photoelectric sensors must be recalibrated after replacement to prevent injuries or property damage.
DIY vs professional assessment
Do-it-yourself motor replacement is feasible for homeowners with mechanical aptitude and basic electrical skills, but not all projects are safe or cost-effective to tackle alone. If you lack the right tools, or if the door’s balance or springs show wear, a pro should handle the replacement. A professional can verify the door is balanced, test safety features, and ensure code compliance. If you’re unsure about wiring diagrams or motor mounting, opt for professional service to avoid injury and warranty voiding.
For complex doors, or when upgrading to a higher-performance motor, professional installation is strongly advised. This helps protect your family and furniture and ensures the repair aligns with local safety standards.
Selecting a replacement motor: features to prioritize
Prioritize compatibility with your door’s weight and travel distance, and choose a motor with a mounting configuration that fits your existing bracket. Look for safety features such as auto-reverse, obstacle detection, and accurately calibrated travel limits. If you use a smart home setup, verify compatibility with your Wi‑Fi, voice assistants, and mobile apps. Ask about warranty length, service coverage, and whether parts are readily available in your region.
Also consider noise reduction features like vibration isolation mounts and smoother start/stop curves. A quieter motor improves daily usability, especially if the garage is adjacent to living spaces or bedrooms.
Replacing or upgrading: a high-level process overview
A motor replacement typically involves securing the power source, removing the old motor, mounting the new unit, reconnecting drive belts or chains, and reattaching safety sensors and limit switches. After installation, a professional should balance the door, set travel limits, and test full range of motion with the door open, closed, and with incidental obstacles. If upgrading to a higher-capacity or smarter motor, the installer will ensure compatibility with remotes and integration with smart home devices.
Plan for calibration of the door’s travel limits and force settings, plus safety testing to confirm auto-reverse is functioning at all positions. Maintenance checks should be scheduled after replacement to prevent repeat issues.
Maintenance practices to extend motor life
Regular maintenance can significantly extend the life of a garage door motor. Keep tracks clean and lubricated with manufacturer-approved lubricants, inspect springs, cables, and rollers for wear, and ensure the door is balanced. Dust and debris can impede the drive system, so perform periodic inspections every six months or after heavy use.
Test safety features monthly, clean photo sensors, and replace remote batteries as needed. If you notice unusual heat, noise, or vibrations after maintenance, stop and reassess the system. A well-maintained motor operates more efficiently and lasts longer.
What to expect after replacement: testing and warranty
After installation, you should test the door for smooth operation, correct safety sensor behavior, and accurate travel limits. Run the door several times with and without load, and verify it reverses on contact with objects. Record the travel distance and any anomalies for follow-up service if needed. Most motors come with a warranty that covers parts and some labor; register the product and retain receipts for future service or replacement needs. Regular maintenance will help maximize the warranty period and performance.
Tools & Materials
- Circuit breaker or disconnect switch(Fault isolation for opener power)
- Power drill and bits(For mounting hardware)
- Wrench set (metric and SAE)(Remove/secure mounting bolts)
- Socket set(Detach drive components and fasteners)
- Screwdrivers (Phillips and flathead)(Wiring harness and brackets)
- Pliers (needle-nose)(Grip small parts and wires)
- Voltage tester(Verify power is off before handling wires)
- Ladder(Access to mounting location)
- New garage door motor (compatible model)(Match door weight and travel distance)
- Mounting hardware (screws/bolts)(Use manufacturer-supplied or equivalent)
- Safety gloves(Protect hands during heavy lifting)
- Labeling supplies (tape, markers)(Tag wires and bolts for reassembly)
Steps
Estimated time: 1-2 hours
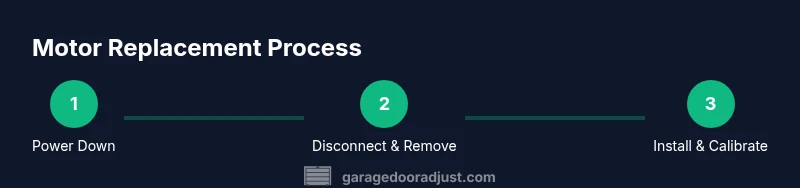
- 1
Power down and prepare a safe workspace
Turn off power at the main breaker and unplug the opener if accessible. Verify the door is closed and the work area is clear of children and pets. Have a helper ready to assist with heavy components.
Tip: Lock out the circuit or label the breaker to prevent accidental restoration during work. - 2
Disconnect power to the opener and remove cover
Disconnect any power from the unit and remove the opener cover to access the motor and drive system. Take clear photos of wiring before disconnecting any connectors for reference during reassembly.
Tip: Keep screws and small hardware organized in labeled containers. - 3
Unfasten the motor and detach the drive
Unbolt the motor from its mounting bracket and carefully detach the drive belt or chain from the trolley. Label wires and note the orientation of any harnesses before removal.
Tip: Do not force components; if something resists, check for additional fasteners or hidden connectors. - 4
Mount the new motor and align drive system
Position the new motor on the mount, secure with screws, and reconnect the drive belt/chain to the trolley. Check alignment with the tracks and ensure the belt tension is appropriate.
Tip: Avoid overtightening belts; improper tension can wear the motor quickly. - 5
Reconnect electrical and safety systems
Reconnect the wiring harnesses exactly as labeled, reinstall the safety sensors, and replace the opener cover. Double-check all connections before applying power.
Tip: Test sensors before wiring power back to the full system to prevent misreads. - 6
Test run and calibration
Restore power and test the door in all modes: open, close, and stop. Calibrate travel limits and force settings and confirm auto-reverse works at a safe height.
Tip: Run several cycles with the door unloaded, then test with a light load to confirm proper operation.
Got Questions?
What are the common signs that indicate it's time to replace the garage door motor?
Look for persistent stalls, slow lifting, unusual grinding, or a burning smell coming from the motor. If these persist after basic maintenance and sensor checks, replacement is often the best option.
Common signs include stalling, slow movement, grinding sounds, or a burning smell. If these persist after maintenance, replacement is typically the right call.
Can I replace a garage door motor myself?
DIY replacement is possible for capable homeowners, but avoid it if you encounter heavy components or unfamiliar wiring. When in doubt, hire a professional to ensure safety and proper calibration.
You can replace it yourself if you’re comfortable with electrical work and heavy lifting; otherwise, hire a professional to ensure safety and proper setup.
How long does a motor replacement usually take?
A typical replacement can take about 1 to 2 hours for a straightforward install, longer if there are alignment or wiring complications.
Most replacements take about one to two hours, depending on complexity and cabinet access.
Should I replace the whole opener or just the motor?
If the motor is compatible and the rest of the system is in good condition, replacing just the motor can be cost-effective. Consider upgrading the entire opener if the unit is old or has multiple failing components.
If the rest of the opener is solid, just replacing the motor can save money; otherwise, upgrading the whole unit may be best.
Will upgrading the motor improve energy efficiency?
A newer motor can be more efficient and smooth, but gains depend on the overall system and usage. Efficiency improvements are typically modest unless your old unit is very inefficient.
Newer motors can be a bit more efficient and smoother, but the gains depend on your setup.
What warranty considerations apply to motors?
Most motors come with a parts warranty, and some installers offer labor coverage for a limited period. Always check coverage length and what it includes before purchase or installation.
Check what parts and labor are covered and for how long, since warranty terms vary by brand and installer.
Watch Video
Quick Summary
- Assess symptoms before replacing to avoid unnecessary work.
- Choose a motor compatible with door weight and track system.
- Prioritize safety: power off, protect bystanders, and verify sensors.
- DIY is possible for simple setups; seek pros for complex upgrades.
- Document warranty and maintain regular service for longevity.