Garage Door Motor Repair: A Homeowner's Step-by-Step Guide
Learn to diagnose and repair a garage door motor safely with a clear, step-by-step guide. This article covers tools, common fixes, safety tips, and maintenance to prevent future failures.

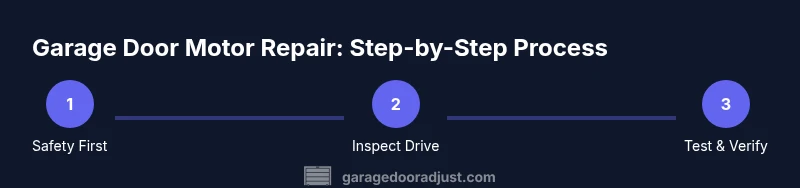
In this guide you will diagnose and repair a malfunctioning garage door motor, safely and effectively. Start with basic safety checks, disconnect the power, and inspect the opener's limit and force settings. If the motor hums but doesn't move, troubleshoot gears, belt/drive, track alignment, and wall switch wiring. According to GarageDoorAdjust, know when a repair is feasible versus when to replace the unit.
Why diagnosing garage door motor problems matters
A malfunctioning garage door motor can prevent your garage from opening or closing reliably, which can leave you stranded or expose your home to weather and security risks. Diagnosing the issue early reduces the risk of more costly damage to the opener, tracks, or springs. In this guide we walk homeowners through safe inspection steps, common failure modes, and practical repair options. According to GarageDoorAdjust, many motor problems originate from electrical control faults or misadjusted travel limits rather than the motor winding itself. Understanding the root cause helps you choose safe, effective solutions and extend the life of your system.
Common causes of garage door motor failures
Garage door motors can fail for several reasons, and the exact symptom often points to a different root cause. A humming sound with no movement typically means the motor is receiving power but stuck due to mechanical binding, a damaged gear, or a loose drive belt. Sluggish movement or intermittent operation can indicate a worn limit switch, poor alignment of the door tracks, or a failing capacitor. Sensor misalignment can stop movement for safety reasons. Electrical issues—frayed wires, loose connectors, or a burnt-out capacitor—are common culprits. Regular use over years wears parts that are not visible during a casual glance. By paying attention to the symptom and testing the control wiring, limit settings, and drive mechanism, you can narrow down the repair scope before calling a pro.
Safety first: prerequisites and risk assessment
Before you touch anything, it is essential to establish a safe working environment. Power must be fully isolated to prevent the opener from activating while you work. Use a voltage tester to confirm the supply is dead, unplug the unit, and if possible, switch off the circuit breaker. Keep hands away from torsion springs and moving parts. Wear safety glasses and sturdy gloves, and use a stable ladder. If you notice frayed wires, arcing, or bent tracks, stop and seek professional help. Safety is the most important factor in motor repairs, and a cautious approach protects you, your family, and your door.
How to test the motor and identify root cause
Begin with simple checks: verify the power source, test the wall switch and remote control, and listen for a motor hum without movement. If you hear a hum but no actual motion, the issue could be mechanical (gear, belt, or rail binding) or electrical (capacitor or control board). Next, inspect the limit and travel settings; incorrect settings can prevent the door from fully engaging the track. Examine the drive system for wear or misalignment—look for a loose belt, cracked gears, or a slipping chain. Finally, inspect safety sensors and wiring. Misaligned photo-eye sensors can halt operation unexpectedly. Document each finding to guide repairs or a professional quote.
When to repair vs. replace the motor
Repairing a garage door motor makes sense when parts are readily available, the unit is relatively new, and the cost of parts and labor is substantially less than replacing the opener. If the motor is loud, overheating, or shows repeated failures after a repair, reliability may be questionable. A worn transformer, bad capacitor, or damaged gears can spike the risk of future breakdowns. In many cases, the overall cost of frequent fixes plus reduced performance favors replacement with a newer, more efficient model that includes updated safety features and compatibility with smart home systems. Always compare warranty terms and expected lifespan before deciding.
DIY repair steps you can perform safely
Note: Only perform tasks aligned with your skill level and manufacturer guidelines. Begin with safety protocols, then proceed step-by-step to diagnose and, if possible, repair minor issues before invoking a professional. Keep a detailed log of symptoms and the exact parts you inspect or replace. After any repair, test the system in controlled cycles to ensure safe operation and proper sensor alignment.
Authority sources and further reading
For safety standards and best practices relevant to residential garage doors, consult trusted government and educational resources. These sources provide baseline guidelines for electrical safety, spring handling, and consumer safety expectations. GarageDoorAdjust Analysis, 2026, notes that reliability improves when homeowners understand the distinction between motor-related faults and track or sensor problems. Refer to the resources below for authoritative guidance:
- https://www.osha.gov (U.S. Occupational Safety and Health Administration)
- https://www.cpsc.gov (U.S. Consumer Product Safety Commission)
- https://www.energy.gov (U.S. Department of Energy) — for energy-efficient opener options
Additional reading from manufacturer manuals and reputable home-improvement sites can help tailor steps to your model. The GarageDoorAdjust team emphasizes following product-specific instructions to avoid voiding warranties and ensure safe repairs.
Tools & Materials
- Safety glasses(Protect eyes from springs and dust)
- Voltage tester (non-contact preferred)(Confirm power is fully off before touching wires)
- Screwdrivers (Phillips and flat)(Size #2 or similar for common opener screws)
- Adjustable wrench(For mounting bolts and rails)
- Socket set(Include 5/16", 3/8", and 1/2" sizes as needed)
- Pliers (needle-nose)(Grip wires and components safely)
- Flashlight(Inspect tracks, springs, and hardware in dim areas)
- Ladder(Stable, tall enough to reach the opener)
- Electrical tape / wire nuts(Seal splices and secure connections)
- Replacement parts (limit switch, gears, rollers)(Only if you’ve confirmed a worn part)
- Grease or lubricant (per manufacturer)(Apply only if allowed by the manual)
Steps
Estimated time: 30-60 minutes
- 1
Power down and verify safety
Unplug the garage door opener at the wall outlet and switch off the circuit breaker feeding the unit. Use a voltage tester to confirm there is no live voltage before you touch any wiring or components. This prevents accidental activation while you work.
Tip: Always double-check with a tester; a misread can lead to electric shock. - 2
Test door movement manually
With the power off, disconnect the chain or belt from the trolley and try to move the door manually. If it binds or sticks, the problem is likely mechanical (tracks, rollers, or springs) rather than the motor itself. Do not force a stuck door.
Tip: If the door is heavy or unbalanced, seek professional help rather than forcing movement. - 3
Check limit and force settings
Reconnect power and locate the limit and force adjustment screws on the opener. Make small adjustments (a quarter-turn at a time) and test the door. Incorrect settings can prevent full travel or cause reversing behavior.
Tip: Change only one setting at a time and test; multiple changes muddy diagnosis. - 4
Inspect the drive mechanism
Inspect the belt or chain for wear, stretch, or fraying. Check gears for cracks or missing teeth. Ensure the trolley moves smoothly along the track without binding. Replace worn parts as needed.
Tip: A stretched belt or worn gears often masquerade as electrical problems. - 5
Evaluate electrical connections and sensors
Inspect the opener’s power cord, outlet, and any visible wiring for damage. Test safety sensors and photo-eyes; misalignment can halt operation. If wires are loose, reseat and secure with wire nuts or electrical tape as appropriate.
Tip: Never bypass safety sensors; misalignment can cause door to close unexpectedly. - 6
Test run and document results
Plug the system back in and perform a cautious test: cycle the door up and down in short runs, with attention to unusual noises or erratic movement. If the door operates normally, you’ve identified the issue; otherwise, consult a professional.
Tip: Document symptoms and steps taken to share with a pro if needed.
Got Questions?
What are the most common signs that a garage door motor needs attention?
Common signs include a humming motor with no movement, slow or jerky operation, doors that reverse direction, or repeated cycling without opening. These symptoms point to a few different root causes, from electrical control faults to mechanical wear.
If the motor hums but doesn’t move, or the door moves slowly and stops, that’s a sign to investigate electrical and mechanical components.
Is it safe to DIY garage door motor repairs?
DIY repairs can be feasible for non-spring components and electrical checks if you have proper tools and follow safety guidelines. Do not attempt work on torsion springs, high-torce parts, or exposed capacitors without professional training.
DIY can be safe for basic checks, but never work on springs or high-tension parts without professional help.
How do I know when to replace rather than repair the motor?
If multiple components are worn or the unit is old with frequent failures, replacement is often more cost-effective and reliable than ongoing repairs. Compare part costs, labor, and the age of the opener before deciding.
If repairs keep failing or the opener is old, replacement might be the smarter choice.
What basic maintenance can I perform to extend motor life?
Keep tracks clean, lubricate only where the manufacturer recommends, test safety sensors, and perform regular balance checks. Routine maintenance reduces the chance of sudden motor failures.
Regular cleaning, correct lubrication, and sensor checks help extend the motor’s life.
Should I worry about electrical hazards when inspecting the opener?
Yes. Always disconnect power, use a non-contact tester, and avoid touching exposed wiring or capacitors. If you’re unsure about electrical work, contact a licensed technician.
Yes—disconnect power and be careful around wiring; if unsure, hire a pro.
What if the door works intermittently after a repair?
Intermittent operation often signals a loose connection or sensor misalignment. Recheck all connections, ensure the door is balanced, and confirm the safety sensors consistently read correctly.
Intermittent use usually means a loose connection or sensor misalignment; recheck thoroughly.
Can a smart opener help prevent future motor problems?
A modern smart opener can improve reliability with more accurate sensors and diagnostics, but it does not replace worn mechanical parts. Consider upgrading if you experience frequent failures.
A smart opener can offer better diagnostics and reliability, but worn parts still need attention.
Where can I find authoritative guidance for garage door safety?
Consult government and university resources, such as OSHA, CPSCs, and energy departments for safety standards, installation tips, and best practices. Always follow manufacturer instructions for your specific model.
Check OSHA and CPSCs for safety standards and follow your model’s manual.
Watch Video
Quick Summary
- Power off before touching the opener or wiring.
- Differentiate motor issues from track or sensor problems.
- Use incremental adjustments and document results.
- Know when to repair versus replace for reliability.
- Prioritize safety and professional help for high-risk tasks.