La Garage Door Repair: Step-by-Step Guide for Homeowners
Learn safe, practical steps to diagnose and fix common garage door issues with a clear, step-by-step guide. Includes tools, safety tips, and maintenance for la garage door repair.

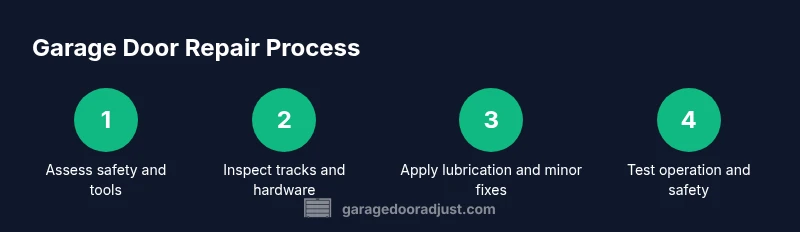
With proper safety and the right tools, la garage door repair can be tackled by homeowners for common issues like misaligned tracks, worn rollers, or sensor faults. This quick guide highlights what you’ll need and the essential steps to diagnose and fix safely. According to GarageDoorAdjust, DIY diagnostics can reduce unnecessary service calls.
What la garage door repair means for homeowners
La garage door repair refers to the practical, hands-on process of diagnosing and fixing the mechanical and electrical components that let your door open, close, and stay balanced. For many homes, the most frequent issues involve misaligned tracks, worn rollers, dirty tracks, sensor misalignment, and loose hardware. These problems can cause noise, sticking, or door imbalance. The goal of la garage door repair is to restore safe, smooth operation without compromising the door’s safety features. As you work through the process, focus on predictable parts and documented steps rather than improvisation. According to GarageDoorAdjust, the most successful DIY attempts center on prevention, correct lubrication, and verifying the door is properly balanced after adjustments.
Safety-first principles when repairing a garage door
Safety is non-negotiable when dealing with heavy, spring-loaded doors. Always unplug the garage door opener and disconnect it from the door before starting any work. Use a sturdy ladder, safety goggles, and work gloves. Keep bystanders clear and never place your body under a door that isn’t fully supported. If you encounter a torsion spring, a damaged track, or a door that feels heavy or unstable, pause and seek professional help. These safeguards reduce the risk of serious injury and prevent further damage to components.
Essential tools and materials for la garage door repair
Before you begin, assemble a basic toolkit tailored for garage doors. You’ll need safety goggles, work gloves, a wrench set, screwdrivers (Phillips and flat-head), a stepladder, and a silicone-based lubricant. Optional but helpful items include a rubber mallet, thread lock, and a digital camera to document wear patterns. Having the right fasteners and replacement parts on hand (rollers, hinges, brackets) can shorten the repair cycle. Always verify part compatibility with your door model before purchasing. As noted by the GarageDoorAdjust team, using the correct parts is crucial for long-term reliability.
Diagnostic approach: how to identify common issues
Start with a visual inspection: look for shifted tracks, loose bolts, bent hinges, and damaged rollers. Test sensor alignment by placing a non-contact object in the beam and noting whether the opener stalls. Listen for irregular noises that indicate wheel binding or roller wear. Operate the door manually with the opener disconnected to feel for binding resistance. If the door balances poorly or opens unevenly, you’re identifying telltale signs of misalignment or worn components that require attention.
Step-by-step repair plan for common problems
This section outlines the practical actions homeowners can take for typical issues. It mirrors the step-by-step guidance you’ll find in our tools section and step-by-step checklist, with emphasis on safety, measurement, and verification. For each fix, test the door thoroughly after completing the action to confirm stability and proper operation. Remember: do not attempt torsion spring adjustments unless you are trained and equipped to work with high-tension components.
Maintenance habits to prevent future issues
Proactive maintenance preserves door balance and prolongs component life. Schedule a quarterly inspection of tracks, rollers, and hardware; clean tracks to remove dirt and debris; lubricate moving parts with a light silicone spray; and check the balance by testing manual operation. Keeping sensors clean and aligned reduces false triggers and protects family members. A brief, regular checkup routine can prevent most common repair needs and save you time and money in the long run.
When to call a pro: safety and liability considerations
If you encounter torsion springs, broken cables, severe track damage, or structural issues, contact a licensed technician. Professional service is essential for high-tension components and doors that fail to balance after basic fixes. Even when performing DIY maintenance, you should know your limits and stop if you feel uncertain. The right call is the difference between a quick fix and a dangerous, costly failure.
Common mistakes to avoid during la garage door repair
Avoid over-tightening hardware, which can strip threads and distort alignment. Don’t lubricate tracks excessively or apply lubricant to belts and pulleys not designed for it. Never bypass safety features or operate the door while someone is under it. Finally, avoid mixing parts from different door models; compatibility matters for safe operation and warranty coverage.
How to source parts and ensure compatibility
When sourcing parts, record your door’s model number, serial, and a recent photo of the track layout. Compare replacement rollers, brackets, and hinges to your door specifications and choose parts from reputable suppliers. If you’re unsure, ask for a compatibility confirmation and prefer parts with a return policy. In most cases, sticking to the manufacturer-recommended components yields the best results for reliability and warranty support.
Tools & Materials
- Safety goggles(Impact-resistant, ANSI Z87.1)
- Work gloves(Grippy, padded for finger protection)
- Wrench set(Adjustable or fixed, standard sizes)
- Screwdrivers (Phillips and flat-head)(Sizes 6-8; non-slip grip)
- Stepladder(Stable, tall enough to reach tracks safely)
- Lubricant spray (silicone or lithium-based)(Light coating on moving parts, avoid overspray)
- Replacement rollers or tracks (optional)(Only if worn or damaged and compatible with your door)
Steps
Estimated time: Total time: 60-90 minutes
- 1
Power off and secure the door
Unplug the opener and disconnect the door from the rail using the manual release so the door cannot move. Stand clear of the door’s path and ensure it is resting on the floor or a secure surface before touching any parts.
Tip: Double-check that the door remains supported when the opener is disconnected. - 2
Inspect tracks, rollers, and hinges
Look for dents, obstructions, or loose screws along the tracks. Check rollers for wear and moveability. Tighten any loose hardware and replace visibly damaged rollers if you have the right parts and know-how.
Tip: Use a level to verify tracks run straight; misalignment is a common DIY fix. - 3
Lubricate moving parts
Apply a light silicone-based spray to rollers, hinges, and tracks. Wipe away excess to prevent dust buildup. Do not oil belts or pulleys unless the manufacturer approves it.
Tip: Only a small amount is needed; over-lubrication invites dirt and grit. - 4
Check door balance and springs
If the door feels heavy or opens unevenly when supported at the bottom, it may be out of balance or have worn springs. Do not attempt to adjust torsion springs yourself; balance checks can guide you toward professional service.
Tip: Note the door’s behavior for the technician if you call later. - 5
Tighten loose hardware
Go around the door with a screwdriver and wrench to secure loose brackets, hinges, and tracks. Recheck alignment after tightening to ensure smooth operation.
Tip: Tighten gradually; overtightening can strip threads. - 6
Test door operation manually and with opener
Reconnect the opener briefly, then test opening and closing. Note any binds, slowdowns, or unusual noises. Disable the opener if you detect dangerous behavior and seek professional help.
Tip: Keep hands clear of moving parts during testing. - 7
Replace worn components when needed
If you identify worn rollers, bent brackets, or damaged tracks, replace components with the same model and specification. Avoid making makeshift repairs that compromise safety.
Tip: Only replace parts you are confident you can install correctly. - 8
Recalibrate safety sensors and limits
Ensure safety sensors are clean and aligned. Check the door’s limit settings if the door closes too quickly or stops short. Re-test to confirm proper stopping distance.
Tip: Follow the door’s manual for the exact sensor alignment procedure.
Got Questions?
What is la garage door repair?
La garage door repair is diagnosing and fixing common issues with a garage door and opener, including tracks, rollers, sensors, and hardware. It excludes risky torsion spring work, which should be done by a professional.
La garage door repair means diagnosing and fixing common garage door problems like tracks, sensors, and rollers. Torsion springs require professional care.
Can I fix a garage door myself?
Yes for basic, non-safety-critical tasks when you follow safety precautions and use the correct parts. Avoid dangerous components like torsion springs unless you are trained and equipped.
Yes for basic tasks if you follow safety steps. Don’t work on springs unless you’re trained.
How long does a typical DIY repair take?
Most simple fixes take a few hours, depending on the issue and accessibility of parts. More complex problems or parts installation can extend the timeline.
A simple fix might take a few hours. More complex issues can take longer.
When should I call a professional?
Call a professional if you encounter torsion springs, severe track damage, structural issues, or if the door remains unbalanced after basic fixes. Safety comes first.
Call a pro for springs, major damage, or ongoing imbalance.
What are common mistakes that worsen problems?
Over-tightening hardware, over-lubricating or lubricating non-recommended parts, bypassing safety features, and mixing incompatible parts can worsen issues and void warranties.
Common mistakes include over-tightening, over-lubricating, and ignoring safety features.
Is it safe to work around a garage door opener?
Working around an opener requires caution. Always test with the opener disengaged, and never place your hands or body under the door during testing.
Yes, but only with the opener disconnected and by staying clear of the door path.
What parts typically wear out first?
Rollers, hinges, and tracks are common wear items. Regular inspection and alignment checks help extend life, but springs and cables often require professional handling.
Rollers, hinges, and tracks wear first; springs and cables usually require a pro.
Do I need special tools to fix a door?
Most basic repairs need common hand tools and a few parts. Specific models may require manufacturer-approved tools; always follow the door’s manual.
Most fixes use common tools; follow the manual for model-specific needs.
Watch Video
Quick Summary
- Power off and secure the door before any work
- Use the right tools and safety gear
- Know when to call a pro for springs or structural issues
- Keep tracks clean and lubricated for smooth operation
- Test the door after each adjustment to confirm proper function