Garage Door Repair Local: Step-by-Step Guide for Homeowners
Learn safe, local garage door repair steps to diagnose and fix common issues. This expert, step-by-step guide by GarageDoorAdjust helps homeowners repair locally and know when to call a pro.

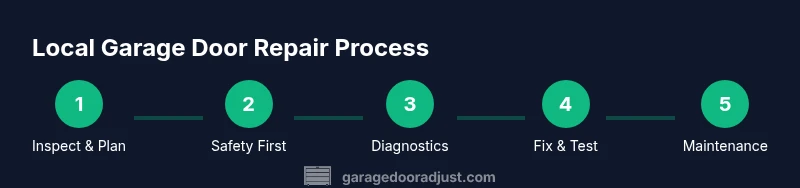
This guide helps homeowners diagnose and safely repair common garage door issues locally. You'll learn a practical, step-by-step approach, when to DIY, and when to call a pro. By following these local repair practices, you can restore quiet, balanced operation without expensive service calls. This plan emphasizes safety, common-sense fixes, and clear cost expectations so homeowners feel empowered to act.
What local garage door repair means for homeowners
Locally focused garage door repair means diagnosing, sourcing parts, and performing safe fixes without shipping parts across the country. When you search for garage door repair local, you're looking for guidance that applies to the models and climates common in your area. According to GarageDoorAdjust, most household repairs involve basic alignment, lubrication, track cleaning, and hardware tightening rather than replacing major components. This approach helps you regain smooth operation with minimal downtime and cost. By treating repairs as a local service, you can build familiarity with your door’s normal behavior: quiet operation, balanced lifting, and consistent stopping points. The GarageDoorAdjust team emphasizes that a grounded, local approach reduces the risk of over- or underestimating the work and keeps safety at the forefront.
Safety and planning before you start
Safety should guide every DIY attempt on a garage door. Start by disconnecting power to the opener and removing the remote control from the wall to prevent accidental activation. Wear safety glasses and gloves, use a sturdy ladder, and ensure the door is fully closed while you inspect tracks. Clear the area of people and pets, and work in daylight if possible. If your door uses torsion springs, treat any spring handling as high risk and call a professional. The aim is to create a simple, safe environment for inspection and basic adjustments, so you can identify what you can fix locally and what should stay in professional hands. This early planning reduces surprises during the repair and keeps your family safe.
Common issues homeowners fix locally
Many local fixes address misalignment, obstruction, or worn hardware rather than replacing entire units. Common symptoms include a noisy ride along the tracks, doors that bind or stick when opening or closing, slow response to the opener, doors that won’t stay up or stay down, and occasional reversing in halfway through travel. Inspect tracks for dents, loose mounting screws, and debris. Check rollers and hinges for wear, and ensure weather stripping or seals aren’t catching on the track. A tidy, obstructions-free path helps the door operate more quietly and safely. If you notice the door sagging or one side dragging, this often points to hardware wear or misalignment rather than a failed motor.
Diagnostic approach for local repairs
Adopt a methodical flow to identify root causes. Start with the opener switch and remote controls to rule out electronic faults. Visually inspect the door’s vertical tracks for bends and the horizontal tracks for obstructions. Check rollers and hinges for wear and lubrication. Test balance by manually lifting the door halfway; it should hold steady. If it falls or rises, spring tension or balance components may require professional evaluation. Finally, lubricate moving parts and re-test the door’s travel limits. This approach helps you distinguish simple fixes from issues that require professional service.
When to call a pro vs DIY
Some tasks are suitable for local DIY work, such as track cleaning, hinge tightening, and lubrication. Other tasks—especially anything involving torsion springs, cables, or serious misalignment—are hazardous and should be handled by trained technicians. If you observe persistent unbalanced operation, unusual noises that don’t disappear after lubrication, or doors that won’t stay in place, it’s time to consult a pro. By knowing your limits, you protect your family and avoid making the problem worse. The GarageDoorAdjust team advises homeowners to err on the side of caution and to schedule a professional inspection when in doubt.
Maintenance to prevent future problems
Regular maintenance keeps your garage door reliable. Schedule periodic lubrication of rollers, hinges, and tracks; wipe away dust and debris from tracks; tighten loose screws; check weather seals for wear; and calibrate the opener if needed. Keep a simple service log to note when you last lubricated components, when weather-stripping was replaced, and any changing sounds. Routine checks prevent small issues from growing into bigger repairs and lengthen system life. The local focus also means you can address seasonal concerns, such as snow and ice buildup in winter or heat-related track expansion in heat waves. Consistent care reduces downtime and sustains smooth operation.
Understanding costs and scheduling locally
Costs for local garage door repair vary with the issue, parts, and labor, and they tend to reflect the local market rather than a single national price point. By performing safe, minor repairs yourself, you can postpone professional visits and use more of your budget for essential maintenance. When you do hire a pro, obtain multiple quotes and ask for a written scope of work, including parts and labor. Scheduling a proactive inspection each year or season can help catch problems early and minimize disruption. Remember that local repairs often yield the best value when you address issues promptly rather than waiting for a total failure.
Tools & Materials
- Safety glasses(ANSI-rated protective eyewear)
- Work gloves(Sturdy material for grip)
- Sturdy ladder(Rated for your height and use)
- Wrench set (adjustable)(For bolts and mounting hardware)
- Screwdriver set (Phillips & flathead)(Assorted sizes)
- Socket set(Optional for some fasteners)
- Lubricant (silicone-based or white lithium)(Light coat on moving parts)
- Soft brush or microfiber cloth(Clean tracks and rollers)
- Allen keys / Torx keys(Only if your hardware requires it)
- Masking tape(Label parts or mark adjustments)
Steps
Estimated time: about ninety minutes
- 1
Disconnect power and secure door
Turn off the opener and unplug it if possible. Secure the door in a closed position to prevent accidental movement during inspection.
Tip: Never place hands near tracks or springs; keep others away from the door. - 2
Inspect tracks and rollers
Look for dents, bends, or loose screws on tracks. Clean debris and ensure rollers move freely without binding.
Tip: Use a soft brush; avoid abrasive tools that could damage tracks. - 3
Check door balance manually
With the door closed, lift it to waist height and release. If it stays put, balance is likely okay; if it moves, balance components may need attention.
Tip: If it’s heavy or unbalanced, do not continue—call a pro. - 4
Lubricate moving parts
Apply a light coat of lubricant to hinges, rollers, and track guide points. Wipe away excess to prevent dust attraction.
Tip: Avoid getting lubricant on nylon rollers; wipe off any overspray. - 5
Tighten hardware and recheck alignment
Tighten loose screws on hinges and brackets. Re-check door alignment and ensure tracks are straight.
Tip: Use the correct screwdriver size to avoid stripping screws. - 6
Reconnect power and test the opener
Restore power and run the door through a full open/close cycle. Verify safety features reverse on contact with obstruction.
Tip: If the door doesn’t reverse automatically, stop and adjust safety sensors or seek professional help.
Got Questions?
What does 'garage door repair local' entail?
Local repair focuses on issues common to your area, using parts and knowledge available nearby. It emphasizes safety, practicality, and minimal downtime.
Local repair focuses on issues common to your area with nearby parts and guidance, prioritizing safety and practicality.
Can I fix a damaged spring myself?
No. Torsion and extension springs are dangerous and require trained technicians. Attempting to adjust or replace them can cause serious injury.
Springs are dangerous; professionals should handle any work on them.
How do I know if I should call a pro?
If you’re unsure about balance, track alignment, or spring and cable integrity, or if the door behaves unpredictably, schedule a professional inspection.
If in doubt about balance or springs, call a professional.
What safety steps should I take before DIY?
Disconnect power, wear PPE, keep bystanders away, and avoid touching springs. Work in daylight and use a stable ladder.
Always disconnect power and wear PPE before starting any fixes.
Are there typical costs for local garage door repair?
Costs vary with the issue and parts. Obtain multiple quotes and request a written scope before work begins.
Costs vary; get several quotes and a written plan before work.
Watch Video
Quick Summary
- Know your local repair scope and safety boundaries.
- Inspect tracks, hardware, and balance before making fixes.
- DIY fixes are fine for minor maintenance; reserve major components for pros.
- Maintain a simple service log to prevent future problems.