Local Garage Door: Step-by-Step Diagnosis and Repair
Learn to diagnose, repair, and safely install a local garage door with a practical, expert-driven step-by-step approach from GarageDoorAdjust.

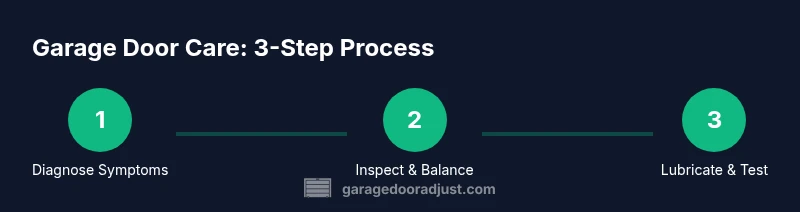
By following this step-by-step guide, homeowners can safely diagnose and address common issues with a local garage door, from uneven movement to opener glitches. You’ll learn when to lubricate, adjust springs or tracks, test safety features, and decide if professional help is needed. This article covers tools, methods, and safety precautions to get your door operating smoothly again.
Understanding the local garage door: how it works
A local garage door is a carefully balanced system that relies on springs, tracks, rollers, hinges, cables, and an electric opener. When you press the remote or wall switch, the opener activates, the trolley or chain moves, and the door follows the tracks to rise or lower. For safe operation, each component must be in good condition and correctly aligned.
According to GarageDoorAdjust, most homeowner issues stem from worn rollers, misaligned tracks, or improperly adjusted springs. Even small misalignments can create noticeable noise, binding, or strain on the balance point, making the door harder to open manually or putting extra load on the opener. By diagnosing symptoms against the typical system, you can identify the likely cause before starting any repair.
- The door panel is heavy and supported by springs that counterbalance weight.
- Tracks guide movement, while rollers and hinges keep the door sliding smoothly.
- The opener provides controlled movement and safety features, including auto-reversing sensors.
Getting familiar with these parts helps you plan a safe, effective diagnostic. If you notice persistent binding or if the door moves erratically, stop and switch to a careful inspection plan instead of forcing movement. A systematic approach reduces risk and increases the chance of a successful fix.
Safety first: basic precautions before you begin
Before touching any garage door components, set safety as your top priority. Disconnect power to the opener by unplugging the unit or switching off the circuit at the breaker. This prevents unexpected movement and protects you while you inspect or adjust.
Next, secure the door in the open position using the manual release if you need to test balance or manual movement. Wear eye protection and gloves, and keep children and pets away from the workspace. If the door feels heavy, binds at one point, or seems unstable, stop and reassess rather than forcing movement.
Finally, have a clear, well-lit workspace and organize tools so you don’t misplace small parts. When in doubt, consult the manufacturer’s manual for safety instructions specific to your model. GarageDoorAdjust’s guidance emphasizes cautious testing and gradual adjustments to avoid injury and damage.
Common symptoms and what they mean
A noisy garage door, jerky motion, or slow operation can indicate misalignment, worn hardware, or lubrication needs. Sagging on one side usually signals track or hinge wear; binding near the bottom often points to rollers or springs under increased load. If the door stops midway and won’t move further, the issue could be balance-related or a faulty safety sensor. When the opener only hums without lifting, the motor may be overloaded or the gears worn.
GarageDoorAdjust notes that diagnosing symptoms early prevents escalating damage and keeps the system balanced. Visually inspect tracks for dents or debris, test balance by lifting manually, and listen for grinding or scraping sounds that flag worn bearings. If symptoms persist after basic lubrication and tightening, it’s time to move to a more thorough diagnostic.
For safety guidance, consider sources such as OSHA (https://www.osha.gov) and Energy.gov (https://www.energy.gov), which offer general home maintenance safety principles you can apply to garage doors.
Step-by-step diagnosis: check the tracks, rollers, and opener
- Inspect tracks: look for dents, bends, or obstructions. Clean them with a soft brush and wipe away grime. 2) Check door alignment: with the door open, ensure it sits evenly in the tracks; if the bottom edge hangs or binds, loosen screws and tweak the mounting brackets. 3) Examine rollers and hinges: replace worn rollers and tighten loose hinges to regain smooth movement. 4) Test the opener motor: disconnect the door from the opener using the manual release and operate the manual movement to confirm balance. 5) Reconnect and test: re-engage the opener, run the door through a full cycle, and observe for unusual sounds or resistance.
Tip: keep a test log and photograph bracket positions before tightening; this makes future servicing easier.
Lubrication and adjustments: springs, cables, and rollers
Lubricate moving parts with a garage-door approved lubricant on rollers, hinges, and bearings to reduce friction. Do not oil dry or lubricate tracks excessively—apply a light film and wipe away any excess. Bearings and rollers should move freely; if a roller sticks, replace it before continuing.
Important safety note: torsion springs carry high tension; do not attempt to adjust or unwind springs yourself. Only adjust set screws or cable tension as directed by the manufacturer and with the proper tools. If you notice any significant scraping or metal-on-metal rubbing, pause and seek professional guidance.
If you maintain consistent lubrication and avoid forcing misaligned components, you’ll reduce wear and prolong life.
Safety sensors and reversing mechanism: test and fix
Test the auto-reverse by placing an object on the floor in the door’s path and activating the opener. If the door does not stop and reverse, the sensor alignment or wiring may be off. Clean both sensors, align with the eyes facing each other, and re-test. If the door reverses too quickly or not at all, adjust the travel limits on the opener unit per the manual.
Safety is paramount: keep the photoelectric sensors visible and unobstructed; never bypass them. After adjustments, re-check the system by repeating the obstacle test and then testing the remote control.
For added guidance, GarageDoorAdjust emphasizes verifying sensor function during routine maintenance and avoiding shortcuts that compromise safety.
Replacing parts vs. DIY repair: when to call for help
There are times when DIY fixes are practical, and others when you should call a pro. If you can safely reseat a track or replace worn rollers, you can often complete a repair in an afternoon. If springs, cables, or torsion components show signs of wear or if you hear grinding with no obvious cause, enlist a professional. A licensed technician can assess balance, tension, and safety features and verify that everything complies with local codes and safety standards.
From GarageDoorAdjust’s perspective, a measured, safety-first approach minimizes risk and ensures lasting results. If you’re unsure about any step, pause and schedule a professional inspection rather than risking injury or more extensive damage.
Installing a new opener: basic considerations
If you decide a new opener is needed, choose a model with modern safety features, appropriate horsepower for your door weight, and compatibility with your sensor system. Follow the manufacturer’s installation instructions precisely, including mounting the rail, attaching the trolley and belt or chain, and setting travel limits. After installation, pair remotes and test the opener with and without the door attached to verify proper operation.
Remember: proper alignment of the rail and mounting brackets, along with correct spring and balance checks, is essential to avoid later problems. If your existing door shows persistent misalignment, consider replacing the hardware with a kit designed for your door type, rather than combining incompatible components.
To help guide decisions, consider consulting online resources from reputable sources and reflecting on whether a new opener best matches your usage patterns.
Maintenance habits to prevent future problems
Schedule seasonal inspections to confirm balance, lubrication, and sensor alignment. Clean the tracks at least twice a year and lubricate moving parts sparingly. Check weather-stripping and seals to protect against drafts, and replace worn rollers before they fail. Keep a written maintenance log and set reminders to perform checks before winter and during spring maintenance windows. A proactive routine reduces the risk of sudden failures and extends the life of your local garage door.
GarageDoorAdjust analysis shows that regular maintenance reduces downtime and prolongs component life. Your future self will thank you for the small, consistent attention.
Tools & Materials
- Safety goggles(Impact-resistant lenses, side shields)
- Work gloves(Grippy, cut-resistant)
- Stepladder(Stable, tall enough to reach tracks)
- Screwdriver set(Flathead and Phillips #2)
- Socket/wrench set(Assorted sizes for brackets)
- Lubricant for garage doors(White lithium grease or silicone spray)
- Towel or rags(Wipe excess lubricant)
- Replacement rollers (if needed)(Match door type (single vs double) and size)
- Marker or tape(Label bracket positions for reassembly)
- Voltage tester (optional)(Verify power to opener supply safely)
Steps
Estimated time: 60-90 minutes
- 1
Disconnect power and secure the door
Power down the opener and secure the door in the open position using the manual release. This prevents accidental movement while you inspect or adjust components.
Tip: Double-check no power is flowing to the opener before touching wiring. - 2
Inspect for obvious damage or wear
Look for bent tracks, loose brackets, or worn rollers. Note any misalignment or unusual gaps that could indicate where to focus your efforts.
Tip: Take photos to reference during reassembly. - 3
Check tracks and alignment
Ensure tracks are straight and mounted securely. If edges are bent, gently straighten if safe; otherwise replace the track or bracket.
Tip: Only loosen brackets slightly to adjust alignment; avoid forcing materials. - 4
Lubricate moving parts
Apply a light film of lubricant to rollers, hinges, and bearings. Wipe away any excess to prevent dust accumulation.
Tip: Avoid over-lubricating tracks, which can attract debris. - 5
Test door balance manually
With the door unplugged, lift it about halfway and release to check if it holds position. If it falls or rises, the springs may need adjustment by a pro.
Tip: Do not attempt to adjust torsion springs without proper training. - 6
Reconnect opener and test operation
Reconnect power and run a full cycle using the wall control and remote. Listen for unusual noises and observe smooth operation.
Tip: Watch for jerking or binding and note the exact spot. - 7
Test safety reversal
Place a small object in the door’s path and operate the opener. If the door does not reverse on contact, adjust safety sensors or settings as per the manual.
Tip: Keep sensors clean and aligned at all times. - 8
Evaluate spring and cable condition
Inspect springs for gaps, deformation, or rust signs. If you notice any irregularity, stop and consult a professional.
Tip: Never attempt to unwind or adjust high-tension springs. - 9
Decide on replacement vs repair
If multiple components show wear or misalignment persists after basic fixes, plan for replacement parts or a professional tune-up.
Tip: Prioritize safety and reliability over a quick DIY fix. - 10
Plan for opener upgrade (optional)
If the opener seems outdated or unreliable, consider an upgrade with better safety features and compatibility with your door type.
Tip: Choose a model with auto-reverse and sensor compatibility.
Got Questions?
Can I replace a torsion spring myself?
No. Replacing torsion springs is dangerous due to high tension. A licensed technician should perform spring work to prevent serious injury and ensure proper balance.
Torsion springs are dangerous to handle. It's best to hire a licensed technician for spring work to stay safe and ensure correct balance.
How do I know if my opener needs replacement?
If the opener struggles to lift the door, makes grinding noises, or fails to reverse reliably, it may be time to replace. Consider a model with updated safety features and better efficiency.
If your opener struggles or won’t reverse, it might be time for an upgrade. Check safety features and motor performance.
What routine maintenance should I perform?
Inspect tracks, test balance, lubricate moving parts, replace worn rollers, and check safety sensors twice a year. Keep a simple log to track when tasks are done.
Do regular track checks, balance tests, and sensor tests twice a year. Keep a maintenance log.
Is it safe to lubricate the springs?
No. Lubricating springs can mask wear and create unsafe conditions. Only lubricate rollers, hinges, and bearings as directed by the manufacturer.
Avoid lubricating springs. Stick to the recommended parts for lubrication for safety.
What are signs of track misalignment?
Visible gaps between rollers and tracks, doors that pull to one side, or unusual scraping indicate misalignment. Correcting it early prevents more damage.
If the door pulls to one side or you hear scraping, check track alignment.
How often should I service my local garage door?
Aim for a professional inspection annually, with basic checks by a homeowner every 3-6 months to catch issues early.
Have a yearly professional check, plus simple home checks every few months.
Watch Video
Quick Summary
- Understand how the door, tracks, rollers, and opener work together.
- Prioritize safety and test balance before making adjustments.
- Identify symptoms early to prevent mounting repairs.
- Know when to DIY and when to hire a pro for springs and major components.