Local Garage Door and Gates: DIY Troubleshooting and Repairs
Learn how to diagnose and repair common issues with local garage door and gates. This homeowner-friendly guide covers safety, tools, step-by-step fixes, and maintenance to keep doors operating smoothly.

You're about to learn how to diagnose and fix common issues with local garage door and gates. This quick guide covers safety precautions, basic tools, and practical steps to address misaligned tracks, worn rollers, loose hardware, and opener faults. With the right approach, you can restore smooth operation without professional help.
Why local garage door and gates reliability matters
Reliability matters for safety, security, and convenience. For homeowners, a malfunctioning garage door or gate can block access, invite security risk, and create energy losses. According to GarageDoorAdjust, reliable operation reduces the risk of trips and injuries and minimizes exposure to the elements. A sturdy, well-adjusted system improves entry control, comfort, and property value. This guide focuses on local garage door and gates in typical residential settings, where torsion springs, tracks, rollers, and openers all work together. We'll explore common failure patterns, practical DIY fixes when appropriate, and reasons to call a pro for hazardous components. You’ll learn how to assess balance, identify binding in the tracks, and perform safe maintenance tasks that extend life and cut down on unexpected downtime. The goal is a door that opens smoothly, closes firmly, and stops where it should—every time you press the button.
How a residential garage door system works
A typical residential system comprises a door connected to a trolley or cables, a torsion spring or extension spring system for balance, tracks and rollers for guided movement, and an electric opener or manual release. The motor powers the trolley to raise and lower the door, while sensors stop operation if an obstacle is detected. Proper balance means the door stays aligned when opened halfway and requires minimal effort to lift manually. When any component wears or misaligns, the opener struggles, movements become jerky, and safety devices may trigger. Understanding these parts helps you diagnose issues without guessing.
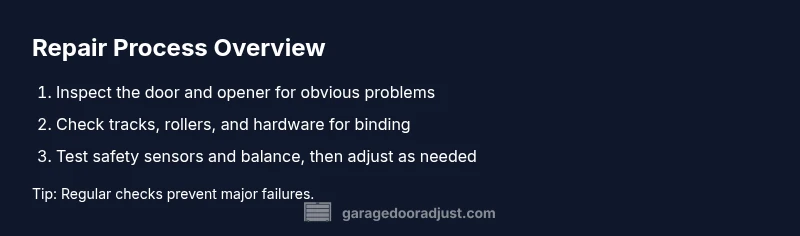
Common issues you can diagnose and fix safely
Common problems include misaligned tracks, loose mounting hardware, worn rollers or hinges, loose safety sensors, and dirty or corroded tracks that cause binding. Often, debris in the tracks or a slight misalignment is enough to create noise or slow operation. Start with a visual inspection from the floor and then test door movement manually after securing power sources. Do not attempt to adjust springs or torsion hardware unless you are trained, as these components hold extreme tension. By tackling simple wear and alignment issues, you can restore smooth operation in many cases.
Safety first: essential precautions before you start
Your top priority is safety. Always disconnect the opener or unplug the unit before touching moving parts. Keep hands clear of the tracks and hinges, and never stand under a door that could drop unexpectedly. Use a sturdy ladder, wear eye protection, and have a helper ready to assist if needed. Clear pets and children from the work area and avoid performing repairs in wet or windy conditions. If you encounter any sign of spring tension or a door that self-balances poorly, stop and seek professional guidance.
Tools, hardware, and consumables you’ll use
A basic homeowner toolkit is enough for many fixes: adjustable wrench, screwdrivers (Phillips and flat), tape measure, a cordless drill, and a stable ladder. You’ll also want silicone or white lithium garage door lubricant, a clean rag, and safety glasses. Optional items include a rubber mallet for gentle nudges and replacement rollers or hinges if wear is evident. Having these on hand helps you complete the job efficiently and reduces the need for multiple trips to a hardware store.
Diagnosis and basic adjustments overview
Begin with a safety check, then inspect tracks for deformation, debris, and alignment. Tighten mounting screws on the tracks and brackets, ensuring they’re snug but not overtightened. Check rollers for wear and replace if they show cracks or flat spots. Lubricate moving parts (hinges, rollers, and springs’ anchor points) to reduce friction. Re-test with the opener unplugged to observe manual movement, then reconnect and run a few cycles to confirm an improvement. If the door binds, slows dramatically, or stops suddenly, reassess alignment and balance.
Maintenance routines to prevent problems
Create a simple maintenance schedule: inspect tracks quarterly, lubricate moving parts twice a year, and test safety sensors monthly. Wipe down tracks to remove dirt, check for loose screws, and replace worn components before they fail. Maintaining proper balance reduces strain on the opener and extends life. Record maintenance dates so you can track when parts were last serviced and plan upcoming replacements.
When to call a professional and what to expect
If you suspect torsion or extension springs are involved, or if the door feels heavy or unbalanced, stop and contact a licensed technician. The most common pro scenarios involve spring replacement, track straightening, and sensor realignment, which require specialized tools and expertise. Expect a professional to inspect balance, safety features, and hardware, provide a written estimate, and perform any necessary parts replacement following safety standards.
Tools & Materials
- Adjustable wrench(12-inch minimum for stiff fasteners)
- Screwdrivers (Phillips and flat)(Medium and small sizes)
- Cordless drill with driver bits(Phillips #2 bit, additional bits)
- Tape measure(2-4 meters)
- Ladder or step stool(Stable and level surface)
- Safety glasses(ANSI-rated protection)
- Garage door lubricant (silicone or white lithium)(Apply to hinges, rollers, and pivot points)
- Rubber mallet(Gentle nudges if needed)
- Gloves(Grip and hand protection)
Steps
Estimated time: 30-45 minutes
- 1
Power down and secure the door
Power off at the outlet or unplug the opener. If safe, use clamps or a block to prevent the door from moving unexpectedly while you work. This prevents injuries from sudden door movement.
Tip: Double-check the opener is disconnected before touching any components. - 2
Inspect tracks and mounting hardware
Look for bent sections, debris, or loose screws in the tracks and braces. Tighten screws gradually and check for alignment using a straight edge. Do not force misaligned sections back into place; address misalignment with gradual, measured adjustments.
Tip: Use a level when checking vertical track alignment to avoid skewed movement. - 3
Check rollers, hinges, and weather seals
Examine rollers for cracks or flat spots; replace worn rollers. Inspect hinges for wobble and tighten screws as needed. Clean and replace weather seals if they appear dry or cracked.
Tip: Lubricate with a silicone-based lubricant; avoid oil-based products on tracks. - 4
Test balance and manual operation
Disengage the opener and lift the door halfway. If it drifts or feels heavy, the balance may be off. Reconnect and test the opener in a controlled cycle.
Tip: If the door is hard to lift manually, stop and consult a professional about balance issues. - 5
Test safety sensors and alignment
Clear the sensors' path and re-align if necessary. Place a small obstacle in the path to confirm the opener stops. If the sensors fail to trigger a stop, do not continue until corrected.
Tip: Use masking tape to mark sensor alignment points for reuse. - 6
Decide if professional help is needed
If you encounter torsion springs, significant misalignment, or persistent binding, stop and call a licensed technician. Springs pose serious danger and require specialized tools.
Tip: Document symptoms and parts involved to share with the pro for a faster diagnosis.
Got Questions?
What is the first sign my garage door is failing?
Slow responses, unusual noises, binding, or the door stopping midway are common early signs. Address these promptly to avoid further damage.
Look for slow responses, strange noises, or the door sticking during operation.
Can I fix a noisy door myself?
Lubrication and alignment adjustments can reduce noise. Do not attempt to adjust springs or torsion components yourself.
Try lubrication and tightening first, but avoid springs.
When should I replace torsion springs?
Torsion springs are dangerous to handle. If you notice heavy door weight, cracking sounds, or uneven balance, call a pro.
If the door feels heavy or you hear cracking, stop and contact a licensed tech.
Is it safe to work on tracks and rollers?
Yes, with power disconnected and no springs under tension. Inspect for debris and wear, and replace damaged parts.
You can inspect tracks, but avoid springs and use safety gear.
How much does DIY repair typically cost?
Costs vary by parts and tools. Plan for replacements and maintenance supplies rather than professional service.
Costs depend on parts and tools; plan for replacements rather than pro service.
When should I program or reset my opener after repairs?
If remotes don’t respond or the keypad fails after maintenance, consult the manual or re-pair the opener. If issues persist, call a pro.
Try re-pairing remotes and keypad per the manual; otherwise seek help.
Watch Video
Quick Summary
- Assess safety before any repair work starts.
- Address simple wear and alignment issues to avoid pro service.
- Do not tamper with springs; call a licensed technician for those steps.
- Regular maintenance reduces the likelihood of unexpected door failures.