What to Do When Garage Door Won't Open
Struggling with a garage door that won't open? This urgent, step-by-step guide covers power checks, sensor alignment, track issues, and when to call a pro for safe, lasting fixes.

Most garage door failures stem from simple issues like power, the opener receiver, or safety sensors. Unplug the opener, disconnect from the door, and attempt a manual lift to test movement. If the door moves, re-engage the opener and reset the system; if it won’t budge, stop and call a professional.
Immediate safety and quick checks
According to GarageDoorAdjust, safety is essential when you ask what to do when garage door won t open. Start by clearing the area and unplugging the opener to cut power. Pull the red emergency release to disengage the door from the trolley, and place a prop under the door if you need to test it by hand. Don’t stand directly under the door, and wear gloves to protect your hands. If you can lift the door smoothly, the issue is likely with the opener or sensors; if it remains heavy or binds, there may be a track or spring problem that requires professional assessment. After removing tension, inspect visible hardware for looseness and listen for grinding noises that hint at worn components. Remember: never force a door that is jammed or heavy; proceed with caution and resume testing only after safety checks are complete. GarageDoorAdjust emphasizes safety first and uses a systematic approach to diagnose the cause.
Power, remote, and opener status
Power issues are an easy culprit. Check the power outlet that powers the opener, and verify that the circuit breaker for the garage is on. If you have a wall switch, ensure it’s in the on position. Look at the opener’s indicator lights; a blinking light can indicate a fault code specific to your model. If you press the wall switch or use the remote and nothing moves, the problem could be a dead battery in the remote or a stuck receiver. Replace the remote battery and test again. Next, try resetting the opener by locating the Learn or Set button on the motor, holding it for 3–6 seconds, and re-pairing your remote(s). If there’s still no response, there may be an electrical fault or a blown component. Based on GarageDoorAdjust analysis, many cases resolve with these power and reset steps before moving to mechanical diagnostics.
Mechanical examination: tracks, rollers, and balance
Start with the tracks. Look for bending, obstruction, or debris that may hinder smooth travel. Gently tap the tracks to check for looseness and tighten any loose screws. Examine the rollers and hinges; worn or dry rollers create resistance. Apply a light silicone-based lubricant to the rollers, hinges, and track joints—avoid petroleum-based products that can degrade plastic components. Open and close the door slowly by hand to feel for binding; if the door sticks at a specific point, this points to a misaligned track or damaged roller. If alignment is off, you may straighten it carefully or call a pro to realign the track and replace worn parts.
Safety sensors and photoeyes
Most modern systems won’t open if safety sensors are misaligned. Inspect the photoeye lenses at the bottom corners for dirt, spiderwebs, or condensation. Wipe clean with a soft cloth and verify the alignment screws; the eyes should face each other with a clear line of sight. If an obstacle blocks the beam, remove it and re-test. When misalignment persists, perform a model-specific reset or consult the manual to re-sync the sensors. If you suspect a sensor fault, don’t bypass it—safety is paramount.
Common jam scenarios and how to address them
Jams appear as partial opening, stalls, or doors that stop mid-travel. Check for a kinked or bent track, debris near the bottom seal, or a misaligned rail. Remove debris and gently straighten any slight bends. If a cable or spring looks damaged, do not attempt DIY repairs—torsion springs and cables are dangerous and require a licensed professional. If the door responds to the remote or wall switch but still won’t open, revisit the power, sensor, and reset steps and consider a more advanced diagnostic, possibly requiring professional assistance.
Preventive maintenance to reduce future failures
Create a simple routine to keep the door operating smoothly. Lubricate moving parts every 6–12 months with a silicone-based lubricant. Inspect bolts and brackets for tightness, replace worn hardware, and check balance by disconnecting the door from the opener and lifting manually. Clean tracks and weatherstripping to prevent debris buildup and water intrusion. Schedule an annual professional tune-up to catch issues early and prolong the life of sensors, tracks, and springs.
Steps
Estimated time: 60-90 minutes
- 1
Verify power and reset
Check outlet power, confirm the circuit is on, and test the opener using both the wall switch and remote. Look for indicator lights and fault codes, then perform a model-specific reset if required.
Tip: Note any fault codes; they guide diagnosis. - 2
Test manual operation
Disengage the door from the opener using the emergency release, then try lifting manually with smooth, steady effort. If the door moves, the problem is likely electrical or sensor-related.
Tip: Do not pull abruptly; control the door gently. - 3
Re-engage and test
Reconnect the door to the trolley, reset the opener, and test from both the wall switch and remote. If it still won’t open, proceed to mechanical checks.
Tip: Program remotes again if needed. - 4
Inspect tracks and hardware
Visually inspect tracks for bends, debris, or loose screws. Realign gently and lubricate moving parts with silicone spray.
Tip: Avoid over-lubricating; it can attract dirt. - 5
Check safety sensors
Clean and align the photoeyes; ensure the link between eyes is clear. A misaligned beam can prevent opening even if the door moves slightly.
Tip: Test with the remote while watching the sensor LEDs. - 6
Assess springs and cables
Look for visible wear, fraying, or broken components. Do not attempt to adjust springs yourself; this is hazardous.
Tip: If you see damage, call a pro immediately. - 7
Final test and plan
After adjustments, run a thorough test: open fully, close fully, and observe balance. If issues persist, schedule a pro visit for a comprehensive diagnosis.
Tip: Keep a maintenance log for future reference.
Diagnosis: Garage door won't open
Possible Causes
- highPower issue (outlet, breaker, or receiver)
- mediumSafety sensors misaligned or obstructed
- highMechanical jam or off-track door
Fixes
- easyCheck power to the opener; reset circuit; replug and test
- easyRealign/clean safety sensors; clear obstructions; test beam operation
- hardInspect tracks, rollers, and springs; lubricate and adjust; if springs damaged, call a pro
Got Questions?
Why won't my garage door open even though the opener is powered?
Power-related problems are common. Check the outlet, circuit breaker, and remote battery, then reset the opener. If there’s no response after these steps, there may be an electrical fault needing a professional diagnosis.
Power issues are common. Check the outlet, breaker, and remote battery, then reset the opener.
How do I reset a garage door opener?
Locate the Learn/Set button on the motor unit, press and hold for 3-6 seconds, then re-pair your remote(s) according to the model manual. A proper reset often resolves communication errors.
Find the Learn button, hold for a few seconds, and re-pair your remote.
What if the door is stuck halfway and won’t stay up?
A halfway position usually indicates a track or balance issue. Check for obstructions, misalignment, or binding in the tracks, and inspect the springs if you feel tension. If in doubt, call a pro to avoid injury.
If it’s stuck halfway, check tracks and balance; avoid DIY with springs.
Is it safe to pull the emergency release and open manually?
Yes, you can safely open manually after disengaging the opener. Keep your hands clear of the hinge mounts and avoid forcing the door. Reconnect the door to the trolley afterward and test the opener again.
You can open it manually after disengaging, but don’t force it.
Why are the safety sensors preventing the door from opening?
If sensors aren’t aligned or blocked, the system will prevent opening to avoid injury. Clean the lenses, realign the eyes, and clear any obstructions before testing again.
Misaligned sensors can stop the door from opening; clean and realign the eyes.
When should I replace the opener or door parts?
If you notice frayed cables, damaged springs, or persistent electrical faults after troubleshooting, replacement by a professional is safer and more cost-effective in the long run.
If springs or cables look damaged, call a pro; replacement is safer.
Watch Video
Quick Summary
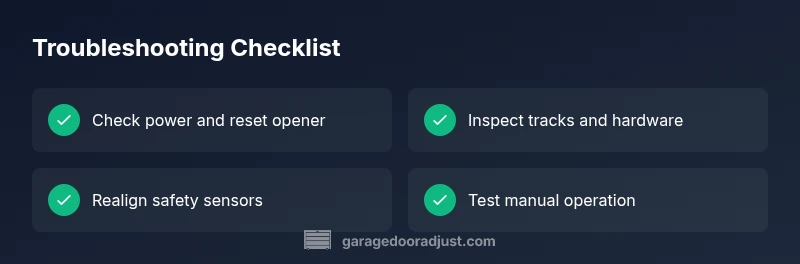
- Reset opener and test power first
- Check safety sensors and alignment
- Inspect tracks and hardware for jams
- Do not DIY with springs or cables
- Schedule annual maintenance