What Stops a Garage Door from Opening: Quick Troubleshooting Guide
Urgent, practical guide to diagnose and fix why a garage door won't open, covering power, sensor misalignment, and mechanical binding with a clear, step-by-step approach.

The most likely reason a garage door won't open is a power issue or safety sensor misalignment. Check the opener's power outlet, reset the circuit, and verify the door's safety sensors are aligned and unobstructed. If the door still won't move, test manually by disconnecting the opener and operating the door by hand.
Common culprits when a garage door won't open
If you're staring at a closed door and wondering what stops a garage door from opening, you're not alone. The answer almost always falls into a small set of predictable categories: power or control signals, safety sensors, and mechanical binding. According to GarageDoorAdjust, the two most frequent stallers are power losses and sensor misalignment, not catastrophic hardware failures. The GarageDoorAdjust team found that addressing these two areas resolves most cases within the first hour of troubleshooting. Other frequent culprits include a tripped emergency release, a dead or misprogrammed remote, a blocked sensor beam, or a loose connection in the opener wiring. When you approach the problem with a clear checklist, you’ll quickly separate simple fixes from issues that require professional service. This article focuses on practical, safe steps you can take at home, with clear warnings about when to pause and call a pro. Remember: in many homes, the key to restoring operation is testing one variable at a time and documenting what you observe as you go.
Check the power supply, remotes, and safety sensors
The most common reasons a garage door won’t respond are simple power issues, remote control problems, or misaligned safety sensors. Start by confirming the opener is receiving power. Plug another device into the outlet to verify power, and inspect the circuit breaker or GFCI that protects the outlet. If the outlet is dead, flip the breaker or reset the GFCI and re-test. While you’re at it, inspect the remote and keypad. Replace the remote’s battery and re-pair it to the opener if necessary. If you can operate the door with the wall-mounted switch, you’ve likely eliminated the remote as the culprit. Safety sensors are the eyes of the system; you’ll often fix a door that won’t open by simply realigning blocked sensors. Look for the two sensor eyes on either side of the door track and ensure nothing is obstructing the beam. Clean the lenses gently and remove any spider webs, dust, or leaves that may be interfering. If the sensor LEDs aren’t steady or you see a red indicator, adjust the alignment until the lights blink/align as designed. A misaligned beam is one of the top reasons for a door that won’t open.
A practical diagnostic flow: symptom → diagnosis → fix
When a door fails to open, start with the symptom. Is the opener light on? Does the door move at all when you press the wall switch? Use a simple flow to map symptoms to likely causes. If the door doesn’t move but the opener motor is running, the issue is often mechanical or sensor-related. If the door shoots upward only to stall, there’s likely an obstacle or misbalance. If the door doesn’t respond to any control, focus on power, receiver, or wiring. By listing observed symptoms in a notebook, you can systematically test each potential cause: test power, test remote functionality, verify safety sensor alignment, inspect tracks and rollers, and check balance. If you identify a specific symptom that matches a known cause, apply the targeted fix first. If a fix doesn’t resolve the symptom, move to the next likely cause. If you are unsure or the problem involves springs, cables, or the track system, stop and seek professional help. This disciplined diagnostic approach minimizes guesswork and helps ensure your safety.
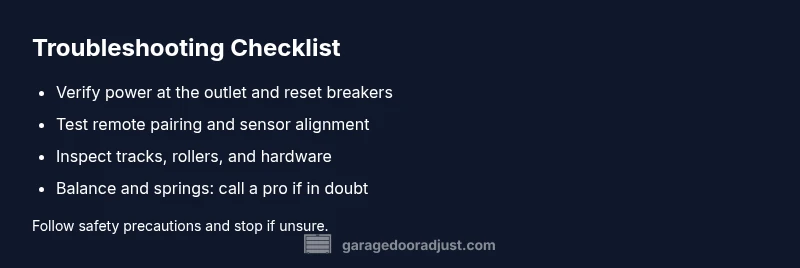
Step-by-step fixes for the most common causes
These fixes address the most common, safe-at-home problems. They are the fastest way to determine if the issue is a simple nuisance rather than a major repair. First, verify power at the outlet and reset the breaker if needed. Then re-test the opener and wall switch. If you still can’t open the door, disconnect the opener from the rail using the manual release cord and try lifting the door by hand; if it moves smoothly, the problem is with the opener mechanism, not the door. Next, inspect the safety sensors for misalignment or obstruction; realign and clear any debris. Finally, check the door tracks for obvious obstructions, loose screws, or worn rollers. If the door’s movement is sluggish or the door seems unbalanced, do not force it—this could indicate spring or balance problems best handled by a pro. If this doesn’t fix the problem, proceed with the diagnostic flow and the step-by-step guide.
Mechanical issues: tracks, balance, and springs
A door that won’t open can be stuck due to misaligned tracks, bent rollers, or a door out of balance. Inspect the vertical tracks for dents and the rollers for wear; lubricate pivots if they look dry. Ensure the track is properly aligned with the rollers and that there are no foreign objects blocking movement. Balance testing involves safely unloading the door’s weight: with the door closed, disconnect the opener and carefully raise the door halfway; if it stays put, the balance is good. If it falls or rises on its own, there may be a problem with torsion springs or extension springs. Springs are dangerous; do not attempt to adjust or replace them unless you’re trained. Loose hardware is another frequent culprit; tighten screws on the hinges, brackets, and tracks. If you detect a problem with springs, cables, or the balance that you’re not comfortable confronting, call a pro immediately. Preventive lubrication and simple adjustments will extend life and reduce future stalls.
Safety considerations and professional limits
Garage doors operate under significant tension and heavy moving parts. Never work on torsion springs or the track system if you don’t have proper training. Disconnect power before inspecting electrical components, and never place hands or tools into the door’s track while it’s moving. If the door is severely off-balance, if you hear grinding or clanking noises, or if anything looks bent or cracked, stop and call a licensed technician. In many cases, calling a pro prevents injuries and prevents additional damage to the door or opener. Protective gear, such as gloves and eye protection, is advised for all basic inspections and maintenance tasks. If you’re not confident performing a step safely, skip it and proceed to the next step in the diagnostic flow or contact a pro. The aim is safe, reliable operation, not a DIY gamble that could worsen the problem.
Maintenance plan to prevent future stalls
A simple, regular maintenance plan keeps the door opening reliably and reduces the chance of sudden stalls. Schedule a biannual check for lubrication of moving parts, test the balance, verify the safety sensors, and inspect the tracks for obstructions. Use a silicone-based lubricant on rollers and hinges—avoid petroleum-based products near belts or plastic components. Replace batteries in remotes and re-pair devices every year to prevent control failures. Keep the door and its path clear of debris, and trim vegetation that could interfere with the sensor beams. Finally, document every inspection and fix so you can spot recurring patterns. With a routine in place, you’ll know what stops a garage door from opening before it becomes a major issue, and you’ll be better prepared to act quickly if it does.
Steps
Estimated time: 40-60 minutes
- 1
Check power and reset the opener
Inspect the outlet, reset the circuit breaker, and confirm the opener receives 120V. Try a different device on the same outlet to confirm power. Then test the wall switch and keypad.
Tip: Use a non-contact tester to verify voltage safely. - 2
Test manual release and reconnect
Pull the manual release to disengage the opener and try lifting the door by hand. If the door moves smoothly, the issue is with the opener, not the door.
Tip: Do not force the door and keep hands clear of moving parts. - 3
Check remote and keypad connections
If the door responds to the wall switch but not the remote, inspect the remote battery and re-pair it to the opener. Check keypad wiring if used.
Tip: Keep remotes away from magnetic disturbances while pairing. - 4
Inspect safety sensors
Make sure sensor eyes are clean and aligned. Remove any obstruction and adjust until the indicator lights behave as designed.
Tip: Small pushes on the sensors can help with alignment. - 5
Assess tracks and rollers
Look for dents, obstructions, or loose hardware. Lubricate moving parts with silicone-based lubricant.
Tip: Avoid heavy lubrication on belts or plastic components. - 6
Test door balance
With the door closed, disconnect the opener and lift the door halfway. If it doesn't stay put, balance needs attention.
Tip: Balance adjustments can be hazardous—consider professional help for springs. - 7
Re-test the system and decide on next steps
Reconnect the opener, re-test all controls, and observe the door’s behavior. If issues persist, contact a professional.
Tip: Document what you checked to share with a technician.
Diagnosis: Garage door won't open or respond to the opener
Possible Causes
- highPower issue (outlet, breaker, or unplugged)
- highSafety sensor misalignment or obstruction
- mediumRemote/receiver signal failure
- lowEmergency release engaged or improperly reset
- lowTrack binding or door out of balance
Fixes
- easyCheck outlet and reset breaker; test with a known-good device
- easyRealign safety sensors and clear any obstruction in the beam path
- easyTest and re-pair remote, replace battery if needed
- easyDisengage emergency release only as needed and re-engage safely
- mediumInspect tracks/rollers; tighten screws and replace worn parts if necessary
Got Questions?
Why won’t my garage door opener work even though the light comes on?
A lit opener commonly means it’s receiving power, but the command flow is blocked by a sensor issue, a remote problem, or a mechanical binding. Start with power checks, then test sensors and remote operation.
If the light is on but the door won’t move, start with power checks, then sensor alignment and remote testing.
How can I tell if the safety sensors are misaligned?
Look for one red LED on each sensor, ensure both eyes face the door path, and remove any obstructions. Realign until both sensors show a stable signal.
Check that both safety sensors face the door and have stable signals with no obstructions.
Is it safe to manually open a stuck door?
Yes, you can test manually by disconnecting the opener, but stop if the door is heavy or you feel resistance. Keep hands clear of tracks and springs.
You can try opening by hand after disconnecting the opener, but don’t force it if it’s heavy.
What if the door moves a little and then stops?
This usually points to balance issues, track obstruction, or sensor interference. Inspect tracks, remove obstacles, and test balance after clearing debris.
If it moves a bit then stops, check for balance and track obstructions.
Can I fix the springs myself?
Springs are dangerous and under high tension. Do not attempt DIY repairs; contact a licensed technician for any spring work.
Springs are dangerous—don’t try to fix them yourself; call a pro.
How often should I lubricate the garage door?
Lubricate moving parts every 6 months, focusing on hinges and rollers. Use a silicone-based lubricant and avoid petroleum products near belts.
Lubricate every six months for smooth operation.
Watch Video
Quick Summary
- Test power and sensors first, they’re the top culprits
- Follow a structured diagnostic flow to avoid guesswork
- Don’t attempt spring work—call a pro when needed
- Maintain a simple routine to prevent future stalls