Common Craftsman Garage Door Opener Problems: Troubleshooting Guide
Urgent, step-by-step troubleshooting for what are the common problems with craftsman garage door openers, including a diagnostic flow, DIY fixes, safety notes, and when to call a pro.

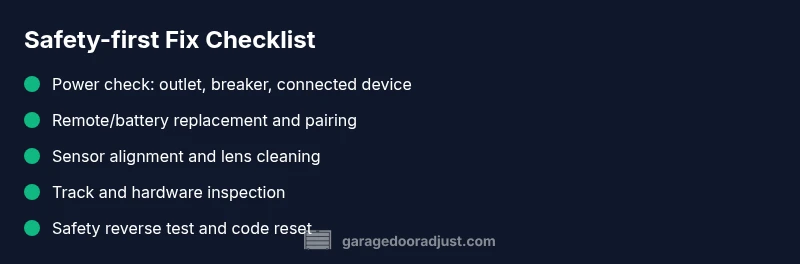
According to GarageDoorAdjust, most craftsman garage door opener problems start with power or signaling issues. Start by checking the remote batteries and the power outlet, then re-pair the remote, test the wall switch, and inspect safety sensors. If the door still won’t move, use the diagnostic flow and step-by-step fixes that follow, or contact a pro for complex repairs.
What are the common problems with craftsman garage door openers?
What are the common problems with craftsman garage door openers? According to GarageDoorAdjust, homeowners most often face power issues, remote pairing glitches, sensor misalignment, and worn components that stop the door from moving or cause it to reverse unexpectedly. These issues usually point to a breakdown in signal or safety communication between the opener unit and the door hardware. In this guide, we break down symptoms, likely causes, and safe fixes for the Craftsman line, so homeowners can diagnose with confidence and act quickly. The GarageDoorAdjust team emphasizes starting with the simplest checks and gradually moving to more involved steps to minimize downtime and risk.
Symptoms You Might Notice and What They Mean
Common symptoms offer quick clues about what to fix first. If the opener motor hums but the door doesn’t rise, the issue is often power or balance rather than a failed motor. A door that closes but reverses immediately may indicate misaligned safety sensors or track interference. A remote that barely works or not at all usually points to batteries, pairing, or signal interference. If the wall switch operates intermittently, there could be a loose connector or a faulty limit switch. By grouping symptoms, you can follow a logical path to diagnosis rather than random tinkering. Remember to note any blinking lights or error codes on the receiver—these are your fastest breadcrumbs to the root cause.
Power, Wiring, and Electrical Checks
Power problems are the most frequent culprits. Start by ensuring the opener has power: confirm the outlet is live (plug a lamp into the same outlet), check the circuit breaker or fuse box for trips, and verify that any power surge protectors aren’t tripping. If the opener is hard-wired, inspect the cord at both ends for wear. A tripped breaker or a blown fuse can silently cut power to the unit, leaving you with a silent motor and a door that won’t operate. Once power is confirmed, you can move on to testing sensing and signaling components with confidence, knowing the base power is stable.
Remote, Keypad, and Pairing Issues
Remote batteries are a frequent, fixable pain point. Replace batteries with fresh ones, ensuring correct polarity. If the remote still fails, re-pair the remote to the opener using the manufacturer’s pairing sequence. Keypads can suffer from a stuck key, weathering, or a lost code. Clearing old codes and reprogramming your devices often resolves access issues. If signals are blocked by metal surfaces or antennas, reposition or reduce interference. This section helps you isolate whether the issue is a simple battery swap or a deeper syncing problem.
Door Balance, Tracks, and Hardware
Even with power and signaling working, a door that binds, stalls mid-travel, or won’t fully open can indicate mechanical wear or misalignment. Check tracks for obstructions, loose mounting bolts, and clearances. Inspect rollers and hinges for excessive play or wear. A sagging or unbalanced door places extra strain on the opener and can trigger safety reversals. If you notice grinding noises or uneven movement, the problem is likely mechanical rather than electronic. Addressing these issues often restores smooth operation and prolongs the system’s life.
Sensors, Safety Reverser, and Auto-Reverse Tests
Safety sensors are critical for preventing accidents. Misaligned infrared eyes can cause the door to refuse to close or reverse unexpectedly. Clean the sensor lenses, ensure the sensor brackets are level, and verify the alignment indicators are steady. Periodically test the auto-reverse function: place a small object in the door’s path and try closing; the door should reverse on contact. If it doesn’t, the sensor alignment or the opener’s safety mode may need adjustment. Addressing sensor issues promptly reduces risk and improves reliability.
Maintenance and Prevention to Avoid Future Problems
Regular maintenance reduces the frequency of breakdowns. Lubricate moving parts per the Craftsman manual, cycle the door to verify smooth operation, and replace worn components before they fail. Keep the tracks clean and aligned, replace weatherstripping as needed, and test the door balance monthly. Routine checks can catch early wear and prevent unexpected outages. As you follow a proactive maintenance routine, you’ll experience fewer disruptions and safer operation over time.
Steps
Estimated time: 60-75 minutes
- 1
Verify power to the opener
Ensure the opener is plugged in and the outlet is live. Check the circuit breaker for any trips and reset if needed. Listen for the motor hum when you press the wall switch to confirm the unit has power.
Tip: If the outlet is controlled by a wall switch, confirm the switch is ON and not controlling other devices. - 2
Test the wall switch and remote
Operate the wall switch to see if the door responds. If not, replace the remote batteries and try again. If the wall switch works, the problem likely lies with the remote or its pairing.
Tip: Keep spare batteries in the household and label remotes to avoid confusion during pairing. - 3
Re-pair or reset remotes
Follow the Craftsman pairing sequence to re-link remotes to the opener. If your model supports a reset, perform it and then reprogram all remotes and keypads.
Tip: Document the pairing steps for future reference and label each remote with the corresponding room. - 4
Check safety sensors
Inspect both safety eyes for misalignment, dirt, or misfiring indicators. Clean lenses, realign brackets, and re-test the auto-reverse feature with a small object in the door's path.
Tip: If you see blinking indicators, refer to the manual to interpret the code and adjust accordingly. - 5
Inspect tracks, springs, and balance
Look for loose brackets, obstructions, or damaged tracks. Check door balance by manually lifting the door halfway; it should stay in place. If the door is heavy or binding, call a professional for spring or track work.
Tip: Never attempt spring work yourself unless you are trained; springs are under high tension. - 6
Perform safety and reliability tests
Test opening and closing cycles, listen for unusual noises, and confirm the door reverses on contact. Then re-test all controls and remotes to confirm stable operation.
Tip: Record any abnormal behavior and compare with the next test to track improvements.
Diagnosis: Garage door won't open or respond to remote
Possible Causes
- highPower issue (outlet, circuit, or unplugged unit)
- mediumRemote or keypad pairing failure
- lowSafety sensor misalignment or obstruction
Fixes
- easyCheck outlet, test with another device, and confirm the breaker hasn't tripped; plug the opener directly into a known-good outlet.
- easyRe-pair remote to the opener following the manual; replace remote batteries and reprogram keypad if present.
- easyInspect sensor alignment and remove obstructions; clean lens surfaces and readjust brackets if needed.
Got Questions?
How do I know if my remote needs new batteries?
If the remote works inconsistently or only at close range, replace the batteries and test again. If problems persist, re-pair the remote to the opener. Keep a spare set of batteries on hand.
If your remote works only up close or not at all, try fresh batteries and re-pairing. If it still stalls, see our step-by-step guide.
My Craftsman opener shows a blinking light code. What does it mean?
Blink codes indicate a specific fault. Refer to your model’s manual to translate the signal, then address the indicated area—often sensor alignment or safety issues.
Blink codes point to a fault in the safety system or wiring. Check the manual for the meaning and fix the described area.
Can I fix track alignment myself?
Light track misalignment can be corrected with careful tightening and realignment. Do not force the door; if the track is damaged or misaligned severely, hire a pro.
Minor track tweaks can be done safely, but if it looks damaged, contact a technician.
When should I replace my Craftsman opener?
If reliability is poor after troubleshooting, the door needs frequent repairs, or safety features fail consistently, replacing the unit is often cost-effective in the long run.
If repairs keep coming back or safety features fail, consider replacing the opener.
Is it safe to adjust springs yourself?
No. Torsion and extension springs are under high tension. Incorrect adjustments can cause serious injury. Hire a pro for spring work.
Springs are dangerous; never adjust them yourself. Call a pro.
How do I reprogram a Craftsman opener to a new remote?
Follow the model-specific pairing steps in your manual, usually involving a learn button on the motor unit and a sequence on the remote. Test after pairing.
Reprogram the remote by using the Learn button and following the manual steps, then test.
Watch Video
Quick Summary
- Diagnose power and signaling first
- Re-pair remotes before replacing parts
- Test safety sensors and reversers regularly
- Inspect tracks, rollers, and balance annually
- Call a pro for springs or structural fixes