How to Fix a Garage Door Opener: Step-by-Step Guide
Learn how to diagnose and repair common garage door opener issues with practical, safety-focused steps. This guide from GarageDoorAdjust covers tools, steps, and maintenance.

According to GarageDoorAdjust, most garage door opener issues are solvable with a methodical diagnostic and safe repair. This guide shows you how to fix garage door opener problems—from misaligned sensors and weak remotes to worn gears and noisy chains—using common tools, practical steps, and safety reminders. You’ll learn quick checks, a step-by-step repair plan, and maintenance tips to prevent future failures.
Why Fixing Your Garage Door Opener Matters
A functioning garage door opener is a daily convenience and a security feature for your home. When the opener fails, you can be left with a door that won’t open, won’t stay open, or operates unpredictably. Regular inspection and timely maintenance help prevent inconvenient breakages and costly emergency calls. In this guide from GarageDoorAdjust, you’ll learn practical, non-destructive steps to diagnose and repair common opener issues, plus safety reminders to protect you and your family. By understanding the main components—motor, drivetrain, sensors, and controls—you can identify the root cause more quickly and decide whether a repair is appropriate or if a replacement is wiser.
Common Symptoms and What They Mean
Look for patterns in how your opener behaves. A click without movement often points to a power or circuit issue, a garage door that won’t respond to the remote may indicate sensor or receiver problems, and a door that reverses before closing can signal misalignment or safety sensor fault. Noisy operation (grinding, squeaking, or whirring) typically means worn bearings, dry or misaligned tracks, or a stretched chain. If the door closes but doesn’t stay put, the force or travel limits may be off. For each symptom, there are reliable, low-risk checks you can perform before calling a pro.
Safety Precautions You Must Take
Before you begin any inspection, unplug the opener from the outlet or switch off the circuit breaker to disable power. Do not attempt repairs while the door is in motion. Wear eye protection and gloves, and keep bystanders clear. If you encounter damaged springs, cables, or a significantly bent track, stop immediately—these parts are dangerous and should be handled by a licensed technician. Keep a helper nearby to manage the door if it starts to move unexpectedly, and never bypass safety sensors.
Diagnostic Checklist: Where to Start
Start with the simplest potential causes. Check remote batteries and re-pair the remote with the opener if needed. Confirm the wall control works, and try a manual operation if your model allows it. Inspect the photo-eye sensors for alignment and obstruction; clean the lenses with a soft cloth. Look for loose hardware on the track, roller, and carriage. Listen for motor sounds when you press the button and note whether the door opens, stops, or reverses. This checklist helps you distinguish electrical issues from mechanical ones and guides you toward the right fix.
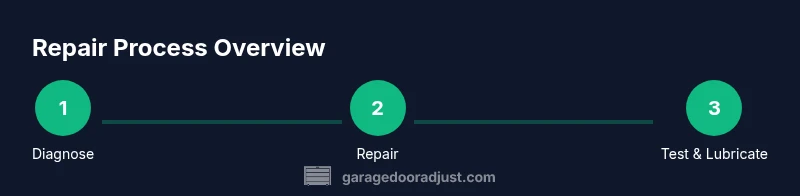
Step-by-Step Repair Guide: Safe, Progressive Fixes
This section provides a practical, action-oriented sequence you can follow. Each step includes a clear action, why it matters, and a pro tip to help you stay safe and accurate. If any step involves parts you’re not comfortable inspecting (like springs or torsion assemblies), skip to contacting a professional. The goal is to restore reliable operation while preserving safety and the life of the opener.
Maintenance and Prevention
After your fix, implement a simple maintenance routine to reduce future failures. Periodically clean tracks, lubricate moving joints with a silicone-based lubricant, and test safety features monthly. Replace worn or cracked components before they fail, and note model numbers to source compatible parts quickly. A small, ongoing maintenance plan can save time, effort, and money in the long run.
When to Consider Replacement
If your opener is old, frequently needs parts, or no longer meets safety standards, replacement may be more economical than continued repairs. Modern openers offer improved efficiency, quieter operation, and better security features. A professional can help you weigh the cost of parts and labor against the benefits of upgrading to a newer model.
Tools & Materials
- Screwdriver set (Phillips and flat-head)(Assorted sizes for screws and mounting bolts)
- Adjustable wrench(For bolts up to 1 inch)
- Pliers (needle-nose preferred)(Grip and maneuver small parts)
- Multimeter(Basic electrical testing)
- Ladder or step stool(Reach components safely)
- Silicone-based lubricant(Lubricate hinges, rollers, and tracks)
- Rags and a mild cleaner(Clean tracks and sensors)
- Safety glasses and gloves(Personal protection)
- Owner's manual or model number(Reference for specific steps)
- Replacement sensors or limit switch (optional)(Only if you’ve diagnosed sensor issues)
- Helper or second person(Assists with testing and safety)
Steps
Estimated time: 60-90 minutes
- 1
Power down and gather tools
Unplug the opener from the outlet or switch off the circuit breaker. This prevents electric shock and accidental movement while you inspect and adjust components. Have your toolbox ready to minimize trips back to the workbench.
Tip: Double-check the power is off by attempting a manual operation with the door disconnected from the opener first. - 2
Check remote and wall controls
Test both the remote and the wall control. Replace batteries as needed and re-pair the remote according to the manufacturer’s instructions. If the wall control works but the remote doesn’t, focus on transmitter issues or receiver alignment.
Tip: Keep a spare battery on hand and test both devices after any re-pairing. - 3
Inspect photo-eye sensors
Look for misalignment or obstructions at the bottom corners of the door. Clean the lenses with a soft cloth and redirect the beams so they face each other. A misaligned sensor is a common reason for doors not closing properly.
Tip: Use a string or level to ensure both sensors are perfectly aimed toward each other. - 4
Check tracks, rollers, and hardware
Inspect tracks for dents, debris, or loose mounting bolts. Clean the tracks and tighten any loose hardware. Misaligned tracks can cause binding and irregular door movement.
Tip: Never force a bent track back into place; replace damaged sections. - 5
Evaluate the drive mechanism
Inspect the belt or chain for wear and the carriage for smooth operation. If you notice missing teeth or a stretched belt, replacement is typically required. Avoid attempting to adjust tension if you’re unsure of the setup.
Tip: Lubricate only the indicated joints; avoid oiling exposed gears directly unless the manual specifies it. - 6
Test and adjust limits and safety reverse
If the door travels too far, or reverses before touching the floor, adjust the travel limits per the manual. Safety reversal should stop the door and reverse it when encountered against an obstacle.
Tip: Make small adjustments and test multiple times to verify correct behavior. - 7
Reconnect power and test operation
Restore power and test the opener with the remote and wall switch. Observe door movement, stopping distance, and sensor response. If everything operates smoothly, proceed to a light maintenance cycle.
Tip: Have a helper stand clear of the door path during the first full test. - 8
Lubricate and finalize
Apply silicone-based lubricant to hinges, rollers, and the tracks as recommended. Wipe away any excess to avoid attracting dust. Perform a final round of opening/closing to confirm smooth operation.
Tip: Avoid over-lubricating; excess lubricant can attract dirt and gum up moving parts.
Got Questions?
How do I know if my garage door opener needs replacement?
If you repeatedly repair components that are nearing the end of their life, or if the opener no longer meets safety standards after troubleshooting, replacement is often more economical and reliable in the long run.
If repairs pile up or the opener is outdated, replacement is usually the smarter choice.
Can I fix sensor alignment myself?
Yes. Ensure sensors face each other, have a clear path between them, and the LED indicators behave as expected. If alignment doesn’t resolve the issue, inspect wiring for damage.
You can realign sensors and test them safely, but if the problem persists, consult a pro.
How often should I lubricate the opener?
Lubricate moving parts every 6-12 months, or after heavy use seasons. Use a silicone-based lubricant and avoid over-lubricating.
Lubricate once or twice a year to keep the mechanism smooth.
What tools do I need for DIY repair?
A basic toolkit with screwdrivers, pliers, a wrench, a multimeter, a ladder, and safety gear is sufficient for many fixes. Refer to your model’s manual for model-specific needs.
A simple toolbox plus safety gear covers most fixes.
Is it safe to adjust the limit switch myself?
It can be safe if you follow the manual precisely and test in small steps. If you’re unsure, stop and seek professional help to avoid door damage or injury.
Limit-switch adjustments are doable with care, but don’t push beyond your comfort level.
When should I call a professional?
Call a professional if you notice damaged springs, cables, or tracks, or if the opener still doesn’t operate after basic troubleshooting. They can assess safety risks and perform advanced repairs.
If you see damaged parts or persistent issues after troubleshooting, a pro is the safest route.
Watch Video
Quick Summary
- Identify symptoms and isolate electrical vs. mechanical causes
- Never bypass safety features or springs
- Follow the manual for sensor alignment and limit adjustments
- Regular maintenance prevents future failures