Repair Genie Garage Door Opener: A Homeowner's Step-by-Step Guide
Learn how to diagnose and repair a Genie garage door opener with a safety-first approach from GarageDoorAdjust. Identify symptoms, test components, reset remotes, and decide when replacement is wiser than repair.

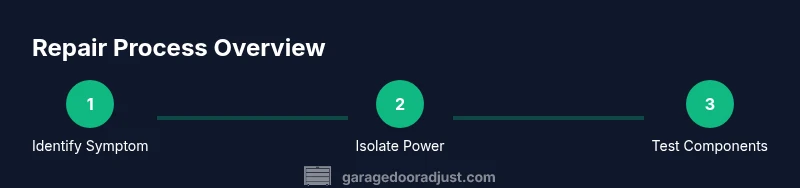
You can diagnose and repair a Genie garage door opener by first ensuring safety, then testing the remote, sensors, drive belt/chain, and limit switches. This how-to guide covers common symptoms like opener not responding, noisy operation, or doors stopping mid-travel, and shows when issues require professional service. Follow the step-by-step process to safely restore operation or confirm you need a replacement opener.
Understanding Genie garage door opener architecture and common failure modes
Genie garage door openers are designed around a few core components: a ceiling-mounted motor, a drive system (belt or chain), a trolley that travels along a guided rail, safety sensors near the door, and limit switches that stop travel. A wall console or remote provides control. When symptoms appear—opener not responding, the door reversing unexpectedly, or grinding noises—the likely causes fall into predictable categories: power supply issues, remote or keypad communication faults, sensor misalignment or obstruction, worn drive components, or misadjusted limit switches. In winter months or after years of use, wear compounds these issues. According to GarageDoorAdjust, sensor misalignment and worn drive belts or chains are frequent culprits in Genie opener failures, and addressing symptoms systematically reduces guesswork and potential damage. Mapping a symptom to a likely cause helps you decide quickly whether a DIY fix is appropriate or if a professional assessment is warranted.
Safety prerequisites before you start
Safety must guide every repair. Before touching any Genie garage door opener components, unplug the opener from the outlet or switch off the circuit breaker feeding the garage. If the door is heavy, disconnect the door from the opener using the emergency release handle so you can test manual operation without tension on the springs. Keep hands away from moving parts and wear eye protection. Confirm the power is off with a non-contact tester before you begin, and never rely on a single test—double-check that the unit is fully de-energized.
Diagnosing symptoms: how to interpret what your opener is telling you
Begin with the most visible symptom and work backward. If the remote doesn't respond but wall controls work, the issue is likely remote programming or battery. If both remote and wall control fail to move the door, inspect the power supply, control panel, and safety sensors. Listen for unusual noises that could indicate a worn drive belt, bearing, or gear. Look for LED codes on the opener's housing; if present, cross-check the manual or manufacturer site for the code meaning. Observing patterns—intermittent responses during cold weather or after heavy use—helps pinpoint whether the problem is electrical, mechanical, or sensor-related. As GarageDoorAdjust notes, a systematic symptom-to-cause approach reduces guesswork and speeds up safe troubleshooting.
Common fixes you can attempt safely (no heavy tools required)
- Replace the remote battery and reprogram the remote if it won't trigger the wall button. A fresh battery can resolve simple communication errors without tools.
- Re-pair or reprogram remotes and keypads following the opener's Learn/Program procedure, ensuring you perform this with the door in a safe state.
- Clean and align safety sensors; remove obstructions, wipe lens surfaces, and check that the sensor eyes are level. Misalignment is a common cause of the door refusing to close for safety reasons.
- Lubricate moving parts along the track and hinge points with a silicone-based lubricant; avoid lubricants based on petroleum.
- Test the reset or reboot sequence (power cycle) to refresh the logic board. If you must, unplug for 60 seconds and plug back in to clear minor glitches.
- Inspect the drive belt or chain for wear or cracks; if you can access it safely, replace the worn component, or consult a pro if you are unsure. A damaged drive system often causes slow travel, slipping, or grinding sounds.
When to replace parts or the entire opener
If the motor sounds strained, the belt/chain shows visible damage, the trolley stalls, or the opener fails multiple diagnostic attempts, replacement is often more cost-effective than ongoing repairs. Consider the age, efficiency, and compatibility with existing remotes and smart-home features when deciding between parts replacement or a full upgrade. Upgrading to a newer Genie model can improve reliability and safety features, particularly if your current unit lacks modern sensors or app integration. The decision should balance expected remaining life, repair costs, and compatibility with your existing door system. GarageDoorAdjust advises homeowners to weigh long-term maintenance against replacement costs and to consult a qualified technician for complex issues.
How to reset and reprogram Genie opener after maintenance
Resetting and reprogramming the Genie opener typically involves powering down the unit, placing the receiver into pairing mode using the Learn/Set button, and then programming remotes and keypads in sequence. Since model variations exist, always refer to your user manual for the exact steps; the general approach is to hold or press Learn until the LED blinks, then press the remote button to complete pairing. After a reset, test all remotes at various distances and ensure the wall control operates as expected. If you use smart-home integration, re-link the opener to your app following the manufacturer steps.
Preventive maintenance and routine checks
Regular maintenance helps prevent many Genie opener failures and extends the life of parts. Create a simple monthly checklist focusing on safety sensor alignment, track cleanliness, lubrication, and battery status for remotes. Start by inspecting and cleaning the track—remove debris, ensure the track is vertical, and look for kinks. Lubricate moving joints with a silicone-based product designed for metal tracks; avoid petroleum-based lubricants. Check the door balance manually by disconnecting the opener and lifting the door halfway; the door should stay in place if springs are balanced (do not attempt to adjust springs yourself). Test the safety reversing sensor alignment by placing a small obstacle near the door; the door should reverse on contact. Finally, review the controller area for any burned smells, melted connectors, or frayed wires. Keep a log of parts replaced, test results, and remote re-pairings. Authority sources: https://www.cpsc.gov, https://www.osha.gov, https://extension.illinois.edu. The GarageDoorAdjust team encourages homeowners to follow these checks as part of a proactive maintenance plan to avoid unexpected breakdowns.
Tools & Materials
- Phillips head screwdriver(Phillips #2 for most cover plates)
- Flathead screwdriver(Flat-blade for prying covers or prying clips)
- Multimeter(Test voltage at the outlet and control board)
- Pliers(Needle-nose or slip-joint for springs-safe handles)
- Wrench set(Adjust bolts on brackets or track hardware)
- Ladder(Stable, tall enough to reach the opener safely)
- Silicone-based lubricant(Apply to moving metal parts; avoid petroleum-based lubricants)
- Safety glasses(Eye protection during inspection)
- Rags or cloths(Clean surfaces and wipe sensor lenses)
- Battery for remote(New battery for remote testing)
Steps
Estimated time: 60-90 minutes
- 1
Power down and isolate the opener
Unplug the opener from the outlet or switch off the circuit breaker feeding the garage. This eliminates the risk of moving parts starting while you work and protects you from electric shock. Verify the power is removed with a non-contact tester before touching any components.
Tip: Always double-check power at both the outlet and breaker—don't rely on the wall switch alone. - 2
Manually disengage the door for safe testing
Pull the emergency release cord to uncouple the door from the opener. This allows you to operate the door manually without the motor or belt applying tension. Lift slowly to confirm the door balance and avoid pinch points.
Tip: Keep hands clear of the track and springs; manually support the door with your knee as you test to prevent sudden movement. - 3
Test the remote and wall controls
With the opener isolated, test the wall switch to confirm it can move the door. Reconnect power and attempt to operate using the remote; note whether signals are received and whether LED indicators behave as expected.
Tip: If one control works but the other doesn’t, focus on remote programming or battery replacement. - 4
Inspect safety sensors and alignment
Check the two safety sensors near the floor on both sides of the door. They should face each other directly with clear lenses. Wipe lenses clean and realign if crossed or misaligned.
Tip: Even small misalignment can prevent doors from closing fully for safety. - 5
Evaluate the drive system and tracks
Visually inspect the belt or chain for wear, cracks, or slack. Check the track for dents, binding, or loose brackets. Lubricate metal contact points with a silicone-based lubricant and confirm smooth operation without binding.
Tip: Do not lubricate plastic gears or pulley wheels unsafely—only apply lubricant to surfaces designed for it. - 6
Reset, reprogram remotes, and test again
If you performed any component replacements or sensor realignments, reassemble and restore power. Use the Learn/Program button to pair remotes and keypads, then test operation from multiple distances.
Tip: Keep a record of remote codes and pairing times for future reference.
Got Questions?
Why won't my Genie opener respond to the remote?
Check the remote battery, reprogram the remote if needed, and verify that the opener has power. If wall control works but the remote does not, the issue is typically with remote programming or compatibility.
First check the battery and try reprogramming the remote. If it still won’t respond, confirm the opener is powered and that the remote is compatible with your model.
How do I reset a Genie garage door opener?
Reset procedures vary by model. Generally, you place the receiver in pairing mode using the Learn or Set button, then pair remotes and keypads in sequence following the manual.
Reset steps differ by model, but they usually involve the Learn button and re-pairing remotes.
Is it safe to repair a garage door opener myself?
DIY work is safe for simple tasks such as battery replacement, cleaning sensors, or reprogramming remotes. Avoid high-tension springs and electrical work beyond basic testing; consult a professional for complex tasks.
DIY can be safe for simple steps, but skip high-tension parts and complicated electrical work—call a pro if unsure.
When should I replace my Genie opener?
If repair costs outweigh the value of a newer unit, or the opener is very old and lacks modern safety or connectivity features, replacement is often the wiser choice.
If repairs cost more than a new unit or the opener is old, replacement is a sensible option.
What causes sensors to prevent the door from closing?
Obstructions, misalignment, or dirty lenses can trigger the safety sensors. Realign, clean the lenses, and ensure nothing blocks the sensor path.
Sensors misaligned or dirty can stop the door from closing; realign and clean them.
Can I upgrade to a smart Genie opener?
Many Genie models support smart integrations and app control. Check compatibility with your current door and Wi-Fi setup before upgrading.
Yes, you can upgrade to a smart model if it fits your door and home setup.
Watch Video
Quick Summary
- Safely diagnose symptoms first to map to likely causes
- Prioritize sensor alignment and drive system checks for Genie openers
- Use model-appropriate reset and remotes programming steps
- Consider replacement when repair costs outweigh benefits
- Maintain a regular preventive maintenance routine to avoid surprises