Garage Door Genie Parts: A Homeowner's Step-by-Step Guide
A complete, expert guide to diagnosing and repairing common garage door genie parts. Learn safe testing, essential tools, step-by-step tasks, maintenance tips, and when to call a pro.

Learn how to diagnose and fix common issues related to garage door parts genie, focusing on safety, proper testing, and reliable results. This quick guide highlights identifying faulty springs, tracks, rollers, and opener wiring; gathering essential tools; and a step-by-step inspection that helps you decide when a replacement or pro service is needed. Follow conservative testing to prevent injuries and further damage.
What is garage door parts genie and why it matters
In common homeowner terminology, the phrase garage door parts genie refers to the complete set of components that work together to open and close your door: springs, tracks, rollers, hinges, cables, and the garage door opener itself. The goal of studying these parts is not to replace every piece at once, but to identify mismatches, wear, or misalignment that degrade performance. According to GarageDoorAdjust, a methodical approach to diagnosing and fixing these parts reduces frustration and increases safety. When you understand how each part should behave, you can spot abnormal sounds, rough motion, or uneven gaps quickly. This guide uses the term genie as a practical shorthand for a holistic look at door hardware, so you can navigate repair steps without getting overwhelmed. Keep in mind that some Genie-brand openers share common design features with other brands, so the diagnostic mindset remains the same: inspect, test, repair, and maintain.
How the genie-style parts interact: springs, tracks, rollers, and openers
The core elements of a garage door system are tightly coupled. Springs (torsion or extension) store the energy needed to lift the door and counterbalance its weight. Tracks guide the door’s vertical path and must be perfectly aligned for smooth operation. Rollers and hinges enable the door to bend and slide along the tracks. The opener motor provides power and, through limit switches and reverse sensors, controls travel distance and stopping points. When one component wears or shifts, others compensate poorly, which manifests as slow movement, jerky stops, or uneven gaps. Regular assessment focuses on balance (the door should stay in place when opened a few inches), tracking (the door remains centered in the tracks), and binding (noticeable resistance during movement). A well-balanced system reduces stress on springs and prolongs component life. This section frames how these parts should work together so you can recognize deviations quickly.
Common failure modes and how to identify them
Common signs indicate which parts are under strain. A loud creak or grind often points to worn rollers or misaligned tracks. A door that lowers unevenly or settles to one side suggests balance or track issues. If the opener strains, stalls, or won’t fully open, the problem may involve the opener itself, safety sensors, or a binding mechanism along the track. Frozen tracks in cold weather can appear as stiffness that gradually frees up with lubrication, but persistent resistance means inspection is needed. If springs are visibly damaged, corroded, or sagging, do not attempt DIY fixes—springs are highly dangerous and require a pro. By noting the exact symptom (noise, speed, alignment, or response) you can narrow down the likely culprits and avoid unnecessary part replacements. GarageDoorAdjust analyses emphasize that early identification through routine checks reduces longer-term wear and eliminates guesswork when scheduling repairs.
Safety-first testing and basic maintenance routines
Safety is non-negotiable when working on garage doors. Begin by unplugging the opener and disconnecting the door from the electrical system so you can operate it manually without risk of sudden movement. Visually inspect hardware for loose screws, worn cables, missing rollers, or bent tracks. Lubricate moving parts with a light silicone-based lubricant on rollers, hinges, and track intersections; avoid grease on metal-to-metal contact where it can attract dust. Check balance by lifting the door about halfway; it should stay in place. If you notice wobble, excessive play, or parts that feel unstable, stop and seek professional service. GarageDoorAdjust notes that routine maintenance, when done safely, can extend component life and improve performance over time.
Troubleshooting flowchart and decision points
Starting from symptoms is often faster than random replacements. If the door moves smoothly manually and the opener still misbehaves, test the opener sensors and limit switches and reprogram remotes if needed. If manual operation exhibits binding or heavy effort, inspect tracks and rollers first, then springs if the issue persists. A loud, repetitive noise usually points to rollers or hinges rather than the spring system, which is a high-risk area for DIY fixes. If you encounter a spring problem, or if the door does not balance correctly after adjustments, stop and call a pro. This flow helps you prioritize safety, maintain performance, and avoid costly mistakes. GarageDoorAdjust Analysis, 2026 highlights that many issues can be resolved with targeted maintenance rather than wholesale replacement.
Preventive maintenance plan and when to call a pro
A proactive maintenance routine keeps garage door genie parts functioning reliably. Create a monthly checklist: visually inspect hardware, remove debris, lubricate moving parts, test safety sensors, and verify door balance. Schedule a professional inspection annually or after any major weather event, impact, or abnormal noise. A pro can perform a more thorough balance test, inspect torsion springs, and verify sensor alignment with calibrated tools. The key to longevity is consistent care: small, regular touch-ups prevent major failures and extend the life of your door system. The GarageDoorAdjust team recommends treating maintenance as a small, regular investment in home safety and convenience.
Tools & Materials
- Socket wrench set(Metric and SAE sizes for mounting brackets)
- Screwdrivers (Phillips and flat-head)(Phillips #2 and small flat-head for adjusters)
- Lubricant (silicone-based)(Avoid petroleum-based lubes)
- Garage door lubricant spray(For tracks and hinges)
- Step ladder (sturdy)(Stable, non-slip)
- Claw hammer(For minor adjustments only)
- Safety gloves(Protect hands during inspection)
- Measuring tape(For track alignment checks)
- Digital camera or smartphone(Document misalignments before/after)
- Voltage tester(Ensure power is off when testing sensors)
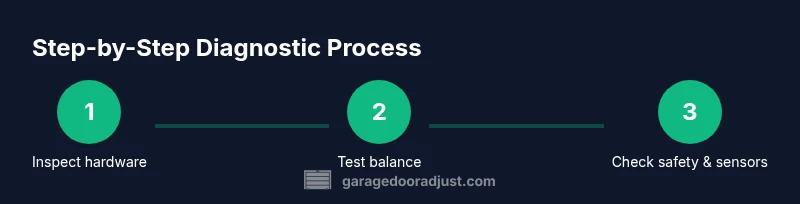
Steps
Estimated time: 45-60 minutes
- 1
Prepare safety and power isolation
Disconnect power to the garage door opener and unplug it if possible. Put on gloves, remove jewelry, and clear the area of people or pets. This step prevents accidental activation during inspection.
Tip: Double-check the wall switch and the disengaged cord before touching any moving parts. - 2
Manual door test and balance check
Close the door and unplug the opener. Lift the door manually to halfway and release. The door should stay in place; if it drops or rises, it’s out of balance and needs adjustment or professional service.
Tip: If you feel heavy resistance, stop—do not force the door further. - 3
Inspect tracks, rollers, and hinges
Look for dents, bends, rubbing marks, or loose hardware along the vertical tracks and horizontal sections. Spin each roller by hand to detect rough spots. Tighten screws on brackets, and replace worn rollers as needed.
Tip: Lubricate rollers and hinges lightly to reduce friction; avoid over-lubrication that can attract dust. - 4
Check springs and cables cautiously
Visually inspect torsion springs for gaps or gaps between coils. Do not touch or try to adjust springs; any sign of wear warrants professional service due to high tension.
Tip: If you see any sign of spring wear, assume danger and call a pro. - 5
Test opener response and safety sensors
Reconnect power and test the opener: press the button and look for full travel and sensor beam alignment. If the door reverses when meeting resistance, adjust the sensors or consult instructions.
Tip: Test the auto-reverse function with a small obstruction to ensure safety features work. - 6
Document and plan next steps
Capture photos of misaligned parts and note any worn components. Decide whether a simple part replacement suffices or if a pro inspection is warranted.
Tip: Keep a simple maintenance log for future reference.
Got Questions?
What does 'garage door genie parts' mean in home repair?
It's a shorthand for the collection of components that enable the door to operate, including springs, tracks, rollers, cables, and the opener. It reflects a holistic approach to diagnosing and maintaining door hardware.
Genie parts are the whole set of door components you inspect to diagnose and fix common issues.
Is it safe to diagnose and fix garage door genie parts by myself?
Basic inspection and lubrication can be safe if you follow safety steps, unplug power, and avoid springs. For any signs of spring wear or ceiling-mounted hardware issues, call a professional.
You can do basic checks, but avoid working on springs or high-tension parts; call a pro for those.
What are signs that springs or tracks need replacement?
Visible wear like gaps in springs, bent tracks, or persistent binding are strong indicators. If the door feels uneven or heavy, inspect tracks for alignment first, and consider professional service for springs.
Look for gaps or bends in springs and tracks, and if you notice heavy effort to lift the door, call a pro.
When should I call a professional for genie parts?
Call a professional when you encounter spring wear, significant misalignment, or the opener wiring and sensors require adjustment beyond basic maintenance. Prioritize safety over DIY attempts.
If springs or major alignment issues show up, or wiring’s involved, get a pro.
What maintenance should I perform regularly?
Schedule routine visual inspections, lubrication of moving parts, sensor tests, and annual professional checkups. Keeping a maintenance log helps catch issues early.
Do regular checks, lubricate moving parts, test sensors, and arrange yearly professional inspections.
Can a bad Genie opener cause problems even if the door is fine?
Yes. A malfunctioning opener can misinterpret limit switches or remote signals, causing irregular travel or non-response. Isolate whether the issue is the door hardware or the opener to decide the fix.
Sometimes the problem is the opener, not the door hardware. Isolate by testing the door manually.
What is the busiest time to schedule maintenance?
Spring and fall are ideal for maintenance, when temperatures are moderate and wear patterns are easiest to assess. Avoid extreme heat or cold when performing lubrication.
Spring and fall are great times for maintenance.
Watch Video
Quick Summary
- Identify key components: springs, tracks, rollers, and opener.
- Test balance and safety features before any adjustment.
- Avoid DIY work on springs; call a pro for this task.
- Document issues and maintain a regular maintenance log.