Genie Garage Door Operator Parts: A Homeowner's Diagnostic Guide
A thorough homeowner's guide to Genie garage door opener parts, including diagnosis, identification, safe replacement steps, sourcing genuine components, and maintenance tips.

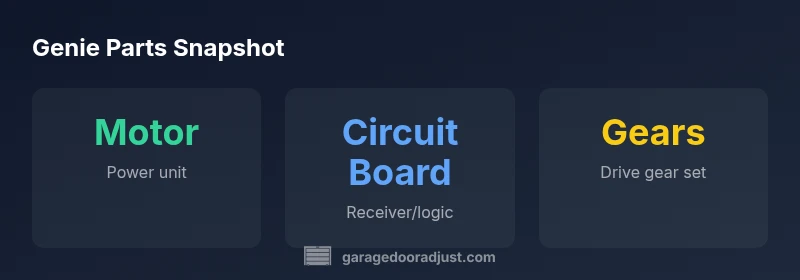
For Genie garage door operator parts, start with the motor unit, receiver board, gears, and limit switches. Correct diagnosis hinges on model identification and safety checks; using genuine Genie parts minimizes noise, improves reliability, and preserves warranty. This guide helps homeowners pinpoint what to inspect and replace.
Understanding Genie garage door operator parts
Genie garage door opener systems rely on a network of parts that work together to lift, lower, and secure your door. The essential components include the motor unit, the circuit board (receiver/logic), drive gears, limit switches, sensors, and the rail/track assembly where the trolley travels. When you assess the health of the system, it’s important to identify the model first, since Genie parts vary by generation. In this guide, we’ll focus on common Genie parts, how they fail, and how to diagnose issues safely. The goal is to empower homeowners with a clear checklist for inspection, replacement, and maintenance that keeps your Genie opener reliable and quiet.
The Genie family includes several lines, but the core principle remains consistent: the motor provides power, the drive gears transfer motion, the electronics govern operation, and the safety interlocks prevent the door from closing on objects. For homeowners, the most actionable starting point is to confirm model compatibility before purchasing any parts. This ensures you don’t accidentally buy parts that won’t integrate with your specific Genie opener model, reducing both frustration and wasted funds. Throughout this article, you’ll see practical steps, safety notes, and sourcing tips aligned with the GarageDoorAdjust approach to responsible home fixes.
Common Genie parts and what they do
Understanding the role of each Genie garage door operator part helps you diagnose failures quickly. The motor unit supplies the power to lift the door, while the circuit board interprets remote signals and manages safety features like auto-reverse. Drive gears and sprockets transfer rotational motion to the door’s lifting mechanism. Limit switches and travel sensors tell the system when to stop, preventing over-travel that could damage the door or opener. Finally, the trolley and rail guide the door along its path. When one component shows wear or malfunction, symptoms tend to emerge in predictable ways.
- Motor and gear assembly: If you hear grinding, see sluggish operation, or experience intermittent movement, the gear set or motor may be worn.
- Circuit board/receiver: Remote controls may fail to respond, or error codes may appear on the opener panel.
- Limit switches/travel sensors: The door may stop early, travel unevenly, or fail to reverse on contact.
- Safety sensors: Misaligned or obstructed sensors can prevent operation or trigger false reversals.
Pro tip: always verify model compatibility and use genuine Genie parts when possible to maintain safety and warranty coverage.
Diagnosing problems: symptoms and what to check
Effective diagnosing starts with a methodical approach and a focus on safety. Begin by unplugging the opener to prevent accidental operation. Inspect the exterior housing for burnt smells or visible damage. Remove the cover to access the motor, gears, and circuit board—look for loose wiring, burnt capacitors, or corrosion. Check the limit switches and travel sensors by manually moving the trolley and watching the door’s response from the wall control. If the keypad or remotes fail to communicate, re-pairing or replacing the receiver board may be necessary. Compare symptoms with model-specific manuals to narrow down the likely part category.
Safety first: never work on a live electrical device or attempt to force a door that is jammed. If the door is heavy or unbalanced, call a pro. When in doubt, document the exact model number, take clear photos of the wiring, and seek guidance from a qualified technician. This approach reduces the risk of incorrect part replacement and helps you maintain the safety interlocks designed into Genie systems.
Replacement strategies: DIY vs professional
Not all Genie garage door operator parts require a pro. Simple replacements, such as a sensor alignment, lens cleaning, or a straight-forward gear swap, can be within a confident DIY skill set. However, when dealing with the logic board, motor windings, or cable and track alignment, it is prudent to hire a licensed technician. Replacing electronics demands caution because improper connections can create short circuits or electric shock hazards. If you choose to DIY, use the manufacturer’s guides and verify the exact model compatibility before ordering parts. Keep a repair log with part numbers, dates, and test results to ensure future maintenance remains straightforward.
A balanced approach—DIY for approachable tasks, professional for complex electronics—often yields the best combination of safety, reliability, and cost control.
Sourcing Genie parts safely
Sourcing legitimate Genie parts reduces risk and helps preserve performance. Prefer authorized distributors or Genie’s official parts store, and avoid third-party sellers that lack model clarity or return policies. Always check part numbers against your opener’s label (usually on the motor housing or instruction plate) before ordering. Beware of counterfeit components that mimic labels but fail to meet safety and reliability standards. When purchasing, request a parts compatibility confirmation with your exact model and serial number, and review warranty terms for replacements. If a price seems too good to be true, it probably is.
For those who value verified reliability, consider keeping a small parts kit with a spare circuit board or a set of limit switches on hand—especially if your region experiences frequent power outages or temperature extremes.
Installation basics for minor part replacements
Assuming you’ve verified model compatibility and obtained genuine Genie parts, follow manufacturer instructions step by step. Begin with proper safety precautions: disconnect power, secure the ladder, and keep a clear workspace. For a gear replacement, remove the old gear assembly, clean mating surfaces, and align the new gear with the drive belt or chain. When replacing a circuit board, ensure all connectors are firmly seated and that wire colors match the diagram. For limit switches, reattach the mechanism in the exact mounting position to preserve travel limits. Finally, test the door with the wall control and remote in a controlled, gradual manner.
If you encounter resistance, re-check alignment, wiring, and torque specifications. Document your steps and power cycle the unit between tests to verify correct operation. If the door remains unstable after a replacement, it’s time to involve a pro.
Maintenance to extend life
Ongoing maintenance reduces the likelihood of sudden failures and extends the life of Genie garage door operator parts. Lubricate moving parts, such as the track rollers and hinge points, with a light silicone-based lubricant; avoid heavy oils that can attract dust. Keep rails clean and free of debris; a small brush or compressed air can help. Inspect safety sensors quarterly and recalibrate if the door’s travel feels off or if the auto-reverse is inconsistent. Finally, replace worn weather stripping to keep the opener free of moisture and to preserve components from environmental stress. Regular inspections catch issues early and help you plan replacements within a reasonable budget.
Common Genie opener parts and replacement considerations
| Part Type | Typical Replacement Time | Common Symptoms | DIY Difficulty |
|---|---|---|---|
| Motor or Gear Assembly | 60-120 minutes | Slow reversal, grinding, unusual motor sound | Medium |
| Circuit Board/Receiver | 30-90 minutes | Unresponsive remotes, error codes | Medium |
| Limit Switch/Travel Sensor | 15-60 minutes | Door stops short, misaligned travel | Low |
Got Questions?
What are the essential Genie garage door operator parts I should know about?
Key components include the motor, circuit board, drive gears, and limit switches. Understanding their roles helps you diagnose issues faster and decide whether a DIY fix is feasible or professional help is warranted.
The essential parts are the motor, circuit board, gears, and limit switches. If you notice odd noises or unresponsive remotes, check these first.
Can I replace Genie parts myself?
Yes for straightforward replacements, but electronics and tensioned mechanisms are best left to a pro. Always unplug the unit, follow the manual, and verify model compatibility.
You can do simple parts yourself, but for electronics or high-tension components, call a professional.
How do I identify the model number for Genie parts?
Look for the model and serial number on the opener nameplate or inside the housing cover. Cross-check the numbers with Genie’s parts catalog to ensure you buy compatible components.
Check the label on the opener or inside the cover to find the exact model and serial number.
Are counterfeit Genie parts a concern?
Counterfeit components can fail quickly and void safety assurances. Buy from authorized Genie distributors and verify part numbers before purchase.
Yes—buy only from trusted Genie distributors to avoid counterfeit parts.
What maintenance tips help Genie parts last longer?
Regular inspections, clean tracks, and gentle lubrication extend life. Replace worn weather stripping and ensure sensors are properly aligned to prevent false alarms.
Do regular checks, keep tracks clean, and lubricate moving parts to help parts last longer.
“Using manufacturer-approved Genie parts ensures compatibility and preserves safety interlocks. When in doubt, consult the GarageDoorAdjust Team for guidance.”
Quick Summary
- Identify your model first to match Genie parts
- Replace with genuine Genie components to preserve safety and warranty
- Match symptoms to common Genie parts before purchasing
- DIY for simple parts; hire a pro for complex electronics
- Document serial numbers and consult manuals before ordering