Washed Garage Door Remote: Step-by-Step Repair Guide
Learn how to diagnose, dry, clean, and reprogram a washed garage door remote. This step-by-step guide helps homeowners save money, prevent corrosion, and restore reliable opener control after moisture exposure.

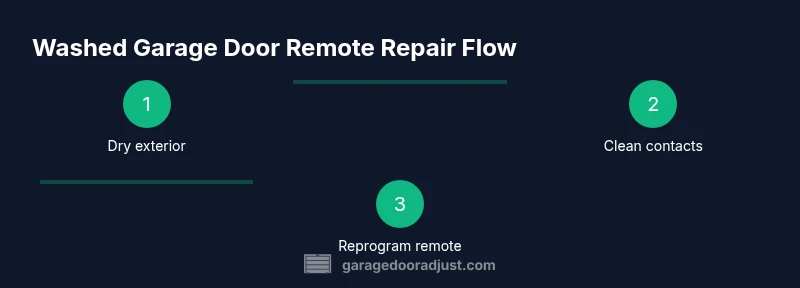
You will diagnose and repair a washed garage door remote by drying the unit, cleaning contacts, and reprogramming it to your opener. Start by removing the battery and letting the remote fully dry, then inspect for corrosion and replace the battery if needed. Finally, re-pair the remote with your opener following the learn/pairing steps. According to GarageDoorAdjust, careful drying and testing prevent corrosion.
What a washed garage door remote implies for electronics
Water exposure is a common culprit behind non-responsive remotes. When a remote that controls a garage door opener gets wet, moisture can cause corrosion on the contacts, short minor circuits, and degrade the silicone seals that protect internal components. Even a small amount of water can leave mineral deposits that interfere with button contacts and the PCB traces. The result is intermittent responses, delayed actions, or complete failure to trigger the opener. According to GarageDoorAdjust, the most reliable path back to function starts with careful drying, gentle cleaning, and a methodical battery check before attempting any reprogramming. This section explains what you’re dealing with, so you can decide whether to repair or replace, and how to proceed without risking further damage.
Immediate safety and prep steps after water exposure
Time is of the essence after a remote gets wet. Begin by powering off any connected devices is not applicable here, but you should remove the battery to prevent short circuits. Gently pat the exterior dry with a clean towel, being careful not to push moisture into seams. If you can access the internal contacts safely, wipe them with a 70%–90% isopropyl alcohol cloth or swab to remove mineral residues. Do not use heat to dry—air drying in a dry room is preferred. Keep the remote in a warm, dry environment and avoid direct sunlight or hair dryers, which can warp plastic or push moisture deeper.
Drying and cleaning the remote housing
If your remote is designed with a removable shell, you may carefully open it to inspect the interior. Look for visible corrosion on battery terminals or PCB pads. Use a soft brush and isopropyl alcohol to clean contacts, blades, and any corroded areas. After cleaning, allow all components to air-dry for at least 24 hours, or longer if humidity is high. Refrain from reassembling while any moisture remains. For sealed remotes, you should still dry the exterior and use alcohol along any crevices, but avoid forcing moisture inside the sealed unit.
Check the battery and replace if needed
Water exposure and corrosion often leave the battery terminal area compromised more than the remote’s electronics. Inspect the coin cell battery for signs of corrosion, pitting, or leakage. If you notice discoloration or residue on the battery contact surfaces, replace the battery with a fresh CR2032 or the battery size specified by your remote’s manufacturer. Clean the battery contact springs and pads with isopropyl alcohol before inserting the new battery. Ensure the battery is seated with correct polarity before testing.
Reprogramming or pairing the remote with your opener
After cleaning and reassembling, you’ll typically need to re-pair the remote with your garage door opener. Locate the Learn or Smart Learn button on the opener unit (often near the antenna) and press it for the indicated duration (check your model’s manual). Within 30 seconds, press and hold the button on the washed garage door remote until the opener’s LED blinks or confirms pairing. Some brands require multiple press cycles or a different button sequence; if your model differs, consult your manual or the manufacturer website for exact steps. Then test at a short distance, and gradually extend range to ensure reliability.
Common symptoms and troubleshooting after drying and reprogramming
If the remote still misbehaves, note whether the LED blinks when pressed, or if there is a complete lack of response. A blinking LED during normal operation usually indicates proper power and pairing, while no LED or erratic blinking may signal deeper PCB damage or lingering moisture. Check for stubborn corrosion on terminals, test with a new battery, and verify you are using the correct remote for your opener model. If issues persist, the problem might be in the receiver of the opener or the logic board inside the remote.
Preventive measures to minimize future damage
To avoid repeat moisture problems, store the remote away from humid areas and avoid leaving it on damp surfaces. Consider a rubberized or splash-resistant case, and keep the opener in a dry, ventilated spot. If you have a metal or wood garage with high humidity, add a desiccant pack in the vehicle or storage area to reduce ambient moisture. Regularly inspect the remote’s button seals and battery compartment for signs of wear and replace components proactively. Small silicone lubricants can also be applied carefully to button gaskets to maintain a tight seal.
Tools & Materials
- CR2032 coin cell battery(Check remote model for exact size)
- Screwdriver (Phillips #0 or #1)(Only if your remote opens)
- Isopropyl alcohol (90%+)(For cleaning contacts)
- Cotton swabs or lint-free cloth(For precise cleaning)
- Soft brush (nylon)(Gently remove corrosion)
- Lint-free towel(Drying exterior and interiors)
- Desiccant pack (optional)(Aid in drying if humidity is high)
- Gloves (optional)(Protect hands when cleaning)
Steps
Estimated time: 25-45 minutes
- 1
Power down and remove the battery
Begin by removing the external cover and taking out the battery to prevent short circuits. This reduces the risk of damage when you inspect the contacts. Keep the battery aside in a dry place while you work.
Tip: Place the remote on a clean, dry towel so tiny parts don’t roll away. - 2
Dry exterior and inspect for moisture
Pat the exterior dry with a lint-free cloth. If you suspect internal moisture, don’t power the unit; allow it to air-dry in a warm, dry room. Look for condensation around the battery compartment and the seam lines.
Tip: Avoid using hair dryers or heat; rapid heating can warp plastic. - 3
Open housing (if design allows)
If your model permits, gently pry the shell apart to access the PCB and contacts. Do not force parts; if it’s a sealed unit, skip to the cleaning steps. Not all remotes are designed for easy opening, and forcing could void warranties.
Tip: Note screw locations and keep small parts organized. - 4
Clean contacts and PCB
Dip a cotton swab in isopropyl alcohol and carefully scrub the battery terminals, contact springs, and any corroded pads. Wipe the PCB areas lightly to remove mineral deposits. Allow everything to dry completely before reassembly.
Tip: Use a fresh swab for each area to avoid redistributing contaminants. - 5
Inspect and replace battery if needed
Check the battery for corrosion or leakage. Replace it with a fresh CR2032 if there’s any sign of damage. Clean battery contacts again after installing the new battery.
Tip: Polarity matters—insert the battery with correct orientation. - 6
Reassemble remote housing
Carefully snap or screw the shell back together, ensuring all seals and gaskets align. Reinsert the battery, keeping the unit dry and dust-free.
Tip: Avoid overtightening screws; it can crack the housing. - 7
Reprogram and test with opener
Follow the learn/pairing steps on your opener and hold the remote button until pairing confirms. Test at close range first, then extend distance gradually to verify reliability.
Tip: If your model requires multiple steps for pairing, refer to the manual precisely. - 8
Verify operation and monitor
Operate the remote from several locations around the driveway. If still erratic, the damage may exceed simple cleaning and replacement steps. In that case, consider replacement or professional inspection.
Tip: Document symptoms for future reference or warranty claims.
Got Questions?
Can a washed garage door remote be saved, or should I replace it?
Most water-exposed remotes can be saved with careful drying, cleaning, and battery replacement. If corrosion has damaged the PCB or signaling pads beyond cleaning, replacement is the safer option. Always test the remote after reprogramming to confirm reliability.
Most washed remotes can be saved with drying and cleaning, but if damage is severe, replacement is safer.
Will water damage affect the opener receiver too?
Water damage on the remote typically does not affect the opener receiver, which is a separate unit inside your garage. However, moisture can introduce contaminants that affect the distant signal and timing. If problems persist after the remote is restored, inspect the opener receiver for signs of moisture or corrosion.
Water in the remote rarely harms the opener receiver, but persistent issues may point to moisture in the system.
How long should I let the remote dry after exposure?
Allow the remote to dry in a dry, warm room for at least 24 hours after thorough exterior drying. If humidity is high, extend to 48 hours to ensure all internal moisture evaporates. Reassemble only when you’re confident there’s no moisture left inside.
Dry for at least a full day, longer if humidity is high.
Do I need to reprogram the remote after drying?
Yes. Reprogramming is usually required after a restoration attempt to ensure the remote communicates correctly with the opener. Follow your model’s Learn/Pairing steps, and test the range afterwards.
Usually you’ll need to reprogram the remote after restoration.
What if the remote still doesn’t work after reprogramming?
If the remote remains unresponsive, the damage may be deeper than a dry and clean can fix. Check for PCB damage, button failures, or battery contact corrosion. Consider replacement or professional service if issues persist.
Persistent issues after reprogramming likely mean deeper damage; consider replacement.
Will opening the remote void the warranty?
Opening a remote can void the warranty for some models. If your unit is still under warranty, check the manufacturer’s policy before attempting internal repairs. For older units, opening may be necessary to access damaged parts.
Opening may void warranties; review policy before proceeding.
Watch Video
Quick Summary
- Dry and inspect before reassembly
- Replace corroded battery terminals
- Reprogram remote to ensure reliable pairing
- Prevent future moisture with proper storage
- If unresolved, seek professional help