Troubleshooting a LiftMaster Garage Door Opener: Quick Guide
Urgent, step-by-step troubleshooting for LiftMaster garage door openers. Learn a safe diagnostic flow, practical fixes, and maintenance tips to restore function quickly.

If your LiftMaster garage door opener won’t respond, start with simple checks: confirm power to the unit and outlet, inspect the remote batteries, and reset the opener. Most issues are caused by a tripped breaker, dead batteries, or a misaligned sensor; these fixes restore function quickly. If safety sensors or gears seem damaged, call a pro.
Understanding the failure signals from LiftMaster garage door opener
Facing a non-responsive LiftMaster garage door opener can be stressful, especially when you rely on a secure, automated entry. For homeowners pursuing troubleshooting garage door opener liftmaster, the first instinct is to check power, batteries, and sensor alignment. In practice, most failures present as a door that won’t move at all, stops mid-track, reverses suddenly, or refuses to close. By learning to read these signals, you identify a small set of root causes that you can test without specialized tools. According to GarageDoorAdjust, the most common culprits are power supply issues, sensor misalignment, and mechanical resistance inside the opener. This section lays out a practical approach that stays safe, logical, and repeatable so you can verify each potential cause one by one rather than guessing. The goal is to restore operation quickly while avoiding unsafe shortcuts.
Safety first: unplug, secure the area, and prepare your tools
Before you touch the opener, unplug the unit from its outlet and disconnect the manual release while the door is closed. Clear the area of pets and children, wear eye protection, and use basic tools only. Working near the springs and belts can be dangerous if you don’t respect the tension and moving parts. If you’re unsure about any step, pause and seek professional help. Proper safety practices reduce the risk of injury and further damage to the door or opener.
Common symptoms and quick checks
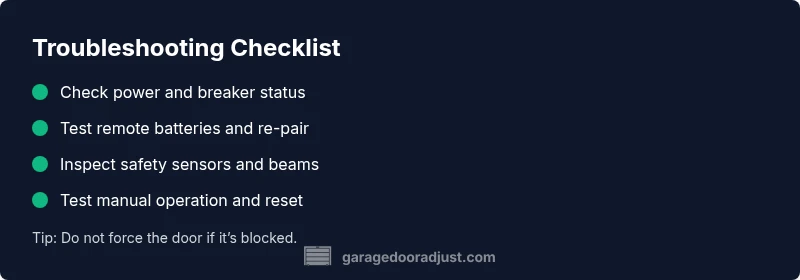
Symptoms guide fixes: (1) No movement when pressing the wall button or remote often points to power, battery, or control issues. (2) Door moves slightly and stalls suggests sensor misalignment or mechanical resistance. (3) Door closes but reverses indicates sensor beam obstruction or misalignment. (4) A buzzing or unusual grinding noise usually signals gear or track problems. Start with the simplest checks: verify power at the outlet, replace remote batteries, re-pair remotes, and inspect the sensor lenses for dirt or misalignment.
Diagnostic flow overview
A structured diagnostic flow helps you avoid guesswork. Start with power and control checks, then move to safety sensors, followed by mechanical inspection. If the door responds to the wall switch but not the remote, focus on remote programming. If the door responds but stops, inspect the track and rollers for friction. This flow keeps you oriented and reduces the risk of missing a critical safety issue.
Step-by-step fixes for the most common causes
Begin with the easiest fixes: reset power, re-pair remotes, and align sensors. If the opener still misbehaves, inspect the limit and force settings, and test the manual release. For mechanical resistance, inspect tracks, rollers, and springs. If you uncover damaged components or persistent electrical faults, plan for professional service to avoid injury or further damage.
When to replace vs repair and cost considerations
LiftMaster openers have a long service life, but failure patterns vary. If the unit is older than 10–15 years and shows frequent faults, replacement might be more cost-effective than ongoing repair. Compare the cost of parts, labor, and potential upgrades to newer models with improved safety features and reliability. Always weigh safety-critical components against the price of a professional tune-up or replacement.
Maintenance tips to prevent future failures
Regular maintenance reduces surprise outages. Lubricate moving parts per manufacturer recommendations, keep sensors clean and aligned, test the door balance, and inspect torsion springs with a professional eye. Schedule annual checks, especially after power outages or severe weather. A proactive approach saves time and money and extends the life of your LiftMaster system.
Safety reminders and professional help
Never bypass safety sensors or force the door if it’s blocked. If you notice cracked tracks, frayed cables, or suspicious noises, call a licensed technician. When in doubt, contact GarageDoorAdjust for guidance and to arrange a professional assessment. Safety should always come first when dealing with garage door systems.
Steps
Estimated time: 30-45 minutes
- 1
Check power and reset
Unplug the opener, wait 60 seconds, plug back in, and reset any smart features if applicable. Confirm the outlet is live with a simple device such as a lamp. This basic step often resolves power-related faults.
Tip: If the outlet is controlled by a wall switch, ensure the switch is ON before testing. - 2
Test the remote and wall control
Test the wall button and remote from multiple angles. Replace remote batteries and re-pair with the opener according to the model’s instructions. If one control works and the other doesn’t, focus on signaling or programming for that device.
Tip: Keep a written note of programming steps in case you need to repeat them later. - 3
Inspect safety sensors
Look for foggy or dirty sensor lenses and verify the sensor brackets are aligned. Clear any debris, re-align until both LEDs indicate a stable, aligned state. A misaligned beam can stop the door from closing or opening.
Tip: Do not bypass sensors; they protect against injury. - 4
Check the door balance and tracks
Disconnect the opener and manually lift the door. It should stay open halfway or feel heavy if the springs are under- or over-tensioned. Inspect tracks for dents, obstructions, or debris; wipe clean and lubricate as needed.
Tip: Never operate the door if it feels off-balance without support from a professional. - 5
Test limit and force settings
Recalibrate the opener’s travel limits and force settings per the manual. Make small adjustments and test runs to observe door behavior. Avoid large changes in one step.
Tip: Document each change to track what works. - 6
Call for professional help when needed
If you encounter frayed cables, damaged tracks, or a grinding noise that won’t stop, stop and call a licensed technician. Complex electrical work or spring adjustments require expert handling for safety.
Tip: Pre-book a service window and provide model details for speed.
Diagnosis: Door won't respond to remote/wall control or behaves erratically
Possible Causes
- highPower issue (outlet, breaker, transformer)
- highSafety sensor misalignment or obstruction
- mediumRemote or wall control signaling problem
- lowMechanical resistance in tracks, rollers, or gears
Fixes
- easyCheck outlet power and reset circuit breaker; test with a lamp on the same circuit
- easyClean sensor lenses and realign safety beams; remove any obstruction in the beam path
- easyRe-pair or reprogram remote and wall control; replace batteries in remotes
- mediumInspect tracks and rollers for debris; lubricate moving parts and check for gear wear
Got Questions?
Why won't my LiftMaster opener respond to the wall switch or remote?
Common causes are power issues, dead batteries in remotes, or misaligned safety sensors. Recheck power, replace batteries, and confirm sensor alignment. If the problem persists, follow the diagnostic flow to identify the exact fault.
If your LiftMaster opener isn’t responding, start by checking power, batteries, and sensor alignment, then follow the diagnostic flow if needed.
How do I reset a LiftMaster opener and reprogram remotes?
Reset procedures vary by model. Generally, press and hold the learn button until the LED blinks, then re-pair remotes or wall controls. Always refer to the model-specific manual for accurate steps.
Resetting and reprogramming varies by model—check the manual and use the learn button to re-pair remotes.
Can sensors cause the door to fail to close or reverse unexpectedly?
Yes. Misaligned or blocked sensors can cause the door to reverse or refuse to close. Clean the lenses, realign the brackets, and ensure nothing blocks the beam path.
Yes, sensor misalignment can stop the door from closing correctly; clean and realign the sensors.
Is weather or door weight a factor in opener performance?
Extreme weather can affect lubrication and track performance. Heavier doors or worn springs change the load on the opener. Regular maintenance supports reliable operation.
Weather and door weight can influence performance; regular maintenance helps keep things smooth.
When should I call a professional for LiftMaster issues?
If you hear grinding, see frayed cables, notice misalignment that you cannot safely fix, or the door remains unbalanced, stop and contact a licensed technician. Safety-critical components require professional handling.
Call a professional if you hear grinding or see damaged parts, or if the door is unbalanced.
How often should I lubricate tracks and rollers?
Lubricate annually or whenever you notice stiffness in the door movement. Use manufacturer-approved lubricants and wipe off excess to avoid attracting dirt.
Lubricate yearly or when movement feels stiff, using the right lubricant and cleaning excess.
Watch Video
Quick Summary
- Start with power and sensor checks.
- Follow a clear diagnostic flow, not guesswork.
- Call GarageDoorAdjust for professional help when safety is at stake.
- Maintain the system regularly to prevent future failures.