LiftMaster Garage Door Opener Not Working with Remotes: Troubleshooting
Urgent, step-by-step guide to resolve LiftMaster garage door opener not working with remotes. Learn battery checks, re-pairing, power tests, and when to call a pro for reliable results.

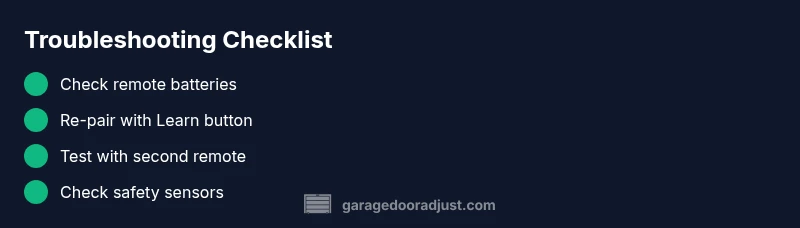
LiftMaster remote not working typically starts with fresh batteries and a quick re-pair. Quick fix sequence: replace the remote battery, re-pair to the opener using the Learn button, verify the opener has power and the wall control responds, then test with another remote to confirm the receiver. If unresolved, check compatibility and sensor alignment as needed.
Introduction to the Issue and Immediate Priorities
If you are seeing the message that the LiftMaster garage door opener is not responding to remotes, the fastest path to restoration is to rule out the simplest causes first. Start with batteries and basic pairing, then verify power to the unit and functionality of the wall control. According to GarageDoorAdjust, many remote problems are caused by fresh batteries and mispaired signals. This section lays out the urgent steps you should take to get the door moving again and identify when a pro is needed.
Common Causes You’ll See First
The majority of remote failures fall into a few predictable categories: dead batteries, mispaired remotes, or outdated remotes that aren’t compatible with the current opener model. Interference from nearby wireless devices can also degrade signal strength, particularly if you have multiple remotes or wall switches. GarageDoorAdjust's analysis shows that these issues account for most quick fix scenarios. If the opener sounds or the light blinks but the door won’t move, the problem is often at the remote or the receiver rather than the mechanical parts.
Diagnostic Flow at a Glance
To diagnose efficiently, follow a symptom-to-diagnosis flow. Start with the simplest fixes (batteries and re-pair) and progressively move toward more complex checks (receiver status and beam sensors). The flow below helps homeowners stay organized: confirm power, test remotes, re-pair, test with a known-good remote, and inspect safety sensors. This approach minimizes guesswork and speeds up resolution while keeping safety front and center.
Step-by-Step Fix: Batteries and Re-Pairing (Easy Wins)
- Replace the remote batteries with fresh, model-appropriate cells. 2) On the opener, locate the Learn button and prepare to re-pair. 3) Within 30 seconds, press a button on the remote to re-pair. 4) Test the remote from different distances and angles. 5) If the problem persists, try a second remote to determine if you must replace the original. The goal is to confirm whether the issue is the remote or the receiver. Pro tip: keep the manual handy for beeps, LED patterns, and Learn button location.
Safety Sensors and Power Checks
Sometimes the door won’t move because safety sensors misread the beam. Check alignment of the infrared sensors near the floor on each side of the door. Clean lens surfaces and ensure nothing blocks the beam. A misalignment can prevent operation even if the remotes are functioning. Also verify the opener is powered: confirm the outlet is live, check the circuit breaker, and unplug/plug the unit to reset electronics if needed.
Advanced Troubleshooting: Receiver, Logic Boards, and Interference
If batteries are fresh and re-pairing works for one remote but not another, the issue may lie with the receiver or control board inside the opener. Inspect visible wiring for loose connections and look for indicator LEDs that signal a fault. If you notice burn marks, unusual smells, or repeated error codes, it’s a signal to pause DIY work and call a professional. Also consider interference from nearby devices (like garage door transmitters from neighbors) and remove or reprogram those devices as a test.
Preventive Maintenance to Extend Remotes’ Life
Regularly test remotes, keep batteries fresh, and avoid exposing remotes to extreme temperatures. Re-pair remotes after major power outages or after opener service. Schedule a periodic inspection of the safety sensors and the receiver board, especially if you notice intermittent failures. With proper maintenance, LiftMaster remotes stay reliable and responsive, reducing the chance of future disruptions.
When to Call a Professional
If you have tried battery replacement, re-pairing, and power cycling but remotes still don’t work, the issue may be a faulty receiver or control board that requires professional service. A certified technician can diagnose receiver faults, inspect wiring, and responsibly handle any internal components. Early professional intervention can prevent further damage and ensure safety features remain functional.
Steps
Estimated time: 20-45 minutes
- 1
Check power and basic functionality
Verify the opener is powered, the wall control works, and the door is not mechanically jammed. If the wall unit behaves inconsistently, there may be an electrical or control issue.
Tip: Ensure the outlet is live and breakers are not tripped. - 2
Replace remote batteries
Open the remote, remove old batteries, insert new ones of the correct type, and test range. A weak signal often stems from old batteries.
Tip: Use high-quality alkaline batteries and avoid rechargeable coin cells. - 3
Re-pair the remote to the opener
Press and hold the Learn button on the opener, then press the remote button within 30 seconds to re-pair. Confirm by testing the remote from several positions.
Tip: Consult your model’s manual for Learn button location. - 4
Test a second remote
If available, test a second LiftMaster remote to determine if the issue is model-specific or a receiver problem.
Tip: If the second remote works, consider reprogramming the original. - 5
Inspect safety sensors
Check the alignment of the safety beams and ensure nothing blocks them. Misaligned sensors can stop the door from functioning.
Tip: Wipe lenses clean and realign as needed. - 6
Power cycle the system
Unplug the opener for 60 seconds, plug back in, and repeat the pairing steps if necessary. This resets microcontrollers and clears glitches.
Tip: Avoid touching internal components during reset.
Diagnosis: LiftMaster garage door opener not responding to remotes
Possible Causes
- highDead or weak remote batteries
- highRemote not paired or losing Learn code
- lowPower loss to the opener or outlet
- lowInterference from nearby devices or incompatible remote
- lowReceiver or circuit board failure
Fixes
- easyReplace remote batteries and re-test
- easyRe-pair remotes using the Learn button and test
- easyPower cycle the opener and verify power at the outlet
- mediumTry a different compatible remote or reprogram the keypad
- hardIf issues persist, call a technician to inspect the receiver/board
Got Questions?
Why won’t my LiftMaster remote pair with the opener?
Common causes are dead batteries, mis-timed Learn sequences, or out-of-date remotes. Follow the Learn steps and try fresh batteries.
Common causes are dead batteries or a mis-timed pairing. Try fresh batteries and re-pair using the Learn button.
What should I do after a power outage?
Power outages can reset remotes or the opener. Restore power, re-pair remotes, and test the wall control first before deeper checks.
After a power outage, re-pair remotes and test the wall control.
Can I use a universal remote with LiftMaster?
LiftMaster typically requires model-specific remotes. Check compatibility on LiftMaster’s site or use a supported remote for your opener.
Universal remotes aren’t always compatible; check model compatibility first.
When should I call a professional?
If the receiver board or wiring shows damage or remotes still fail after re-pairing and battery changes, it’s time for a technician.
If you still have trouble after re-pairing and battery changes, call a pro.
Could misaligned safety sensors block operation?
Yes. Realign sensors and verify indicator lights; misalignment can prevent the door from operating even when remotes are fine.
Misaligned sensors can stop the door; realign and retest.
Why does the door drift or reverse during operation?
That usually indicates sensor issues, track alignment, or obstruction detection. Clear any obstruction and inspect tracks for damage.
Door reversing usually means sensor or track issues—check sensors and tracks.
How often should I replace the remote batteries?
Test remotes periodically; replace batteries at the first sign of weak signals or slow response.
Check batteries regularly and replace at the first sign of weak signals.
Watch Video
Quick Summary
- Start with fresh batteries and re-pair
- Power cycle and test with multiple remotes
- Check safety sensors and alignment
- If unresolved, assess receiver/board health
- Call a professional if internal components are suspected