What is Wrong with My LiftMaster Garage Door Opener? A Step-by-Step Troubleshooting Guide
Urgent, step-by-step LiftMaster garage door opener troubleshooting. Identify faults, test safety sensors, replace batteries, realign beams, and decide when to call a professional.

Most likely, your LiftMaster garage door opener isn't working due to sensor misalignment, a blocked safety beam, a loose wall switch or outlet connection, or a worn remote battery. Start with safety: unplug the unit, disconnect the door from the trolley, and manually lift to ensure the door moves freely. If the door stays down, check sensors and re-pair remotes; otherwise, inspect the rail and drive system for wear.
Symptom Overview
If you're wondering what is wrong with my LiftMaster garage door opener, you’re not alone. In many homes the telltale signs are clear: the opener won’t respond to the wall switch or remote, the door hesitates or stalls, the safety sensors illuminate or beep, or the motor runs without lifting the door. According to GarageDoorAdjust, many LiftMaster issues begin with sensor misalignment or weak remote batteries. This section helps you interpret common symptoms and triage them safely, prioritizing the simplest checks first so homeowners can often identify the fault without tools or a service call.
Immediate Safety Steps
Safety comes first when troubleshooting a LiftMaster opener. 1) Unplug the opener from the power outlet to cut electricity to the unit. 2) If you can safely reach the trolley, disconnect the door from the opener so the door can be moved manually. 3) Manually lift the door to confirm it moves smoothly and stays balanced; if it binds, stop and avoid forcing it. 4) Keep bystanders away, especially kids and pets, while you test components. 5) Reconnect only after you’ve completed basic checks and are ready to test the system.
Common Causes (With Diagnostic Hints)
There are several frequent culprits behind LiftMaster faults. Sensor misalignment or obstruction is one of the top issues, followed by weak batteries in remotes or keypads, loose wiring, and wear in the drive mechanism. Weather and dust can also affect sensors and gears. GarageDoorAdjust Analysis, 2026 indicates sensor alignment and power issues are common failure points. By understanding these causes, you can quickly target the area most likely at fault and avoid unnecessary replacements or service calls.
Diagnostic Flow Preview
A structured approach helps you move from symptom to solution. Start by confirming power is reaching the opener, then verify sensor alignment and remote function. If your tests point to a sensor or remote issue, fix those first. If problems persist, inspect the drive belt/chain and track alignment. This flow keeps safety risk low and increases the chances you’ll solve the problem without tools or a professional.
Quick Diagnostics You Can Run (Non-Destructive)
Try these quick checks to narrow down the fault without disassembling the unit: - Confirm the outlet is powered by plugging in a lamp or charger. - Test the wall switch and the remote; replace remote batteries if dim or unresponsive. - Realign the safety beams so the red or green indicator is stable and unobstructed. - Listen for the motor hum; if you hear grinding or the motor stalls, stop and evaluate the drive system or contact a pro. - Re-pair remotes after power cycling the whole system. These steps are designed to be completed in under 15 minutes and can save a service call when the issue is minor.
Safety Tips & Common Mistakes
Keep safety as your guiding principle. Do not attempt to adjust torsion springs or tension mechanisms—such work is dangerous and requires a licensed tech. Avoid running the opener when sensors show an obstruction or misalignment, as this can damage the rail or door. Always disconnect power before handling the trolley or track components, and never force a door that binds. Regular maintenance—cleaning sensors, lubricating bearings, and resetting remotes—prevents many issues.
When to Call a Pro (Clear Thresholds)
If you cannot restore operation after sensor realignment, remote re-pairing, and a power check, or if you notice frayed wires, broken belts, or unusual grinding noises, it is time to call a professional. The GarageDoorAdjust Team recommends a professional for any suspected spring problems, track damage, or electrical faults that require access to the ladder or power tools. Pro involvement reduces risk and ensures lasting repair.
],
diagnosticFlow
Steps
Estimated time: 60-90 minutes
- 1
Power down and isolate the opener
Start by unplugging the unit and disconnecting the door from the trolley. This prevents accidental movement while you inspect components. Verify the power cord is intact and the outlet has power using a test device.
Tip: Use a dedicated garage outlet if possible; use a non-contact tester to confirm power presence. - 2
Test manual operation
With the door disconnected, try lifting it by hand. A door that moves smoothly indicates the problem is likely electrical or sensor-related, not mechanical. If it binds, stop and reassess before applying force.
Tip: Have a partner gently steady the door while you test its movement. - 3
Check remotes and keypad
Replace the remote/battery if needed and re-pair the remote with the opener according to LiftMaster instructions. Do the same with any wall keypad or mobile app connection you use.
Tip: Keep remotes labeled to avoid confusion and ensure you’re pairing to the correct unit. - 4
Inspect safety sensors
Look at both sensor eyes; remove dust, check alignment pins, and ensure the beam is unobstructed. A misaligned sensor is a common cause of non-opening behavior.
Tip: Clean sensor lenses with a soft, dry cloth; realign until the indicator is steady. - 5
Verify wiring and power at the unit
Inspect visible wires for loose connections or damage. Ensure the terminal screws are tight and the circuit board shows no burn marks. Re-seat connectors if needed.
Tip: Disconnect power again before touching internal wiring to avoid shocks. - 6
Evaluate the drive mechanism (belt/chain)
Check the belt or chain for wear, slack, or disengagement. A worn drive may stall during operation even if the motor runs.
Tip: Do not attempt belt/chain replacement unless you’re confident in the process; replace as a unit if necessary.
Diagnosis: LiftMaster opener won't respond to remote or wall switch
Possible Causes
- highPower issue (outlet, plug, transformer)
- mediumSensor misalignment or obstruction
- mediumRemote pairing or programming problem
- lowMechanical drive wear or belt/chain failure
Fixes
- easyCheck outlet power with a lamp; ensure the opener is plugged in and a reset performed
- easyRealign sensors and clear beams; ensure no obstruction
- easyRe-pair remotes and reprogram keypad
- mediumInspect belt/chain for wear; tighten or replace parts as needed
Got Questions?
Why won’t my LiftMaster garage door opener respond to the remote?
Start with fresh batteries, then re-pair the remote to the opener. Check the wall switch for power, and verify the remote is within range and not blocked by metal or electronics.
If the remote isn’t working, replace the battery and re-pair it to the opener, then check the wall switch for power.
How do I realign the safety sensors on a LiftMaster opener?
Inspect the two sensor eyes, clean them, and ensure the mounting brackets are straight. Realign until the indicator lights stay steady and the beam is unobstructed.
Realign the sensors so the beams are clear and the lights are steady.
What if the door won’t open manually even when disconnected from the opener?
Check for binding at tracks and rollers; if the door sticks or binds, don’t force it. Disconnect power and call a pro if the problem persists.
If the door won’t move by hand, stop and contact a professional for a safe assessment.
Can a worn belt or track cause the opener to fail?
Yes, a worn belt or misaligned track can prevent lifting. Inspect for wear and replace components as necessary; seek professional help for spring or structural issues.
A worn belt or misaligned track can stop the door from lifting; inspect and replace as needed.
When should I call a professional for LiftMaster issues?
If you detect damaged wiring, suspect spring problems, or cannot resolve the issue with basic troubleshooting, it’s safest to call a trained technician.
If you see damaged wiring or suspect springs, call a professional for safety.
Watch Video
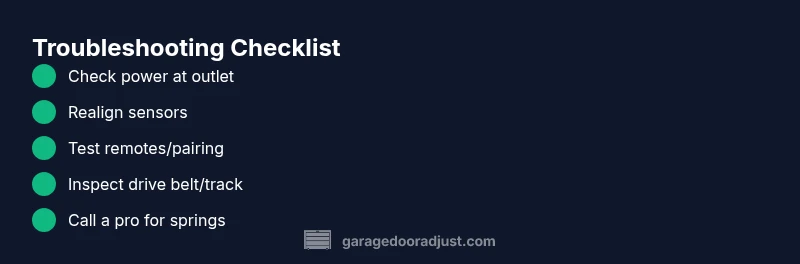
Quick Summary
- Check power and safety sensors first.
- Isolate the door and test manual movement.
- Re-pair remotes and keypad to restore control.
- Call a professional for spring or heavy-mechanism issues.