Garage Door LiftMaster Problems: Quick Fix Guide
Urgent, practical troubleshooting guide for garage door liftmaster problems. Step-by-step diagnostics, safety tips, and expert advice to restore your opener quickly.

Facing garage door liftmaster problems? Start by confirming the outlet, resetting the remote, and checking safety sensors. If the door still won’t operate, follow the diagnostic flow below to identify the root cause and apply a safe, practical fix. This quick path helps homeowners regain control while avoiding unnecessary calls.
Understanding LiftMaster Problems and Quick Fixes
When a LiftMaster opener acts up, homeowners benefit from focusing on power, sensors, and balance before guessing at major repairs. This section lays the foundation for fast problem-solving and reduces downtime. Start with the simplest checks: ensure the outlet is live, confirm the door isn’t blocked, and inspect the mounting hardware for looseness. If nothing obvious shows up, inspect safety sensors for misalignment and verify the remote is properly paired. By clarifying symptoms early, you can save time and avoid unnecessary parts replacements. The GarageDoorAdjust team emphasizes starting with simple checks and documenting what you see to inform the next steps. Staying methodical prevents panic and keeps you safe while you troubleshoot.
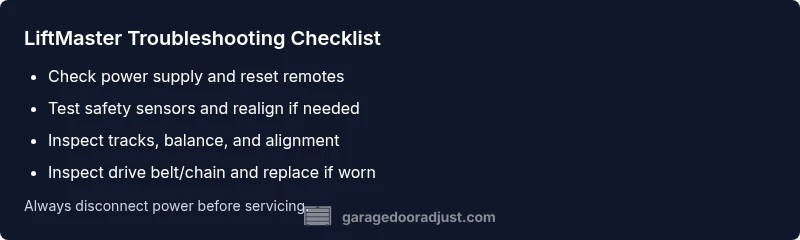
Common LiftMaster Problems and Quick Fixes
LiftMaster problems frequently fall into power, sensor, or mechanical categories. A failing outlet, tripped breaker, or a damaged remote can mimic more serious faults. Misaligned safety sensors are another frequent culprit because they trigger auto-reverse and halt operation. Worn drive belts or damaged gears can also bind the mechanism, producing grinding noises or stalls. In some cases, software glitches or outdated firmware in smart openers create communication gaps between remotes, apps, and the unit. Understanding these common culprits helps you target fixes without wasting time on speculative replacements.
Quick Diagnostics You Can Do Right Now
Begin with straightforward checks: swap in a known-good outlet, replace remote batteries, and re-sync remotes by pressing the Learn button. If the door remains unresponsive, test the wall switch, and look for any obstruction along the track. Clean and realign safety sensors, ensuring the blue and black faces are facing each other with the recommended gap. Note any error codes displayed on the keypad or indicator lights on the opener—these codes map to specific subsystems and guides your next moves. Keeping a simple log of symptoms and steps taken accelerates future troubleshooting.
Diagnostic Flow: Symptom → Diagnosis → Solutions
This section outlines a practical flow to translate what you observe into concrete actions. Start with the most obvious symptoms (no power, no remote response) and work toward less obvious ones (erratic travel, slow operation). For each symptom, identify a probable cause, then apply recommended fixes in an incremental order: verify power, confirm sensor alignment, inspect tracks and balance, and test drive components. If a fix requires disassembly or electrical work, pause and consider professional help. The goal is to reach a safe, functioning opener while avoiding risky steps.
Step-By-Step: Fix Most Common Cause (Safety Sensor Alignment)
Fixing sensor alignment is one of the most common successful interventions. Misaligned sensors can cause immediate door reversal or failure to close. Here’s a practical sequence to correct it: 1) power down the unit before adjustments; 2) loosen and reposition sensor brackets to bring the sensor faces directly opposite each other; 3) wipe the sensor lenses clean; 4) test the door at least twice to confirm proper operation. If misalignment is due to a shifted track, address mounting screws and re-seat the sensor brackets. This approach minimizes risk and gets you back to safe operation quickly.
Safety, Warnings, and Common Mistakes
Safety should be your top priority. Always disconnect power when removing covers or adjusting mechanical parts. Never bypass safety features or tape sensors to pretend they’re aligned. Common mistakes include over-tightening brackets, ignoring track obstructions, and attempting to force the door when the opener stalls. If any step feels uncertain, stop and seek professional help. Document symptoms and steps taken so you can explain the issue clearly to a technician.
Maintenance and Prevention to Avoid LiftMaster Problems
Regular maintenance dramatically reduces future LiftMaster problems. Check for loose mounting hardware every few months, lubricate moving parts with manufacturer-approved lubricants, and keep tracks clear of debris. Replace worn belts or chains promptly and update firmware if your model supports it. Periodic testing of safety sensors and remotes keeps the system reliable. A proactive maintenance routine, like a 15-minute monthly check, can prevent many common failures.
When to Call a Pro and What to Expect
Some problems require a professional touch, especially if you encounter frayed wires, a damaged opener, or persistent sensor faults. If you smell burnt plastic, hear grinding noises, or the unit occasionally trips breakers, stop using the opener and contact a licensed technician. A pro will perform a controlled diagnostic, verify electrical safety, and replace worn components with manufacturer-approved parts. Expect a written estimate and a brief test-run after service to confirm full functionality.
Steps
Estimated time: 60-90 minutes
- 1
Check power and reset remotes
Unplug the opener or switch off the circuit breaker for 30 seconds, then restore power. Replace remote batteries and re-pair the remote using the Learn button. This clears minor software glitches and confirms basic power is available.
Tip: Label remotes by room to avoid confusion later. - 2
Test safety sensors
Inspect sensor lenses for dirt, misalignment, or mounting looseness. Clean lenses with a soft cloth, and adjust brackets so the sensors face each other within the specified gap. A successful test shows both lights steady, not blinking.
Tip: Avoid pointing sensors at reflective surfaces that can confuse readings. - 3
Inspect tracks and balance
Look for obstructions on tracks, bent rails, or loose hardware. Slide the door manually to feel for binding. Tighten mounting screws and ensure the door rolls smoothly with minimal resistance.
Tip: Never force the door beyond its normal travel limit. - 4
Check drive belt/chain and gears
Examine the belt or chain for cracks, fraying, or excessive slack. If worn, replace with OEM parts or recommended equivalents. Lubricate bearings as specified by the manufacturer.
Tip: Use only recommended lubricants; some materials attract dust if over-applied. - 5
Test limit switches and remotes
Access the limit switch screws and adjust a tiny amount to correct travel. Reprogram remotes and keypad if necessary. Run a full cycle to confirm the door fully stops at open and closed positions.
Tip: Make small adjustments and test between attempts. - 6
Final full-cycle test
Close the door completely, then reopen to verify the auto-reverse and safety features work. Listen for unusual noises, and watch for any binding. If any fault codes appear, consult the manual for specific remedies.
Tip: Document results in a notebook for future reference.
Diagnosis: Door won't open or stalls mid-travel; opener hums but the door doesn't lift.
Possible Causes
- highPower issue (outlet, surge protector, circuit)
- highSafety sensor misalignment or obstruction
- mediumWorn or damaged drive belt/chain
- lowFaulty limit switches or control board
Fixes
- easyTest outlet with another device; bypass surge protector; reset breaker if tripped
- easyRealign or replace safety sensors; clean lenses; ensure proper gap
- easyInspect belt/chain for wear; adjust tension or replace parts
- mediumReset the opener; reprogram remotes; verify limit switch positions
Got Questions?
Why won't my LiftMaster remote work?
Dead batteries, poor pairing, or range issues are common. Replace batteries, re-sync the remote using the Learn button, and test from a close distance. If the issue persists, verify the receiver is functioning and consider reprogramming the opener.
Try fresh batteries and re-pair the remote; if that fails, check the receiver and programming.
The door reverses before it fully opens—what's wrong?
Most often sensor misalignment or a track obstruction. Clean and realign sensors, remove any debris from the track, and adjust limits if needed. If the problem continues, inspect for bent tracks or damaged rollers.
Sensor alignment or track obstruction is usually the cause.
Error code E1/E2 on LiftMaster?
Error codes map to specific subsystems. Check the manual for the code meaning, reset the opener, and re-test. If codes persist, professional diagnosis is recommended.
Check the manual for the code and reset; persistent codes may need a pro.
How do I reprogram LiftMaster remotes?
Press and hold the Learn button until the LED blinks, then press the remote button to pair. Repeat for additional remotes. Confirm each device activates the opener.
Use the Learn button and the remote button to re-pair each remote.
When should I call a professional?
If you see damaged wires, frayed cables, or persistent sensor faults, stop and contact a licensed technician. Electrical work can be hazardous and can void warranties if done improperly.
If in doubt or you see damage, call a pro.
Is LiftMaster covered by warranty for these issues?
Warranty terms vary by model and region. Check your purchase documents and contact LiftMaster support or a licensed technician for guidance specific to your unit.
Warranty varies; check your documents and contact support for details.
Watch Video
Quick Summary
- Start with power and sensor checks first.
- Follow the diagnostic flow to identify root causes.
- Call a pro if you encounter electrical hazards or major damage.
- Maintain your system regularly to prevent future LiftMaster problems.
- Record symptoms and fixes to streamline future troubleshooting.