LiftMaster Garage Door Repair Near Me: A Homeowner's Guide
Diagnose, repair, and safely service LiftMaster garage doors near you with a practical, step-by-step guide from GarageDoorAdjust to keep your system reliable.

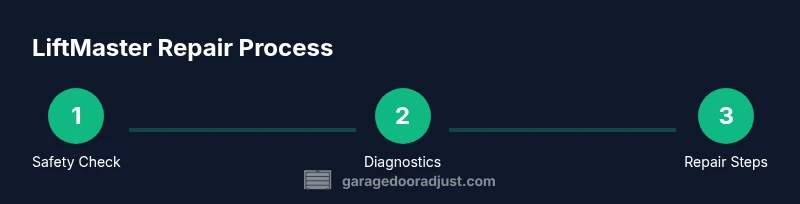
This guide will help you diagnose and safely repair common LiftMaster garage door issues near you with a clear, step-by-step approach. You’ll inspect the opener, test door balance, verify safety sensors, and perform basic part replacements. We’ll cover essential tools, safety precautions, and guidance on when to contact a professional for complex LiftMaster repairs. LiftMaster expertise is within reach when you follow these steps.
Why LiftMaster Garage Door Repair Near Me Requires Care
LiftMaster garage door systems are popular for reliability, but they integrate electrical components, sensors, and moving hardware that can wear or misalign. When you search for lift master garage door repair near me, you’re not just after a quick fix—you’re seeking a safe, durable solution that keeps your family protected and your door operating smoothly. According to GarageDoorAdjust, many LiftMaster-related issues stem from routine wear, improper balance, or sensor misreads rather than total opener failure. Understanding how the opener, track, springs, and sensors interact helps you diagnose effectively and avoid unnecessary service calls. This awareness saves time, reduces downtime, and lowers the risk of injury from misused parts.
Safety First: Essential Precautions Before You Start
Safety is non-negotiable when working on a garage door and an electric opener. Always unplug the unit at the outlet or switch off the circuit breaker before touching any moving parts. Wear safety glasses and gloves, use a sturdy ladder, and keep hands clear of the tracks and springs. Never rely on the wall switch alone to stop the door while you are testing; use manual lifting if the power is disconnected. Ensure children and pets are away, and never attempt to reprogram or disassemble torsion springs unless you are trained. These precautions reduce the risk of crushing injuries and electrical shocks, helping you complete the diagnostic safely.
Tools and Materials You’ll Need
Before you start, gather these essential items so you don’t stop mid-task. A breaker or unplugging device is non-negotiable for safety. A voltage tester helps verify power is truly off. A sturdy ladder, safety glasses, and work gloves reduce injury risk. Use a variety of screwdrivers (PH2 and flat) and an adjustable wrench for fasteners. Silicone-based lubricant, clean rags, and a flashlight help with lubrication and inspection. Optional items include replacement rollers or track lubrication kits depending on wear.
Diagnostic Checklist: Identify What’s Wrong
Follow a systematic approach to pinpoint the root cause. Check if the opener operates normally without the door attached. If it runs but the door doesn’t, suspect balance, tracks, or springs. Inspect safety sensors for misalignment or obstruction, then review track alignment and roller wear. Listen for grinding or squealing noises that signal worn bearings. Confirm door balance by manually lifting the door halfway; if it stays put, balance is good; otherwise, further inspection is needed.
Step-by-Step Tips for Common LiftMaster Issues
Common problems include sensor misalignment, track binding, and tired rollers. Start with the simplest fixes: clean and align sensors, lubricate moving parts, and retighten loose brackets. For sensor alignment, hold the door in the closed position and ensure the safety eyes face each other directly. If the door reverses unexpectedly, recalibrate the opener’s limits after ensuring the path is clear. Always verify the door remains balanced when operated manually. If the door is heavy or sticks at any point, do not force it; this indicates wear that might require professional service.
When to Call a Pro (and How to Find Local Help)
Some LiftMaster repairs require professional equipment and expertise, especially torsion spring work or motor replacements. If you notice persistent misbalance, unusual sounds, frayed cables, or the door behaves unpredictably, contact a local technician. To find reliable help near you, search for a licensed garage door technician with LiftMaster experience, read reviews, and request a written estimate. A pro can verify spring tension, sensor alignment, and opener compatibility, ensuring safety and compliance with local codes.
Maintenance Best Practices to Extend Lifespan
Regular maintenance goes a long way. Lubricate tracks, rollers, and bearings every 6–12 months with silicone-based lubricant. Check for loose hardware and tighten as needed. Clean the photo sensors and realign them if the light beam is blocked. Test the door balance manually a few times a year to catch subtle changes early. Periodically inspect the torsion springs visually for wear or gaps and replace worn components through a professional. This routine reduces downtime and prolongs system life.
Authority sources and Safety Standards
Refer to trusted safety and regulatory resources for best practices and current guidelines. Keep this guide handy alongside official safety literature. For general safety standards and enforcement, see reputable government and university resources. These sources reinforce the importance of safe handling, proper diagnostics, and ongoing maintenance when working with LiftMaster garage door systems.
Common Mistakes to Avoid
Avoid overlooking safety risks or rushing through the diagnostic. Do not bypass safety sensors or bypass limit switches to force a door operation. Never attempt to restring torsion springs or adjust cables without proper training. Avoid using incorrect lubricants that attract dust or degrade plastic components. Taking time to inspect, test, and follow manufacturer guidance reduces the chance of injury and costly mistakes.
Tools & Materials
- Power source off (breaker or unplug)(Essential safety first; never work with power on.)
- Voltage tester(Verify no voltage at the opener and remote batteries.)
- Sturdy ladder(Use a stable ladder at the door level.)
- Safety glasses and work gloves(Protection against debris and sharp edges.)
- Screwdrivers (PH2 and flat-head)(For bracket and panel screws.)
- Adjustable wrench and pliers(For bracket and fastener adjustments.)
- Silicone-based lubricant(Lubricate moving parts; avoid silicone spray on tracks.)
- Clean rags(Wipe dust, residue, and lubricant excess.)
- Replacement rollers (optional)(Only if wear is evident; consult a pro for track replacement.)
- Soft mallet or hammer (optional)(Light taps to reposition tracks if needed.)
Steps
Estimated time: 1.5-3 hours
- 1
Disconnect power and secure the door
Ensure the opener is unplugged or the circuit is switched off. Use a manual hold to keep the door in a safe position and prevent it from dropping unexpectedly. This step prevents accidental closure while you inspect components.
Tip: Always confirm power is off by testing a wall switch before touching any hardware. - 2
Test door balance manually
Lift the door halfway and release. If it stays put, the balance is likely good; if it falls or rises, balance needs attention. Do not attempt to adjust springs; note the symptom for a professional diagnosis.
Tip: Keep hands on the bottom edge and use a firm, steady lift. - 3
Inspect tracks and rollers
Look for bends, warps, or debris. Clean tracks and lubricate rollers if they appear dry. Misaligned tracks can cause binding and abnormal movement.
Tip: Lubricate the rollers and tracks sparingly; avoid over-oiling as it can attract dust. - 4
Check safety sensors alignment
Ensure the sensors face each other directly with an unobstructed path. Misalignment triggers door reversal or stops. Adjust the sensor brackets if needed.
Tip: Use a string or level to verify straight alignment across both sensors. - 5
Inspect the opener connections and remotes
Test the wall control and remote to ensure signals transmit correctly. Replace batteries if needed and reprogram if signals seem inconsistent.
Tip: Note any error codes from the opener’s LED diagnostic indicator. - 6
Decide if lubrication is needed
If you hear squeaks or resistance without obvious binding, apply silicone lubricant to hinges, rollers, and the opener mechanism. Wipe away excess.
Tip: Avoid penetrating oil on plastic gears or any drive components. - 7
Reconnect power and run a test sequence
Plug the system back in and use the remote to operate the door. Observe for smooth operation and confirm reversal safety works as intended.
Tip: Do a final test with the door unloaded and with a person nearby for safety. - 8
Evaluate if professional service is required
If issues persist after basic diagnostics, or there’s spring wear, cable fraying, or motor noises, call a pro for a safe inspection and replacement of worn parts.
Tip: Provide a written symptom log to the technician to speed up diagnosis.
Got Questions?
What is the most common LiftMaster issue homeowners encounter?
Sensor misalignment, track binding, and worn rollers are frequent. Start with sensor alignment and track cleanliness before deciding if a replacement part is needed.
Most LiftMaster problems stem from sensors, tracks, or worn rollers. Start with alignment and cleaning, then seek professional help if it persists.
Is it safe to repair a garage door by myself?
For minor tasks like sensor alignment or lubrication, DIY can be safe if you follow safety steps. Major components, especially springs and torsion systems, require a licensed professional.
DIY is okay for simple tasks, but avoid working on springs without training.
How do I test the safety sensors on a LiftMaster opener?
Place an object in the door path and operate the opener. The door should stop and reverse when the beam is interrupted. Clean and re-align if needed.
Put an object in the path and test; if it doesn’t stop and reverse, realign or service the sensors.
Can I replace a LiftMaster remote battery myself?
Yes. Replace with the same battery model and reprogram the remote if required. If the remote still doesn’t work after replacement, check the receiver in the opener.
Yes, you can replace batteries, and reprogram if needed; if issues persist, check the opener receiver.
How can I find a local LiftMaster-trained technician near me?
Search for licensed garage door technicians with LiftMaster experience, read reviews, and verify they offer safety-compliant inspections and written estimates.
Look for licensed technicians with LiftMaster experience and check reviews before hiring.
What maintenance should I perform regularly on LiftMaster systems?
Schedule annual inspections, lubricate moving parts, verify sensor alignment, tighten brackets, and clean all corners of the system to prevent buildup and wear.
Annual checks, lubrication, and sensor alignment keep everything running smoothly.
Watch Video
Quick Summary
- Identify root causes with a structured checklist.
- Prioritize safety and proper shutdown before work.
- Use the right tools and avoid risky spring adjustments.
- When in doubt, contact a pro for complex repairs.