How to Stop a Garage Door Halfway: A Homeowner’s Step-by-Step Guide
Learn how to stop a garage door halfway safely, diagnose common causes, and troubleshoot with a homeowner-friendly plan. Includes safety steps, tools, diagnostic flow, and guidance on when to call a pro.

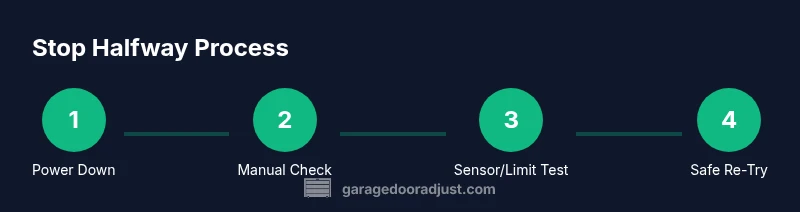
You can stop a garage door halfway by safely halting travel, disconnecting the opener, and performing a guided diagnostic. This guide walks you through safety checks, the essential tools, and a clear step-by-step plan to identify whether the issue is mechanical or electrical and to restore normal operation.
Understanding the halfway stop: what it means for your door
When a garage door stops halfway, it usually points to a mismatch between motion limits, balance components, or electrical controls. This symptom can arise from a misadjusted travel limit on the opener, a sensor misalignment, worn springs or cables, a blocked track, or a binding roller. Before you panic, recognize that most halfway stalls are solvable with careful inspection and proper precautions. This section explains what 'halfway' translates to in real-world terms—roughly a controlled pause where the door neither fully opens nor closes—so you can plan safe, effective checks. Throughout this guide, you’ll encounter the phrase how to stop garage door halfway as a practical objective, not a mystery. Remember: personal safety comes first, and GarageDoorAdjust emphasizes caution when handling springs and electrical components.
Safety first: essential precautions before you start
Before touching any part of the system, power down the opener to prevent unwanted movement. Use the wall switch to unplug the opener or flip the circuit breaker dedicated to the garage door. Wear sturdy gloves and eye protection, and keep bystanders clear. Never attempt adjustments on torsion springs while the door is under tension. A halfway stop should prompt careful testing rather than aggressive forcing. Keep a clear workshop space, remove pets and kids, and work from a stable ladder if you need to reach higher components like tracks or sensors. If at any point you feel uncertain, stop and consult a professional. This safety mindset—paired with the right tools—helps you avoid dangerous surprises when learning how to stop garage door halfway.
Diagnosing with a simple flow: is it mechanical or electrical?
A reliable approach is to separate mechanical resistance from electrical control. If the door moves smoothly in manual mode but stalls under the opener, the issue is more likely with limits, sensors, or the opener itself. If manual movement feels heavy or jerky, balance or track problems may be the culprit. Use a methodical flow: disconnect the opener, test manual travel, re-test with the opener, and observe where the stall occurs. Document your observations so you can compare results as you proceed. This diagnostic mindset helps homeowners pinpoint whether the problem is in the tracks, springs, or sensors, which then guides safe next steps.
Inspect and test the track, rollers, springs, and cables
Begin with a clear inspection of the entire path: tracks should be straight, clean, and free of obstruction. Look for dents, loose bolts, or debris that could impede movement. Check rollers for wear and lubrication; replace worn wheels if necessary and ensure hinges move freely. Inspect cables for frayed strands or broken strands that could compromise safety. Springs—whether torsion or extension—should show no signs of excessive wear or gap irregularities. If you notice significant wear, it’s best to halt DIY attempts and call a professional. This section covers practical checks you can perform safely to diagnose why a door stops halfway and what fix is typically appropriate.
Electrical checks: opener limits, sensors, and travel settings
A common cause of a halfway stop is a misconfigured travel limit or misaligned safety sensors. Locate the limit screws on the opener rail and adjust gradually, testing travel after each small adjustment. Realign photoelectric sensors so that the green indicator light remains steady when the beam passes unobstructed. If you recently replaced the remote or rewired components, re-test to confirm the new configuration mirrors the original wiring diagram. Remember to re-engage the unit only after confirming the door travels through its full range and stops at the correct points. This ensures you’re addressing the modern electrical controls that often trigger a halfway stop scenario.
Manual balance test and safe adjustment basics
A balanced door resists closing and opening evenly when released from mid-travel. To test balance, disconnect power to the opener and lower the door manually to halfway, then briefly let go. If the door remains in place, balance is good; if it drifts up or down, springs or track alignment may need adjustment. Use caution: torsion springs store a lot of energy even when the opener is unplugged. Do not attempt to adjust springs yourself unless you have the proper training and tools. If the door requires more than minor adjustments, call a pro to avoid serious injury or damage. This section provides the practical approach to verifying balance and understanding when DIY adjustments cross safety lines.
When to call a professional and what to expect
If you’re encountering persistent halfway stops after checking limits, sensors, tracks, and obvious misalignments, it’s time to involve a licensed technician. Persistent issues with springs, cables, or torsion systems require professional handling due to the risk of severe injury. A technician will run a full diagnostic, verify safety features, and replace worn components with proper torque and safety standards. The goal is a stable, safe door that travels the full range with reliable stopping points. This final guidance helps homeowners decide whether to DIY or schedule professional service, ensuring long-term reliability and safety.
Summary: what you learned about stopping a garage door halfway
By following a structured safety-first approach, you can identify the root cause of a halfway stop, perform non-destructive inspections, and determine whether the issue lies with the opener, sensors, or mechanical components. Remember that cracks in balance or damaged springs require professional intervention. With the right precautions and a methodical diagnostic flow, you can restore smooth operation and minimize the risk of injury.
Tools & Materials
- Ladder or step stool(Stable, tall enough to reach tracks/sensors)
- Screwdriver set (Phillips and flat-head)(For adjustments on brackets and fasteners)
- Wrench set or socket set(For bolts on tracks and hardware)
- Pliers (needle-nose)(Grip and adjust small components)
- Measuring tape(Assess alignment and position)
- Silicone lubricant spray(Lightly lubricate tracks and rollers)
- Safety glasses(Eye protection during diagnostics)
- Work gloves(Hand protection from sharp edges)
- Flashlight(Illuminates tracks and springs)
- Voltage tester(Used if you must test wiring (with caution))
Steps
Estimated time: 45-75 minutes
- 1
Power down and secure the door
Unplug the opener or switch off the circuit breaker for the garage door. Confirm the door cannot move with the opener engaged, then move it manually to a safe halfway position. This ensures you can inspect without automatic movement.
Tip: Never work under a door that can slide unexpectedly; double-check the opener is disconnected. - 2
Test manual travel and note resistance
Grasp the door firmly and move it up and down slowly to feel for sticking or heavy resistance. If movement is smooth, the issue may be with the opener settings; if not, the track, rollers, or springs may be binding.
Tip: Keep one hand on the door and the other on the rail to gauge ease of movement. - 3
Inspect tracks and rollers for debris
Check both tracks for obstructions, dents, and rust. Remove debris, wipe clean, and lubricate the rollers with silicone spray if they appear dry. Ensure rollers spin freely without grinding.
Tip: Do not lubricate pulley or belt areas that are designed for dry-running only. - 4
Check hardware and alignment
Look for loose bolts and misaligned brackets that can cause binding. Realign any skewed components and re-tighten fasteners to the manufacturer’s torque specs. Return the door to halfway and test manual travel again.
Tip: Use a level to verify tracks run true; small misalignments amplify stickiness over time. - 5
Test sensor alignment and opener limits
With power still off, verify sensor alignment so the beam is uninterrupted. Reconnect power and adjust travel limits in small increments, testing full travel after each adjustment.
Tip: If you recently touched wiring, re-check color-coded connections against the wiring diagram. - 6
Balance check: manual drop test
With the door disconnected from the opener, lift it to the halfway point and briefly release. If it drifts, the springs or balance system may require professional adjustment. Do not attempt to re-torque torsion springs yourself.
Tip: If in doubt, stop here and call a pro instead of risking a spring failure. - 7
Re-connect and run a full travel test
Reconnect power and command the door to open and close fully. Observe the travel points and confirm the door stops precisely at each end of travel. If issues persist, document observations and plan a professional service visit.
Tip: Keep a log of travel points and any abnormal noises for the technician.
Got Questions?
Why does a garage door stop halfway?
Halfway stops typically indicate misadjusted limits, sensor misalignment, or balance issues. A systematic check of the opener settings, safety devices, and mechanical components will usually identify the cause.
A halfway stop usually means the limits, sensors, or balance are off. A careful diagnostic helps you find the exact culprit.
Can I fix this myself without a professional?
Many non-spring issues like misaligned sensors or loose tracks can be addressed safely by homeowners. Do not attempt to adjust torsion springs or internal components under tension; call a professional for those tasks.
Yes for many checks, but never work on torsion springs yourself.
What safety gear should I wear when troubleshooting?
Wear safety glasses and gloves, and keep others clear of the work area. Use a stable ladder and never work under a door supported only by you.
Glasses, gloves, and a sturdy ladder keep you safe while you inspect.
How do I test the door balance safely?
Disconnect the opener, raise the door to mid-travel, and briefly release. It should stay put if balanced; otherwise, address balance or call a pro.
Do the mid-travel balance test with the opener unplugged.
When should I replace springs or cables?
If springs or cables show wear, fraying, or permanent deformation, replacement is required. This is hazardous and typically requires a licensed technician.
If you see wear or fraying on springs or cables, call a professional.
What should I do after adjusting limits or sensors?
Test full travel again, observe end positions, and ensure safety lights function. If issues recur, log observations and contact a pro.
Retest full travel and safety features after any adjustment.
Watch Video
Quick Summary
- Identify whether the stall is mechanical or electrical.
- Inspect tracks, rollers, and springs for wear before adjusting limits.
- Test sensors and travel limits in small increments.
- Avoid DIY work on high-tension springs; call a pro when unsure.
- Document findings to aid professional service.