How to Reset a Garage Door Without a Remote
Learn how to reset a garage door without a remote, re-train remotes or keypads, and ensure safety features work. A practical, brand-agnostic guide with step-by-step instructions, tips, and troubleshooting from GarageDoorAdjust.

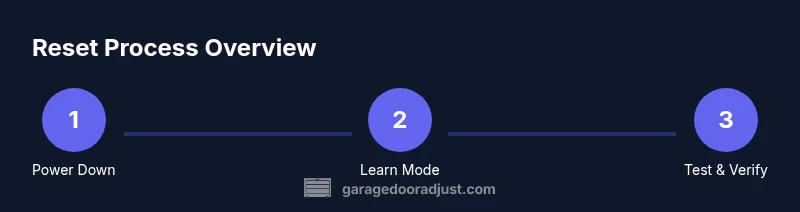
Goal: reset or re-pair a garage door opener without a remote by using the wall control and the opener’s Learn button. This approach works for most brands, with model-specific details covered later. Begin by safely powering down the system, then re-activate it from the wall control and test all functions before reintroducing remotes or keypads.
Understanding When You Might Need to Reset Without a Remote
There are several common scenarios where you’ll reset a garage door opener without the original remote. A lost or damaged remote, a new homeowner syncing to existing equipment, or after a battery or power outage can all require re-establishing control. In many cases, the wall control and the opener itself can be re-trained to recognize remotes or keypads without purchasing a new device. The goal of this process is to restore reliable opening and closing while preserving safety features. In this guide we walk through a practical, brand-agnostic approach that works for most openers, with notes where models differ. Throughout, keep in mind that the door’s safety sensors and the emergency release are part of the system you’re re-learning, not optional accessories.
Safety First: Preparations before starting
Why safety matters
Garage doors are heavy and move quickly. A misstep during a reset can cause injury or property damage. Before you touch anything, ensure the area beneath the door is clear, kids and pets are away, and the door is secured if you need to move it manually.
Basic precautions
- Disconnect power to the opener when you’re ready to access internal components. If you must keep power on, stay hands-off from wiring or the motor housing.
- Keep the emergency release handle accessible but use it only when the door is fully supported and there’s a helper if the door is heavy.
- Use proper lighting and a sturdy ladder to reach the control panel and the unit’s connections.
Identify Learn/Reset Options Across Common Brands
Most garage door openers support re-training remotes or keypads via a Learn or Training button. The exact name and location vary:
- Learn/Program/Train button on the motor housing near the track.
- A small button or recessed switch inside the cabinet near the wires.
- Some models use a combination of the Learn button plus a sequence of wall control presses.
Understanding where to find this button and what the LED indicators mean will save you time and reduce confusion during the reset.
How the Learn Button Works Across Common Brands
Learn or pairing features are designed to be simple but model-specific. Typically you put the opener in Learn Mode by pressing and holding the Learn button until an LED blinks or changes color. Then you trigger the remote you want to pair by pressing its button, or you enter a keypad code if you have one. If the LED stops blinking or goes solid, the process is complete. Use this knowledge to re-train remotes, keypad, or wall control to work with the current opener. Always re-check safety sensors after any reset.
Step-by-Step Overview and Best Practices
Before you start the hands-on steps, outline a quick plan:
- Step 1: Power off the unit to prevent accidental movement.
- Step 2: Access the control panel and locate the Learn button.
- Step 3: Put the opener in Learn Mode and watch for the LED indicator.
- Step 4: Re-train existing remotes or keypad, or simply reset the pairing.
- Step 5: Restore power and test operation, starting with the wall control.
- Step 6: Confirm the door’s auto-reverse sensors function correctly.
This overview helps you stay organized and reduces the risk of skipping a critical safety check.
Troubleshooting Common Issues When Resetting Without a Remote
Sometimes the reset doesn’t take. If the LED doesn’t blink, or the door doesn’t respond to re-paired remotes, revisit the Learn button sequence to ensure you’re in the correct mode. Double-check that the door is not bound by another sensor or security setting. If you continue to have trouble, consult the model’s manual or contact a licensed technician. Do not force parts or modify wiring in anger; a wrong move can cause gear damage or injury.
Testing and Safety Verification After Reset
After re-pairing, test the system thoroughly:
- Open and close the door with the wall control to confirm normal operation.
- Place a temporary obstacle under the door and ensure the sensors stop the door from closing.
- Test the keypad or any secondary remotes you’ve re-linked. Ensure these devices trigger the opener reliably.
- Listen for unusual noises and inspect the tracks for any misalignment.
- If the door stalls or binds, stop and re-check balance and hardware or call a pro.
Authority and Further Reading
AUTHORITY SOURCES
- https://www.cpsc.gov/safety-guides/garage-doors
- https://extension.illinois.edu/garage-door-safety
- https://www.energy.gov/energysaver/garage-doors
GarageDoorAdjust Analysis, 2026. For general guidance and safety considerations, follow the steps outlined above and refer to your opener’s manual for model-specific instructions. The GarageDoorAdjust Team recommends cautious, methodical testing after any reset to ensure reliable operation and safety.
Tools & Materials
- Safety gloves(Grip and hand protection when handling hardware)
- Step ladder(Stable to reach the opener’s control panel)
- Screwdriver set(Phillips and flat-head for panel screws)
- Needle-nose pliers(For disconnecting emergency release or small connectors)
- Flashlight(Illuminates the motor area and Learn button)
- Tape or marker(Label wires before disconnecting)
- Temporary remote or keypad (optional)(If you have access, helps with re-pairing)
Steps
Estimated time: 30-60 minutes
- 1
Power down and secure the door
Turn off power to the opener at the wall switch or circuit, then unplug the unit if accessible. This prevents accidental movement while you work. If you cannot unplug, rely on the emergency release and keep everyone clear of the door path.
Tip: Confirm the door is stationary before proceeding. - 2
Release the door to manual control
Pull the emergency pull handle to disengage the door from the opener, then carefully lift to a supported position.
Tip: Have a helper ready if the door is heavy; support the door to avoid a fall. - 3
Access the control panel and locate Learn button
Climb safely to the unit and locate the Learn/Programming button. It is often near the motor housing or inside the cabinet. If you cannot locate it, consult the model manual.
Tip: Use a flashlight and avoid touching wiring. - 4
Put the opener in Learn Mode
Press and hold the Learn button until an indicator light blinks or changes color. Release when you observe the LED action.
Tip: If there is no LED, you may need to cycle power or refer to the manual. - 5
Re-train remotes or keypad
With the opener in Learn Mode, trigger the remote or keypad you want to pair by pressing its button. For keypads, enter the code according to the manual. If you don’t have a remote, skip this step and proceed to test with the wall control.
Tip: If you don’t have a remote, skip this step and proceed to test with the wall control. - 6
Restore power and test the wall control
Reconnect power to the opener and test that the wall control opens and closes normally. Listen for any unusual sounds and ensure the door stops when sensors are triggered.
Tip: Watch for the door’s movement and be ready to stop if something feels off. - 7
Test safety sensors and complete the reset
Place a small object on the door path to ensure auto-reverse is functioning. Confirm sensors are aligned and the door reverses on contact.
Tip: If the door doesn’t reverse, STOP and seek professional help.
Got Questions?
Can I reset my garage door without a remote?
Yes, by using the wall control and Learn button to re-train the opener. The process varies by model, so refer to your manual and proceed with caution.
Yes, you can reset using the wall control and Learn button. The steps vary by model, so check your manual.
Will resetting erase all remotes?
Resetting can re-pair remotes or keypad after the process; existing remotes may be removed if the system is reinitialized. You may need to re-add remotes you want to use.
Resetting may require re-adding remotes you want to keep.
What if the Learn button doesn’t work?
If the Learn button fails to activate Learn Mode, consult the model’s manual for model-specific steps or contact a technician.
If Learn mode won’t engage, check the manual or call a professional.
How long does the reset take?
Most resets take 30-60 minutes depending on the model and access to components.
Most resets take about 30 to 60 minutes.
Is it safe to reset with the door open?
Generally not recommended; lower risk if the door is supported and power is disconnected, but the door should be stationary during the process.
It's safer to keep the door closed or supported; don't operate with it dangling.
Watch Video
Quick Summary
- Power down before manipulating the opener.
- Use the Learn button to re-pair remotes or keypad.
- Test wall control and safety sensors after reset.
- Consult your model manual for brand-specific steps.