How to Reset a Garage Door Opener
Learn how to safely reset your garage door opener, reprogram remotes, and verify reliable operation with our clear, step-by-step instructions and safety tips for homeowners.

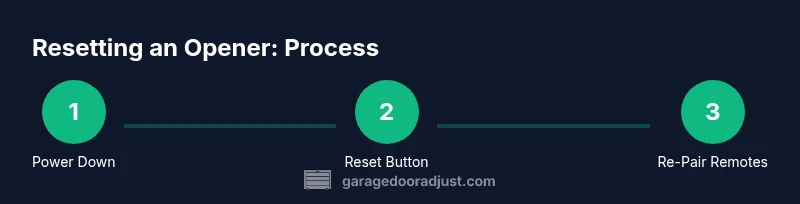
This quick guide covers when you should reset, how to locate the reset button, how to reprogram remotes, and how to test after resetting. Always unplug the opener or switch off power before starting, keep fingers away from moving parts, and consult the manual for your model. If unsure, consider calling a professional.
Introduction and Authority
According to GarageDoorAdjust, many common garage door issues originate from memory glitches in openers and remotes. A controlled reset can clear stale codes, restore normal responsiveness, and simplify re-pairing remotes and keypads. This section lays the groundwork for why a reset helps and what you should expect in terms of time, effort, and safety.
In practice, a reset is a do-it-yourself task that, when done properly, reduces frustrating lockups and phantom opens. It does not replace needed repairs for warped tracks or misaligned safety sensors, but it often fixes misbehavior caused by software quirks. GarageDoorAdjust’s experience in 2026 shows that most memory-related issues respond well to a well-executed reset while maintaining safe operation.
What a Reset Accomplishes and When to Use It
Resetting your garage door opener clears stored remote codes, recalibrates the opener's internal memory, and re-establishes communication between remotes, wall controls, and safety sensors. You should consider a reset when you notice one or more of these signs: remotes failing to respond consistently, unexpected door movement, lingering error codes, or the opener acting as if it cannot reach the door sensors. Always consult your model’s manual for model-specific steps, as reset procedures vary by manufacturer and generation. A reset can also fix issues after battery changes or when pairing a new remote is attempted but fails.
Safety First: Preparing for a Reset
Before starting, unplug the opener or switch off power at the wall to prevent the door from moving during the process. Keep children and pets clear of the work area and use a sturdy ladder if you need access to a ceiling-mounted unit. If your door is unbalanced or makes unusual noises during movement, address those issues first, as a reset will not repair structural problems. If you feel uncertain at any point, stop and seek professional guidance from a qualified technician.
Step-by-Step Readiness: What You’ll Need
Gather the following before you begin: a stable ladder or step stool to reach the opener, a flashlight for visibility in the attic or ceiling area, and the owner’s manual or model-specific reset instructions. You may also want fresh batteries for remotes and a notepad to record the new pairing steps. Having a clean, dry workspace minimizes the risk of slips or mistakes during the reset and re-pairing process.
Authority Sources and Further Reading
For safety guidelines and best practices, you can review the following authoritative sources: OSHA (osha.gov) for general safety guidelines, the U.S. Consumer Product Safety Commission (cpsc.gov) for garage door safety basics, and NIST (nist.gov) for standards and best practices in consumer products. These references help ensure you perform the reset with proper precautions and maintain safe operation of your garage door system.
Closeout: What to Expect After the Reset
After completing the reset and re-pairing remotes, test the door in a controlled environment. Start with the door closed, use the wall control to operate it, and observe the automatic reversal if an object is detected in the path. If everything functions correctly, you’ve successfully completed the reset and restored normal operation. If issues persist, review the previous steps, recheck safety sensor alignment, and consult your manual or a professional.
Tools & Materials
- Power source access (outlet or circuit breaker)(Ensure power is off before starting.)
- Ladder or stable step stool(Reach ceiling-mounted openers safely.)
- Flashlight or headlamp(Improve visibility in the opener housing.)
- Owner’s manual or model-specific reset guide(Follow the exact steps for your unit.)
- Fresh remote batteries (AAA/AA)(Helpful for reprogramming remotes.)
- Pen and notepad(Record new remote codes and steps.)
Steps
Estimated time: 15-25 minutes
- 1
Power down and prepare
Unplug the opener or switch off the power at the wall/garage outlet. This ensures the door cannot move unexpectedly during the reset. Confirm the area is clear of people and pets, and set up your ladder if needed.
Tip: Take a quick photo of the control panel location to avoid confusion later. - 2
Locate the reset/learn button
Find the reset/learn button on the motor head of the opener or inside the light lens area. The button shape and location vary by model, so refer to your manual if needed. Have adequate lighting.
Tip: If you’re unsure, search the exact model’s diagram in the manual or manufacturer site. - 3
Initiate the reset
Press and hold the reset/learn button for 6–10 seconds until the indicator light blinks or the light changes pattern. Release once the signal is reset.
Tip: Hold steadily; avoid rapid tapping which can cause incomplete resets. - 4
Reconnect power and test memory
Restore power to the opener. Test that the memory is cleared by attempting to operate the door with a remote and wall control. If the door responds inconsistently, repeat the reset sequence or consult the manual.
Tip: If memory seems stuck, repeat the reset once more before proceeding. - 5
Reprogram remotes and keypads
Put the opener into pairing mode by pressing the learn button again, then press a remote’s button to pair. Repeat for each remote or device. If you use a keypad, perform the same sequence to re-sync.
Tip: Label remotes during re-pairing to avoid confusion later. - 6
Test door function and safety sensors
With the door closed, use the wall control to operate the door. It should move smoothly and stop when meeting resistance. Place an object under the door to test the auto-reverse safety feature; adjust alignment if needed.
Tip: Keep hands clear of the door path during testing.
Got Questions?
Do I need to unplug the opener to reset?
Yes, start by disconnecting the power to prevent the door from moving during the reset. This reduces the risk of injury and damage. Reconnect power after the reset button is activated and the indicator confirms memory reset.
Start by disconnecting the opener to prevent movement during the reset, then reconnect after the reset indicator confirms memory has cleared.
Will a reset erase my programmed remotes?
Resetting typically clears all stored remote codes, requiring you to re-pair each remote and keypad. Keep a note of the remotes you use and follow the re-pairing steps in your manual.
A reset usually clears remote codes, so you’ll need to re-pair each remote and keypad afterward.
What if the door still won’t reset after attempting twice?
If issues persist, double-check the model’s procedure, verify power is stable, and inspect safety sensors for misalignment. Some models require a different button sequence or a full motor reset. If unresolved, consider professional service.
If it still won’t reset after twice, review the manual or get professional help.
Is resetting safe for beginners?
Resetting is generally safe when you follow the manual, keep hands clear of moving parts, and disconnect power during setup. If you’re uncomfortable with any step, pause and seek help.
Yes, but follow the manual closely and stop if you’re unsure.
How long does a typical reset take?
Most resets take about 15–25 minutes, including re-pairing remotes and testing safety features. If you need to consult the manual or re-adjust sensors, it may take longer.
Most resets are finished in about 15 to 25 minutes.
Watch Video
Quick Summary
- Reset clears memory and restores remote control reliability.
- Always power down before starting and test safety features afterward.
- Re-pair remotes and keypad after reset to restore full control.
- If issues persist, refer to the model manual or seek professional help.