How to Get a Garage Door Opener Working: Step-by-Step
A homeowner-friendly guide to diagnosing and repairing a garage door opener. Learn power checks, remote programming, sensor alignment, and safety tips to get your opener working again.

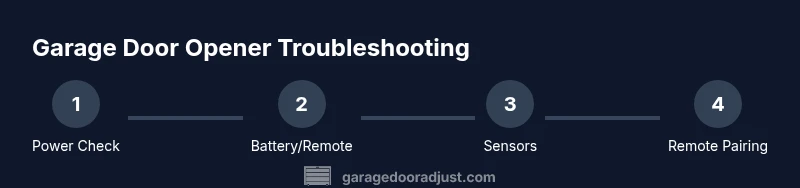
You're about to restore function to a stubborn garage door opener. This guide shows you how to get garage door opener to work by verifying power, checking the wall switch and batteries, re-pairing remotes, and testing safety sensors. Follow the step-by-step instructions to diagnose common faults safely and effectively. This quick answer gives you a practical starting point and signals when to call a pro.
Troubleshooting Foundations
When you ask how to get garage door opener to work, safety comes first. Start by unplugging the opener or switching off the circuit to avoid accidental movement. Check that the door is not stuck in manual mode, then verify the powered outlet. Use a simple outlet tester if you have one. If the outlet isn’t live, reset the breaker or replace the fuse; never overload the circuit. According to GarageDoorAdjust, power and basic checks resolve the majority of basic opener faults. Once power is confirmed, you can move to battery checks and remotes. The goal is to establish a stable baseline before deeper diagnostics. For homeowners, this is the quickest path to regain control without special tools.
Power, Batteries, and Wall Switch
A common reason people ask how to get garage door opener to work is a dead remote battery or a malfunctioning wall switch. Replace remote batteries with fresh, manufacturer-recommended types and test each remote. If the wall switch doesn’t respond, check for loose wiring at the switch and ensure the unit is receiving power. Remember to avoid attempting to operate the door with the manual release while power is interrupted. If you cannot get a response after a battery change, continue to sensor checks and reprogramming. Staying methodical prevents misdiagnosis and unnecessary parts replacement.
Safety Sensors and Travel Limits
Garage door openers rely on safety sensors; misalignment or dirty lenses are frequent culprits. Inspect the photo-eye sensors on both sides of the door; clean lenses and realign so the beam is unobstructed. If the door reverses unexpectedly or won’t close fully, re-check the travel limits and force settings in the opener’s control panel. After correcting alignment, run a full test to verify that the safety system functions reliably. Clear, proper alignment is often the difference between a stubborn issue and a smooth, safe close.
Re-pairing Remotes and Keyless Entry
With remotes and keypads, re-pairing often resolves issues that block operation. Locate the learn/pair button on the opener and follow the manual to initiate pairing. Within 30 seconds, press the desired button on the remote or enter the keypad code. Test each remote from different distances to confirm reliable communication. If your model uses rolling codes, complete the pairing promptly before codes reset. This step is crucial for consistent operation across devices.
Maintenance, Safety, and When to Call a Pro
Perform periodic maintenance like lubricating moving parts and inspecting tracks. Use a light white lithium grease on metal components, avoiding plastic gears. Check balance: with door closed, disconnect the opener and lift the door halfway; it should hold. If you feel resistance, misalignment, or abnormal noises persist, it’s time to contact a qualified technician. The GarageDoorAdjust team recommends handling basic maintenance yourself but seeking pro help when issues exceed routine fixes. Regular checks save you time and prevent costly failures.
Authority Sources
This guide references safety and operation standards from official sources and credible publications. Use these links to verify best practices and model-specific instructions, and always follow local electrical safety rules when servicing hardware.
Tools & Materials
- Power outlet tester(Checks that the outlet supplying the opener has power)
- Batteries for remotes(AA/AAA as appropriate for your remotes)
- Screwdrivers (Phillips & flathead)(To access the control panel and battery compartments)
- Ladder or step stool(Safe height to reach the opener unit)
- Lubricant (white lithium grease)(Lubricate drive rails and hinge points if stiffness is present)
- Pliers or needle-nose(Helpful for wire adjustments or sensor alignment)
Steps
Estimated time: 45-75 minutes
- 1
Power and circuit check
Unplug the opener or switch off the circuit breaker to ensure safety. Inspect the outlet for power using a tester. Restore power only after confirming it is safe to work.
Tip: If the outlet is controlled by a wall switch, test it from both sides to confirm it remains powered. - 2
Replace remote batteries
Open each remote, replace batteries with fresh ones, and test the LED indicator. If remotes still fail, try a known-good remote.
Tip: Keep a spare battery type consistent with each remote to avoid compatibility issues. - 3
Test the wall switch and manual release
Confirm the wall button opens the door or stops movement. If the door is stuck, use the manual release to verify the chain/belt is free.
Tip: Never force the door; use the release cord while the door is supported. - 4
Sensor alignment check
Inspect photo-eye sensors on both sides of the door. Clean lenses and realign so the beam is unobstructed. A misaligned sensor can prevent operation.
Tip: Use a level to align sensors at equal height on both sides. - 5
Re-pair remotes and keyless entry
Follow your opener model's manual to pair remotes and any keypad. Usually involves pressing a learn button and then issuing a remote command.
Tip: If your model has a rolling code system, complete the pairing within a few minutes before the code resets. - 6
Check drive mechanism and tracks
Inspect the belt/chain for wear, lubricate rails, and ensure the door moves smoothly along the tracks. Misalignment or friction slows or stops operation.
Tip: Wipe away dust from tracks; debris can cause binding. - 7
Reset and test the opener
Power the unit back on, perform a full function test, and ensure up/down, stop, and safety reverse work as expected.
Tip: If safety reversal doesn't work, stop using the door and consult a pro.
Got Questions?
Why won't my garage door opener work?
Common causes include dead batteries, misaligned safety sensors, or a tripped circuit breaker. Follow the steps above to diagnose each area and restore function.
Common causes are dead batteries, misaligned sensors, or a tripped circuit breaker. Start with those areas and test each one.
How do I reprogram my remote?
Refer to your opener's manual for the specific learn button sequence. Usually you press and release a learn button, then press a button on the remote to pair.
Use the learn button method from your manual, then press a button on the remote to pair.
Should I reset the opener after a power outage?
Power outages can reset some openers. After restoring power, re-program remotes if needed and run a full test.
After power returns, reprogram remotes if needed and test the system.
Why does one side of the door move but not the other?
This usually indicates track or cable wear, or misalignment of the drive system. Inspect tracks and balance the door.
It’s often due to track wear or balance issues; check the tracks and balance the door.
Is it safe to lubricate the tracks?
Lubrication helps smooth motion, but avoid over-lubricating belts or chains. Use white lithium grease on metal parts.
Lubrication can help, but don’t overdo it—use a light metal lubricant on rails.
When should I replace my garage door opener?
If the unit is older than 15-20 years or requires frequent repairs, replacement is often more economical and safer.
If it's very old or needs constant repairs, consider replacement.
Watch Video
Quick Summary
- Verify power and batteries first.
- Re-pair remotes and reset for reliability.
- Align photo-eye sensors to restore function.
- Lubricate moving parts and check tracks.
- Call a pro if the door still won’t operate safely.