How to Program a Garage Door Opener
Learn how to program your garage door opener safely and efficiently. This expert guide covers locating the learn button, clearing codes, pairing remotes, keypad setup, and testing. Updated for 2026 by GarageDoorAdjust.

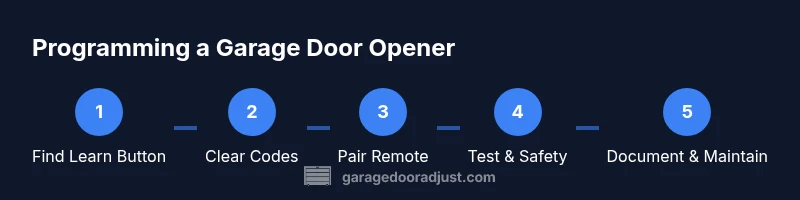
You will learn how to program a garage door opener, including locating the learn button, clearing codes, pairing remotes, and testing operation. This guide covers common models, safety considerations, and best-practice steps to help homeowners complete the task confidently. By following these steps, you’ll enhance security and convenience while preventing common misprogramming errors.
Understanding the basics of programming a garage door opener
Programming a garage door opener is a practical, hands-on task that most homeowners can perform in under an hour if they follow a clear, model-appropriate sequence. The core idea is to teach the opener to recognize your remotes or keypads and to establish secure, rolling-code communication between devices. Throughout this guide you’ll see practical, model-agnostic steps, with pointers to your specific manual. According to GarageDoorAdjust, understanding your opener’s learning protocol is the foundation for successful pairing. Start by identifying your opener brand and model, then locate the Learn button on the motor housing. When you see the LED indicator, you’ll know the unit is ready to enter programming mode. You’ll also learn to recognize differences between rolling-code and fixed-code remotes, which affects how you complete the next steps. By the end, you’ll be able to add remotes, keypads, and even smart devices with confidence, while keeping your family safe.
This section sets expectations and clarifies terms like “learn button,” “pairing,” and “codes.” A basic understanding helps you avoid common mistakes. Remember that each model can have small variations, so use your manual for confirmation if something feels different. The overall process, though, remains consistent: prepare the space, access pairing mode, learn new devices, and verify operation with a test run. The goal is a smooth, secure setup you can repeat whenever you acquire a new remote or upgrade components.
Safety and compatibility checks before you start
Before you touch the hardware, take a moment to verify safety and compatibility. Ensure the power to the opener is disconnected to avoid accidental movement while you remove covers. Keep the work area clear of pets and children, and wear safety glasses if you’re working near moving parts. If you use a ladder, set it on a hard, level surface and have a helper spot you. Check the door balance and spring tension as described in your manual because misalignment can lead to unexpected movement during testing. Review the compatibility notes for your remotes or keypad: some models require digital codes or a specific sequence for programming. This preparation reduces the risk of unintended door movement and makes the process smoother for beginners, as GarageDoorAdjust Team would assure.
A calm, methodical approach minimizes risk. If you’re unsure about your door’s balance or spring tension, postpone programming until you’ve consulted the manual or a professional. Safety matters with garage doors because a mis-timed movement can cause injury or property damage. Keep a flashlight handy to see inside the housing and avoid forcing components that resist movement. After this step, you should be ready to locate the learn button and begin the pairing process with confidence.
Identify opener type and locate the Learn button
Different openers place the Learn button in different spots, but common locations include the back or side of the motor housing, under a light cover, or near the line of wiring near the gears. The button can be recessed or small, and the LED near it signals when the unit is in programming mode. If you’re unsure, consult the model-specific manual or search the model number online. Knowing whether your unit uses rolling-code remotes or fixed-code remotes helps you follow the correct steps for pairing. For most homeowners, locating the Learn button is the key first actionable step that allows the rest of the process to proceed.
Tip: If you can’t find the button, photograph the exposure area, check the user manual, or contact the manufacturer’s support line. Quick confirmation with the manual saves time and avoids accidental damage to components. In this guide, you’ll be guided step-by-step on how to press and release the Learn button correctly, how long to hold it, and what LED patterns to look for to confirm programming readiness.
Clear existing codes and prepare to pair new devices
Clearing previously learned codes ensures that you won’t accidentally trigger the door with an old remote. This step usually involves pressing and holding the Learn button until the LED changes pattern or goes out, then releasing. Some models require a second activation to erase all existing codes. After clearing, wait a few seconds for the unit to be ready for new learning, as indicated by the LED. This reset is especially important if you are replacing remotes or adding a keypad, and it prevents cross-talk between devices.
Why this matters: clearing codes reduces confusion and ensures that only the devices you intend will operate the door. If you’re unsure about timing, refer to your manual or the manufacturer’s support site. Always re-check the LED pattern to confirm the unit is ready before attempting to pair a remote or keypad.
Program a remote: basic pairing steps for most models
To program a remote, press and hold the desired button on the remote, then trigger the Learn button on the opener as described in your manual. Keep the remote steady and close to the opener during the process, and watch the LED pattern to confirm a successful pairing. In many units, the LED will blink or go solid for a moment, then stop blinking when the pairing is complete. Do this for each remote you want to use.
Pro tip: Program one remote at a time to avoid confusion. If you’re programming a keypad, you’ll use a similar timing window and must follow the keypad manufacturer’s steps after the Learn button is engaged. If a remote fails to pair, try again with the battery freshly installed and keep the device within a few feet of the opener.
Program a keypad or wall console (if applicable)
Keypads or wall consoles let you operate the door without a remote. The keypad uses a code that you enter, while the wall console uses a button sequence. After you’ve placed the opener in programming mode, follow the keypad’s instructions to enter your chosen code and complete pairing. The LED should signal the success of the operation. If your keypad uses a separate learning mode, you may need to press a specific key combination (consult the manual) to finalize the link between the keypad and the opener.
Tip: Choose a code that’s easy to remember but hard for others to guess. After programming, check that the keypad reliably opens and closes the door from the desired distance. Use a schedule or a note to track which remotes and keypads have been added.
Test operations and verify safety
With all devices programmed, test each remote and keypad to ensure they operate the door reliably. Stand clear of the door’s path and observe the door’s travel from multiple angles. If the door hesitates or reverses unexpectedly, stop using the device and re-check the Learn button sequence, distance to the opener, and battery condition. Do a quick safety check of the sensors—if the beam is blocked, the door should stop and reverse. Correct any misalignment before resuming regular use to prevent injury.
This step ensures reliability and safety, confirming that every device you added behaves exactly as intended.
Advanced considerations: rolling codes, compatibility, and security
Rolling-code technology enhances security by ensuring that each remote uses a unique code. Some older remotes use fixed codes, which are less secure and harder to integrate with newer remotes or smart devices. If you replace the opener or add a smart hub, verify compatibility with your existing remotes and keypad. When working with modern systems, you may need to perform a full factory reset or re-learn each device. Document model numbers, firmware versions (if available), and the steps you followed so you can re-create the setup if needed in the future.
Keep in mind that safety, privacy, and security are critical. If you’re unsure about compatibility or security implications, contact the manufacturer or a licensed technician to avoid creating vulnerabilities in your home system.
Common pitfalls and how to avoid them
Common mistakes include pressing the Learn button for too long, attempting to pair a remote while the door is moving, or failing to replace batteries before testing. Always perform programming on a stable, flat surface and with hands free of jewelry or loose clothing. If the door moves unexpectedly, stop and re-check the sequence. Do not attempt to bypass safety features or override sensors. Finally, never rely solely on online tutorials; consult your model’s official manual for any model-specific steps.
Sticking to the documented steps and following safety precautions reduces errors and improves reliability. As a rule, if a device refuses to pair after multiple attempts, verify compatibility and consider professional assistance.
Model-specific notes and when to call a pro
Some brands require specific codes or smartphone apps for programming. If you have a newer model and can’t locate a Learn button, or if the LED behavior doesn’t match the manual’s description, consult the manufacturer’s support page or call their helpline. A licensed technician can handle electrical connections, sensor alignment, and complex setups safely and efficiently, especially when multiple openers are installed. The goal is to ensure security and prevent failures that could jeopardize safety or convenience.
Maintenance, security reminders, and next steps
After programming, reset, test, and document your setup. Replace batteries on remotes regularly and update any connected smart-home integrations. Use a tamper-resistant cover for exposed wiring where possible and ensure the sensors stay clean and aligned for reliable operation. Schedule periodic checks—every 6 to 12 months—to inspect springs, cables, rollers, and tracks. Regular maintenance reduces wear, lowers the risk of sudden failures, and keeps your garage door system secure for 2026 and beyond.
Tools & Materials
- Non-contact voltage tester(Use to verify power is off before inspecting wiring.)
- Flathead screwdriver(Remove housing screws and panel covers.)
- Phillips screwdriver(Remove screws securing the motor housing or control panel.)
- Ladder (at least 6 ft)(Stable and on a flat surface; have a spotter if possible.)
- Marker or tape(Label remotes and note the Learn button location.)
- Owner’s manual for your opener model(Reference for Learn button timing and codes.)
- Replacement remote batteries(Fresh batteries improve reliability.)
- Smartphone or camera (optional)(Take photos of connections for reference.)
- Clean rag(Wipe dust from sensors or lens areas if needed.)
Steps
Estimated time: 60-90 minutes
- 1
Identify opener type and locate Learn button
Find your model’s Learn button on the motor housing or inside the cover. Determine if the unit uses rolling-code remotes, fixed-code remotes, or both. This step confirms the correct sequence for pairing and prevents incorrect timing.
Tip: If you can’t locate the button, photograph the area and consult the model manual or manufacturer site. - 2
Power down and prepare the area
Unplug the opener or switch off the circuit breaker. Remove any housing covers to access the Learn button, and clear the area of people and pets. Ensure you’re working on a stable ladder and wearing eye protection if needed.
Tip: Never program with the door moving or the motor energized. - 3
Clear existing codes
Press and hold the Learn button until the LED changes state (blinking or turns off). Release and wait 5–10 seconds to ensure the unit is reset. This step prevents old codes from interfering with new devices.
Tip: Make sure you’re near the opener so you can observe the LED feedback clearly. - 4
Program the first remote
With the Learn button engaged, press and hold the remote button you want to program. Release the Learn button once the LED indicates success (pattern or blink). Test the remote from a few feet away.
Tip: Program one remote at a time to avoid confusion. - 5
Program additional remotes or keypads
Repeat the pairing process for each additional remote or keypad. Some models require a specific code entry on the keypad after Learn button activation.
Tip: Label each remote to avoid mixing codes in the future. - 6
Test operation from all devices
Test each programmed device by pressing its button to operate the door. Confirm the door opens and closes smoothly without delay and that the safety sensors respond.
Tip: Test from multiple angles to ensure reliable range. - 7
Check sensors and door balance
Wave an object in the beam to confirm the safety sensor stops the door if interrupted. Verify tracks and springs are aligned and door balance is proper.
Tip: If the beam is misaligned, adjust sensors before use. - 8
Document settings and test again
Record which remotes, keypads, and codes you programmed. Re-test after any changes and ensure all devices continue to function.
Tip: Keep a simple log for future maintenance or changes. - 9
Troubleshoot and seek help if needed
If programming fails after multiple attempts, power cycle the unit and reattempt. If issues persist, contact the manufacturer or a licensed technician.
Tip: Avoid forcing components; persistent issues often indicate compatibility or safety concerns.
Got Questions?
Will programming erase other remotes?
Most models allow you to add or re-learn remotes without erasing all existing ones. Some may require re-learning everything if you reset the unit. Always refer to your manual for model-specific behavior.
Most openers let you add remotes without erasing others, but check your model's manual for the exact behavior.
Do I need to unplug the opener while programming?
Power should be off only during the initial safety checks or when removing covers. In most steps you’ll keep power on, but avoid operating the door while making connections or removing covers.
Usually you don’t unplug the unit during programming, except for safety steps when removing covers.
Can I program a keypad myself?
Yes. Keypad programming uses a code you enter and follows the Learn button sequence. The keypad may have its own pairing steps—check the manual for exact instructions.
Yes, you can program a keypad yourself by following the Learn button steps and keypad instructions.
What if the Learn button won’t light?
If the Learn button doesn’t illuminate, recheck power and wiring, ensure the button isn’t clogged, and consult the manual. Some units require a reset or battery check.
If the Learn button won’t light, verify power and consult the manual; you may need a reset.
Is it safe to program with the door open?
It is safer to program with the door fully closed or in a controlled position. Do not stand under or near the door during testing, and ensure the area is clear.
Programming is safer when the door is closed or stationary; keep the area clear during testing.
Watch Video
Quick Summary
- Identify opener type before starting.
- Clear codes before pairing remotes.
- Test all devices after programming.
- Document settings for future maintenance.