Genie Garage Door Opener Programming: A Homeowners Guide
Learn how to program Genie garage door openers, troubleshoot remotes and keypads, and safely pair devices. This comprehensive home guide covers timing, batteries, and model variations for reliable operation.

Genie garage door opener programming can restore reliable remote access and keypad control in minutes. This guide explains how to pair Genie remotes, keypad inputs, and mobile controls, plus common troubleshooting tips for timing, batteries, and model variations. By following the steps, homeowners will safe-program multiple devices, reduce garage-door misfires, and keep safety sensors aligned. According to GarageDoorAdjust, correct programming cuts service calls and boosts daily convenience.
Why Genie Garage Door Opener Programming Matters
Genie garage door opener programming is a foundational skill for homeowners who want fast access and reliable safety. When remotes, keypads, or mobile controls aren’t properly paired, doors may respond inconsistently or not at all, creating frustration and potential hazards. According to GarageDoorAdjust, a large share of service calls comes from incorrect or incomplete programming, not a faulty motor. This guide focuses on Genie models because they use standardized Learn-button workflows that, once understood, unlock quick, repeatable results for most remotes and keypads. Whether you’re replacing a lost remote, adding a keypad for family access, or pairing a new smartphone control, the core steps remain consistent, but the exact timing and button presses depend on the model. By mastering Genie programming, you gain confidence, save time, and reduce wear on the door and opener. You’ll also improve safety by ensuring safety sensors and auto-reverse features stay correctly aligned after any changes.
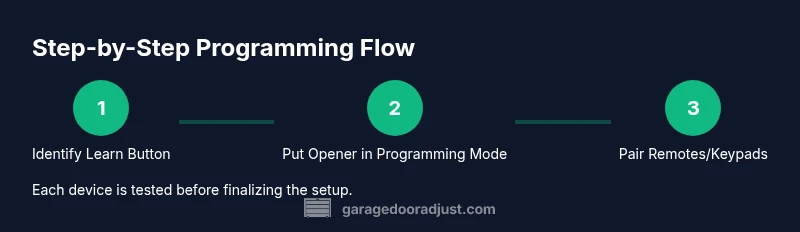
In practice, Genie programming boils down to three things: identifying the correct device to pair (remote, keypad, or app), placing the opener in programming mode, and confirming the new device works from a safe, stable position. Small mistakes—like using old batteries, pressing Learn for the wrong duration, or attempting to pair while the door is in motion—are common culprits. This article walks you through each step with practical checks, model-specific notes, and safeguards to help you finish with confidence.
Understanding Genie Systems: Learn Buttons, Remotes, and Keypads
Genie uses a few core concepts that repeat across most models: a Learn button on the motor housing, a status LED that indicates when you’re in programming mode, and one or more devices that send signals to the opener. Remotes are convenient for daily access, while wireless keypads expand entry options without carrying a fob. Genie's newer systems may also support mobile apps, allowing you to control the opener from a phone, which adds layers of security practices such as PIN entry and remote disarming.
Key distinctions to keep in mind include the location of the Learn button (behind an access plate on the opener), the LED behavior during programming, and whether you need to reset existing remotes before adding new ones. If you’re replacing a remote, you typically don’t erase the others—unless the model requires a full reset. For keypad programming, you’ll enter a code and then teach the keypad to transmit a unique signal to the opener. Rolling-code technology is standard, helping prevent code theft and unauthorized access. Understanding these basics helps you diagnose issues and plan how many devices you want to pair.
Getting Ready: Tools, Safety, and Prep
Before touching the opener, collect a few essential tools and prepare your workspace:
- A Genie remote control and, if available, the keypad or mobile app access
- Fresh batteries for remotes and keypad batteries if applicable
- A sturdy ladder or step stool to reach the opener safely
- A clean, dry workspace free of clutter near the garage door
- The model number and a quick reference to your owner’s manual (for model-specific nuances)
- A notepad or digital log to record programming steps and device codes
Safety first: keep hands, fingers, and clothing away from the door and springs. If you’re unfamiliar with garage-door hardware or your system is unusually heavy or noisy, pause and seek professional help. The goal is to keep you and your family safe while you complete the programming steps.
Step-by-Step Overview for Programming a Genie Remote
This section provides a concise overview of the commonly used steps for Genie remote programming. It’s designed to align with the full, model-specific instructions in your manual and the detailed steps that follow later in this article. You’ll typically:
- Confirm the opener is powered and stationary before starting
- Locate the Learn button on the motor housing and prepare the LED cue
- Use the remote to send a signal once the opener is in programming mode
- Test the remote from the car or doorway to confirm close/open responses
- Repeat for any additional remotes or keypads you want to pair
Remember that some models may vary in the Learn button duration or sequence, so always cross-check with your manual.
If you encounter a mismatch between the device and the opener’s response, recheck battery levels and repeat the process with the Learn button timing adjusted as shown in your model’s guide.
Common Issues and How to Troubleshoot Genie Garage Door Opener Programming
Programming issues are common and solvable with a few targeted checks. Common symptoms include remotes not responding, keypad entries failing, or the LED not blinking as expected. Potential fixes:
- Replace remote batteries and try again
- Ensure the opener is idle (door fully closed and not moving) before initiating programming
- Confirm you’re using the correct Learn button for your model and press duration as specified
- If the LED does not blink, you may be in a locked-out state or require a full reset of the opener (consult the manual)
- Check safety sensors to ensure they are aligned and unobstructed; misalignment can interfere with programming feedback
Document which remote or keypad you pair and test, then proceed to the next device with the same approach.
Advanced Configurations: Keypad Setup, Multiple Remotes, and Security
Beyond basic remote pairing, you can configure multiple devices and enhance security features. Keypad programming often involves entering a PIN, then sending a signal to the opener. You can also pair additional remotes to control the same door, while noting how different devices may be assigned unique signals. If you’re integrating with a smartphone app, ensure your Wi-Fi or Bluetooth connections are stable and that the app’s permissions align with your opener model. Consider enabling auto-reverse and sensor calibration after new devices are added, since changes can influence safety features. For households with frequent comings and goings, setting up a second remote for a trusted family member can streamline daily routines while preserving security.
Be mindful that some models require a factory reset to erase old codes before adding new ones. Always log each code or device during setup so you can retrace steps if something goes wrong.
Maintenance After Programming: Safety Checks and Best Practices
After programming, perform a quick test routine to confirm proper operation and safety compliance. Verify that the door opens and closes fully, reverses on contact with an obstacle, and that the infrared sensors align correctly to prevent injury. Keep batteries fresh and maintain a clean contact surface on remotes and keypad modules. Periodically re-check the Learn button’s function, as dust or wear can affect the timing and reliability of future programming attempts. As a best practice, maintain a simple inventory of devices paired with the opener, including model numbers and the dates of programming. This makes future updates smoother and reduces the risk of stray remotes or compromised access.
Finally, schedule a yearly safety review for your garage door system. Regular checks help catch sensor misalignment, worn springs, or loose hardware that could impact programming outcomes.
Authoritative References and Safety Standards
For safety and best practices beyond home guidance, consult official standards and safety resources:
- https://www.osha.gov/
- https://www.cpsc.gov/
- https://www.ul.com/
These sources provide foundational guidance on electrical safety, consumer product safety, and industry standards that underpin safe garage door operation. While the Genie-specific steps come from manufacturer guidance, applying general safety and wiring standards helps ensure you perform programming without compromising personal safety or household security.
Tools & Materials
- Genie remote control(Have spare batteries on hand; confirm compatibility with your model)
- New batteries(Replace batteries in remotes/keypad before programming)
- Stable ladder or step stool(Ensure a firm stance and avoid overreaching)
- Owner’s manual (model-specific)(Identify Learn button location and timing for your model)
- Notepad or log(Record device IDs and programming steps for future reference)
- Screwdriver (Phillips)(Only if access plates require removal)
Steps
Estimated time: 20-30 minutes
- 1
Identify the Learn button and model
Power the opener and locate the Learn button on the motor housing. Confirm the LED indicator behavior for your model, as timing and location can vary between Genie models. This step ensures you’re working with the correct device to pair.
Tip: If unsure, photograph the button and LED pattern for reference. - 2
Check batteries and prepare remote
Replace batteries in the remote or keypad, then test the device's own light or button response. Fresh power reduces false negatives during programming and improves reliability.
Tip: Always use the recommended battery type for your remote. - 3
Put the opener into programming mode
Hold or press the Learn button until the LED blinks or stays solid—per model instructions. Don’t rush this step; timing often determines success.
Tip: If the LED doesn’t respond, reset the opener as described in the manual before retrying. - 4
Program each remote or keypad
While the opener remains in programming mode, press and hold the remote button (or enter the keypad PIN) to transmit a signal. Wait for the LED to confirm the pairing before moving to the next device.
Tip: Program one device at a time to avoid confusion. - 5
Test device operation
Test that each remote and keypad opens and closes the door from the intended location. Check both directions and verify safety sensors respond to the full door travel.
Tip: Test from multiple locations to ensure consistent signal strength. - 6
Document and finish
Record the devices paired (model, serial, and codes if applicable) and confirm the door remains safe after programming. Complete any remaining setup like re-enabling keypad security features if applicable.
Tip: Keep your notes in a known, easily accessible place.
Got Questions?
How do I program a Genie remote to a Genie garage door opener?
To program, locate the Learn button on the opener, then press and hold the remote button until the LED indicator responds. Follow the model-specific prompts and test the remote after pairing.
Locate the Learn button on the opener, press and hold the remote button until the LED signals, then test the remote to confirm it works.
Why isn’t my Genie remote programming working?
Check batteries, ensure the opener is idle, verify you press the Learn button for the correct duration, and consult the manual for model differences. If needed, reset the opener and try again.
First, check the batteries and make sure the door is still. If needed, reset the opener and retry with the correct Learn-button timing.
Can I program a keypad after programming remotes?
Yes. Enter the keypad code, then initiate the device pairing as described in your manual. Ensure the keypad has fresh batteries and is within range of the opener.
Yes. After pairing remotes, enter the keypad PIN and complete the pairing sequence.
Should I reset my Genie opener before adding a new device?
Some Genie models require a reset to erase old codes before adding new ones. Check the manual to confirm whether a reset is needed for your model.
Some models need a reset before adding new devices. Check your manual to be sure.
How can I verify multiple remotes are paired correctly?
Test each remote from its usual location and a secondary location. Confirm that each one opens and closes the door consistently without interference.
Test each remote from its usual and secondary locations to confirm it works reliably.
Where can I find model-specific Genie programming instructions?
Refer to your Genie model’s user manual or Genie’s official support site. If you no longer have the manual, search the model number on the manufacturer’s site for the exact steps.
Check the manual or Genie’s official site for exact steps for your model.
Watch Video
Quick Summary
- Power up devices and verify model specifics before programming
- Program devices one at a time to avoid conflicts
- Test door operation from multiple points after pairing
- Keep a log of paired devices for easy future updates
- Follow safety guidelines to prevent injuries during setup