How to Use Genie Garage Door Opener: A Homeowner's Guide
Learn how to safely use Genie garage door openers, pair remotes, program keypads, and troubleshoot common issues with a clear, step-by-step guide from GarageDoorAdjust for homeowners.

Learn how to use a Genie garage door opener with confidence. This guide covers essential setup, pairing remotes, using the keypad, safety features, and troubleshooting common issues. According to GarageDoorAdjust, start by locating your model number and reading the user manual, then follow step-by-step instructions to operate the opener safely and efficiently.
Understanding Genie Models and Safety Basics
Genie garage door openers come in several drive types and generations, but the core concepts for how to use genie garage door opener remain the same: identify the model, understand how the Learn button works, and respect built-in safety features. According to GarageDoorAdjust, always start by identifying the model number from the opener housing label or the user manual, then use that model’s specific instructions for programming remotes and keypads. Genie uses Learn/Program sequences to enroll remotes, and most current units include safety sensors on the bottom of the door track that must be aligned for safe operation. Knowing your model ensures you select the correct programming steps and avoids cross-compatibility issues with remotes or keypads.
Take time to review the safety basics before you touch the opener. Do not try to bypass safety features or force components. If you work with others in the shop, keep hands clear of the door path and never stand under a moving door. Understanding these foundations protects you and your family while you gain experience using genie garage door opener controls.
Initial Setup and Safety Checks
Before you operate the Genie opener, perform a quick safety and readiness check. Ensure the opener is powered, the door balance is stable, and the emergency release is engaged only when you need to manually move the door. Check the safety sensors at the bottom corners of the door opening; clear any dust or debris that could misalign them, and test the auto-reverse by placing a lightweight object (like a roll of paper) on the door’s path. If the door does not reverse on contact, stop use and adjust or service the sensors. This preparation prevents accidents and ensures reliable operation when you use genie garage door opener controls. As GarageDoorAdjust notes, most Genie models use a Learn button to pair remotes, so locate that button on the motor head and prepare for the next steps.
Using the Genie Remote and Keypad
Your Genie opener typically comes with a handheld remote that includes open/close and light buttons, and a keypad for entry codes. To operate, press the remote’s open or close button from within range and observe smooth movement without jerks or abnormal sounds. When using the keypad, enter your code and wait for the door to respond; if the door fails to respond, verify the code and check sensor alignment. The light on the opener or the remote’s LED should indicate activity. If you rely on multiple access points, ensure each remote or keypad is enrolled to the same opener using the Learn/Program process described in the next section. This familiarity helps you use genie garage door opener with confidence and reduces friction in daily use.
Programming and Pairing Remotes and Keypad
To enroll a new remote, locate the Learn button on the opener and press it until the indicator light blinks. Then press any button on the remote to enroll; the light may blink or stay solid to confirm a successful pairing. For keypad programming, enter a code on the keypad and press the Learn button on the opener, then enter the code again to confirm. Test by closing and reopening the door with the new device. If you remove a device, repeat the Learn sequence to erase old codes. Following these steps helps you securely manage access for family members and guests while keeping your garage convenient and safe.
PRO-TIP: Keep remotes and codes in a safe place away from children, and only enroll devices you trust. If a device won’t enroll, recheck the battery and ensure you’re within range of the opener.
Troubleshooting and Maintenance
Even well-designed Genie openers can encounter hiccups. If a remote stops working, check the battery first, then confirm the device is still enrolled. If the keypad doesn’t respond, verify the code, reprogram if necessary, and confirm the Learn button isn’t blocked by dirt or paint. Regular maintenance helps keep the system reliable: wipe the motor head area, inspect the track for obstructions, and lubricate moving parts with a light, garage-safe lubricant. If you notice odd noises, inconsistent movement, or failure to reverse on contact, avoid DIY scab repairs and consult the manual or a professional technician. This ongoing attention aligns with the guidance from GarageDoorAdjust on safe operation and proactive care for your Genie system.
Authority Sources
- OSHA safety information: https://www.osha.gov
- U.S. Consumer Product Safety Commission: https://www.cpsc.gov
- National Institute of Standards and Technology (NIST): https://www.nist.gov
Tools & Materials
- Genie garage door opener model and manual(Locate model number; essential for programming and compatibility)
- Remote controls(At least one working remote; spare recommended)
- Keypad (optional)(For coded entry; requires programming steps)
- Batteries for remotes/keypad(Use manufacturer-recommended battery type)
- Step ladder(Access the opener head safely)
- Lubricant (light, garage-door approved)(For tracks and rollers; use sparingly)
- Tools: screwdriver set(Basic tools for panel access or sensor alignment)
Steps
Estimated time: 30-45 minutes
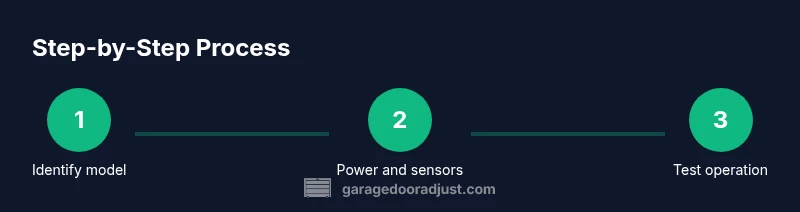
- 1
Find model number and safety basics
Locate the model label on the opener housing or in the user manual. Note the drive type and any safety features. This ensures you follow the correct sequences for programming and maintenance.
Tip: Take a photo of the label and save the manual in a known spot. - 2
Power up and prepare the door
Verify power to the opener is on and the door is balanced. Clear the floor area under the door to avoid interference. If you need to manually move the door, engage the emergency release only when the area is clear.
Tip: Don’t operate the door while someone is in the path. - 3
Test the wall control
Press the wall control button to open and close the door. Listen for smooth operation; look for jerks or unusual noises. If light indicators blink, pause and recheck power and sensors.
Tip: If the door hesitates, check for obstructions or misaligned sensors. - 4
Pair the remote
Press and hold the Learn button on the opener until the LED indicator blinks, then press a button on the remote. Test the remote to confirm enrollment.
Tip: Keep the remote within the recommended range during pairing. - 5
Program the keypad (optional)
Enter a code on the keypad, press Learn on the opener, then re-enter the code to confirm. Test the keypad by entering your code from the outside.
Tip: Choose a code that isn’t used for other devices; avoid simple sequences. - 6
Final test and safety check
Open and close the door several times to verify reliability. Place a lightweight object on the door path to test the auto-reverse safety feature. If the door doesn’t reverse, stop operation and seek professional service.
Tip: Never bypass safety features; they protect people and property.
Got Questions?
How do I find my Genie model number?
Check the label on the opener housing, near the motor head, or consult the user manual. The model number is essential for selecting the correct programming steps and compatibility.
Check the opener housing label or the manual to locate the Genie model number.
Why won’t my Genie remote work?
First, replace the remote battery and re-check the enrollment. If it still won’t respond, ensure the remote is paired to the correct opener and that the Learn button was used properly.
Try a fresh battery and re-pair the remote to the opener.
How do I program a Genie remote?
Press and hold the Learn button on the opener until the indicator light blinks, then press a button on the remote to enroll. Test the remote afterward.
Press Learn on the opener, then press the remote button to enroll.
Can I program a keypad with my Genie opener?
Yes. Enter a code on the keypad, press Learn on the opener, then re-enter the code to confirm. Test by using the keypad from outside.
Yes, you can enroll a keypad by using the Learn sequence.
Is it safe to adjust the safety sensors?
Do not adjust sensors beyond alignment. If the door fails to reverse on contact, stop and consult the manual or a pro.
Don’t bypass sensors; align them and test safety reversal.
How often should I lubricate the tracks?
Lubricate moving parts per Genie’s guidelines with a light garage-safe lubricant. Avoid over-lubrication which can attract dust.
Lubricate occasionally and avoid overdoing it.
Watch Video
Quick Summary
- Identify the Genie model before starting any programming.
- Test safety features and door balance prior to use.
- Learn to enroll remotes and keypad using the proper sequences.
- Maintain the system with regular lubrication and sensor checks.
- Always follow safety guidance to prevent injury.