How to program a Genie garage door opener
Learn how to program a Genie garage door opener with a clear, model-aware method. This guide covers memory clearing, pairing remotes, and testing for reliable operation—perfect for homeowners troubleshooting Genie openers.

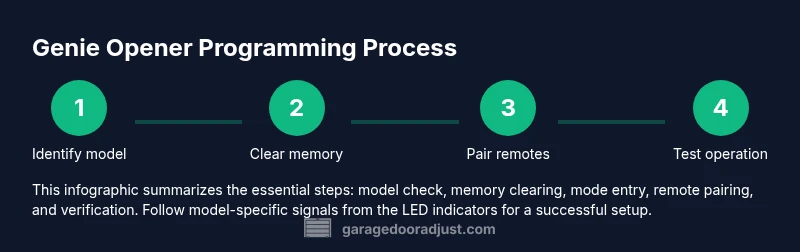
You will learn how to program a Genie garage door opener and pair remotes, including how to clear existing codes, enter programming mode, and test operation. This guide covers safety steps and model-specific notes to avoid mispairs, so you can regain quick, reliable door control.
Overview and prerequisites
Programming a Genie garage door opener starts with understanding your model and the remotes you plan to use. According to GarageDoorAdjust, begin by locating the Learn or Programming button on the opener and confirming the model number before you touch any buttons. The GarageDoorAdjust team found that most programming problems stem from trying the wrong model steps or attempting to program without a clear memory sequence. Before you begin, ensure the opener is powered, the area beneath the door is clear, and you have access to the remotes you want to pair. This initial preparation reduces the chance of mismatched signals and lingering codes that could prevent the door from responding correctly. Use a well-lit area and have a step ladder handy if the Learn button is mounted high. Safety first, then proceed with a calm, methodical approach.
Why it matters: Genie remotes and openers can share similar button patterns across models, but the exact sequence to enter programming is model-specific. Following a clear plan minimizes trial-and-error and protects you from unpredictable door movement during the process. For ongoing maintenance, GarageDoorAdjust recommends keeping the manual handy and recording the exact model and remote versions you own.
Identify your Genie model and remote type
Genie has multiple lines of openers and remotes with small but crucial differences in programming. The first step is to locate the model number on the opener housing, which is typically on a label near the motor head or under the cover. Once you know the model family (for example, a common Genie model might be part of the Intellicode or Connect lines), match your remote type to that family. The difference between remote types (rolling code vs fixed code, or different Learn button behaviors) will dictate the exact steps you follow. If you’re unsure, consult the product manual or contact Genie support to confirm compatibility before attempting to program. Having the correct model information helps prevent wasted attempts and incorrect button sequences.
Safety and prep checklist before programming
Before you start programming, take a moment to ensure the area around the door is clear and people are away from the path. If your garage door is heavy or you’re working on a ladder, consider having a helper spot you during the process. Disconnect power only if you’re directed to in your manual, otherwise leave the unit powered to avoid instability during programming. For safety, keep hands away from the door tracking and avoid standing directly under the door during any test. The GarageDoorAdjust team emphasizes using proper safety practices and verifying that all safety sensors remain aligned after any re-pairing.
Pro tip: If your opener has a light indicator, watch it closely during programming—LED behavior (blinking vs solid) often confirms successful actions or signals missteps. This quick feedback helps you adjust without guesswork.
Authority sources
- https://www.osha.gov/, Safety guidelines for garage doors and moving parts.
- https://www.consumerreports.org/ Major publication referencing consumer safety around home garage equipment.
- https://nsc.org/ National Safety Council guidance on preventing injuries with garage doors.
These sources provide safety-oriented context for the steps described here and help homeowners verify best practices when working on residential openers.
Testing, troubleshooting, and confirmation
After pairing a remote, test it from several distances to ensure consistent response. If the door doesn’t respond, re-check the Learn button sequence and the LED feedback; some Genies require an additional press on the remote after triggering the opener. If you need to erase all codes and start fresh, be sure you follow model-specific instructions—some Genies allow a full memory reset, while others require selective clearing. Document which remotes were paired and in which order to avoid confusion if you add or replace remotes later. GarageDoorAdjust notes that most ongoing issues stem from skipped steps or attempting to pair a remote that uses a different code system than the opener.
Final tips and next steps
If you have multiple remotes, repeat the pairing steps for each one, then test all remotes from common entry points (driveway, hallway, and inside). For those using a keypad or smart hub, ensure those devices are also reset or paired according to their own instructions. If issues persist after testing, it may be time to consult Genie support or consider a newer remote compatible with your model. The GarageDoorAdjust team recommends documenting your model, remote types, and dates of programming to simplify future maintenance and potential upgrades.
Tools & Materials
- Genie garage door opener remote(s)(Have at least one remote to program; additional remotes help.)
- Genie garage door opener motor unit access (ladder if needed)(Access the Learn/Program button safely.)
- Flathead screwdriver(Used only if the opener cover screws need removal.)
- Batteries for remotes(New batteries ensure reliable test results.)
- Owner's manual or model number handy(Helpful if you need model-specific steps.)
- Pen and paper or notes app(Record pairing outcomes and remote IDs.)
Steps
Estimated time: 8-12 minutes
- 1
Gather model info and remotes
Collect the opener’s model number and locate all remotes you intend to program. Verify compatibility to avoid trying the wrong sequence. This initial step prevents wasted effort and ensures you follow the correct, model-specific procedure.
Tip: Double-check the model number on the label near the motor housing before proceeding. - 2
Clear old codes from memory
Access the Learn/Program button on the opener and follow model-specific instructions to erase previously stored remote codes. This step prevents old signals from triggering the door during new programming.
Tip: Use a long tool or your finger if the Learn button is recessed; keep hands clear of the moving parts. - 3
Put the opener into programming mode
Initiate programming by the prescribed action (button press or switch) so the LED indicator signals the system is ready for pairing. Wait for the LED to show the expected pattern (blink or solid) per your model.
Tip: If the LED behavior doesn’t change, re-check that you’ve cleared memory and are using the correct Learn sequence. - 4
Program the remote
While the opener is in programming mode, press a button on the Genie remote until the indicator confirms a successful pairing. Repeat for each remote you want to program.
Tip: Program one remote at a time to avoid cross-interference between devices. - 5
Test the remote and door response
With power restored as needed, stand within a typical distance and press the remote’s button. The door should respond smoothly—if not, reattempt with the steps in a slightly altered sequence or consult the manual.
Tip: Test from both indoors and outdoors to ensure consistent performance for all access points. - 6
Add keypad or smart controller (optional)
If you have a keypad or smart home integration, follow their guidelines to pair with the Genie opener after remotes are configured. Some integrations require different pairing steps.
Tip: Keep the keypad location accessible and update any security codes after setup.
Got Questions?
Do I need to unplug the opener during programming?
Typically no. Most Genie programming steps rely on the Learn/Program button and remote presses while the unit remains powered. Follow the brand guidance for your exact model to avoid unsafe disconnections.
Usually you don’t need to unplug the opener. Use the Learn button and remote presses as directed by your model’s manual.
Can I program multiple remotes to the same opener?
Yes. After you clear memory, you can pair each remote one by one. Test each remote after pairing to verify all are functioning correctly.
Yes, you can program multiple remotes one by one and test them all after pairing.
What if the LED on the opener doesn’t blink during programming?
If the LED doesn’t blink, you may have not cleared the memory or selected the correct programming mode for your model. Revisit the manual to confirm the exact steps for your Genie opener.
If the LED doesn’t blink, re-check memory clearing and the programming sequence for your model.
Will these steps work with Intellicode or other Genie lines?
Genie Intellicode and non-Intellicode remotes can differ in sequencing. Always confirm your specific model’s requirements, as some lines use a longer press or different LED signals.
Always check your model’s exact steps since some Genie lines use different signals.
How do I erase all codes and start fresh?
Use the memory-clear procedure specified for your model. This often involves holding the Learn button for several seconds until the indicator changes, then re-pairing remotes.
Use the model-specific memory-clear procedure and then re-pair remotes one by one.
What should I do if my remote won’t pair after repeated attempts?
Ensure the remote’s battery is fresh, confirm you’re using the correct Learn sequence for your model, and verify you’re within range during pairing. If problems persist, contact Genie support.
Check battery, model-specific steps, and try within range; contact support if needed.
Watch Video
Quick Summary
- Verify Genie model before programming.
- Clear memory to avoid stale codes.
- Program remotes one at a time for clarity.
- Test from multiple locations to confirm reliability.
- Document model and remotes for future reference.