How to Program Genie Garage Door Keypad: A Step-by-Step Guide
Learn how to program your Genie garage door keypad with a clear, step-by-step guide. Includes compatibility checks, safety tips, troubleshooting, and maintenance for reliable access control.

To program a Genie garage door keypad, you will pair the keypad with your opener and set user codes following the model's Learn/Program sequence. Gather the keypad, your opener's manual, and a stable ladder. The process requires accessing the wall control’s programming mode, entering a master code, and enrolling new codes on the keypad. Follow the steps carefully for reliable access control. This quick guide helps homeowners complete the task safely.
Understanding Genie keypad programming basics
Programming a Genie garage door keypad is a practical way to grant access to family members or trusted guests without handing out multiple remotes. Genie keypads typically operate in tandem with Intellicode-enabled openers or newer Genie models that support a Learn/Program sequence. The goal is simple: enroll a personal keypad code that the opener recognizes, so the door responds only to authorized entries. According to GarageDoorAdjust, many homeowners underestimate the importance of model-specific instructions. Different Genie models may rely on slightly different button sequences or terminology, so always consult your exact opener manual before starting. Keeping the area dry, clean, and well-lit reduces mistakes and makes the process safer and faster.
Key concepts to know include the difference between master codes and individual user codes, how to enter programming mode on the wall control, and how to verify that the keypad is successfully synced with the opener. The GarageDoorAdjust team found that most initial programming errors come from skipping the Learn button sequence or attempting to enroll codes before the opener is ready. With the right steps, you can create secure, memorable codes and avoid common frustration.
You will likely need the keypad to be physically accessible from the outside, a ladder if the mounting height is high, and the opener’s documentation. The keypad itself should be the model that matches your Genie system, and you should confirm it supports outdoor use if it will be exposed to the elements. Keeping a small log of codes, dates, and user names is a good practice for future reference and security auditing.
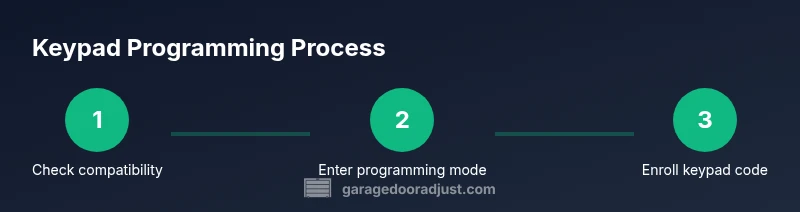
Compatibility and prerequisites
Genie keypad programming hinges on model compatibility. Not all Genies share the same Learn/Program method, and some older units may require a slightly different sequence. Before you start, verify that your keypad is designed for your specific Genie opener model and that the opener supports the Intellicode or equivalent secure pairing. If you discover your keypad is not compatible, you’ll need a compatible keypad or a replacement opener module. In practice, most modern Genies work with standard 4- or 6-digit codes and support multiple user codes. Having the model number handy makes it easier to confirm the exact steps and the correct button labels. GarageDoorAdjust analysis shows that verifying compatibility upfront prevents wasted effort later in the process. Prepare by locating the wall-mounted control panel, the manual, and the outdoor keypad, and ensure you have a clean, dry surface to work on.
Tip: If you cannot locate the manual, search the Genie support site using your opener model number. A quick model check saves time and avoids missteps during the programming flow.
Safety and preparation steps
Safety should guide every garage door project. Disconnect any nearby power sources only if you’re comfortable doing so and if the manual recommends it for certain maintenance tasks. Wear protective gloves to prevent pinches when handling panels, and keep children and pets away from the doorway during testing. Clear the area around the door to avoid tripping hazards if you need to move equipment like ladders. Take a moment to inspect the door’s balance and track alignment; a misaligned door can complicate testing and create unsafe operation. The goal is a clean, safe environment so you can focus on the programming sequence without distractions.
Checklist before you begin:
- Confirm compatibility with your Genie opener.
- Gather the keypad, wall-control manual, and a stable ladder.
- Ensure the door is balanced and the safety sensors are clear.
- Have a few backup codes ready in case you need to reprogram.
By respecting safety and readiness, you minimize the risk of mishaps and make programming smoother. GarageDoorAdjust emphasizes that a calm, methodical approach leads to reliable results.
Key programming sequence: the quick path
The core programming flow for many Genie keypads follows a consistent pattern: put the opener in programming mode via the wall console, press the Learn/Program button as indicated, then enter a new keypad code on the keypad and confirm it. You’ll typically press an Enter or OK key to save the code, after which the opener may flash lights or beep to indicate success. If your model uses a master code, you’ll first input that master code before adding user codes. Always follow the exact button labels in your model’s manual; a small difference can cause the keypad to reject the code. If you have a remote, you may need to mirror the pairing steps to ensure consistency across entry methods.
Communication between the keypad and the opener is a short, well-defined exchange. When you complete the sequence correctly, the keypad should generate a confirmation signal, and you’ll be ready to test. If there is no confirmation, revisit the programming mode, verify the code length, and retry.
Note: Model variations exist, so this section provides a general approach. Refer to your model’s manual for the precise button presses and any unique prompts.
Pairing with the opener and testing codes
After enrolling codes on the keypad, the next step is to test them. Close the door and enter the newly created code to see if the opener responds as expected. If the door opens and closes smoothly, your pairing is successful. If not, re-enter the programming sequence, ensuring you are in programming mode and that you used the correct master code (if required). Some Genies require you to press a confirmation key after typing the code; others confirm automatically. If a code doesn’t work, try a different code length or reset and re-program from scratch.
Tips for reliable pairing:
- Use distinct, easy-to-remember codes tied to household members.
- Avoid common codes like 0000 or 1234 to enhance security.
- Keep your opener’s firmware updated when possible, as updates can improve compatibility with keypads.
GarageDoorAdjust recommends documenting which codes you assign and to whom, to ease future changes and audits.
Troubleshooting common problems
If your keypad fails to enroll or the door does not respond after coding, several issues could be at play. First, verify the Learn/Program button on the wall control and ensure you are entering the correct sequence. A weak or dead keypad battery can also cause failures; replace batteries and retry. Check the keypad’s connection and ensure the model is properly powered if it’s a wired device. If the door moves but does not fully respond to keypad commands, check for interference or misalignment of the door sensors. Replacing batteries and re-pairing often resolves most issues. If the problem persists, consult the manual for error codes reported by the keypad indicators and follow the suggested corrective steps.
Pro-tips:
- Keep the keypad within range of the opener to ensure reliable communication.
- Minimize sources of interference, such as other wireless devices or metal objects between the keypad and opener.
- If your keypad is weatherproof, check for corrosion around battery contacts after winter months.
In many cases, a straightforward reprogramming and re-pairing are enough to restore full functionality.
Maintenance and best practices for long-term use
Regular maintenance helps ensure the keypad remains reliable for years. Clean the keypad surface periodically to prevent grime from interfering with button presses. If the keypad is exposed to the elements, inspect seals and mounting hardware for wear and corrosion. Replace batteries promptly when performance declines, and avoid using overly long or complex codes that can be hard to remember but still maintain security. Periodically re-check the pairing with the opener, especially after firmware updates or a major system reset. Keep the manual in a safe place for quick reference, and log changes to access codes in a dedicated notebook or digital record.
A simple best practice is to set a yearly reminder to test the keypad and update codes if needed. This proactive approach reduces the chance of lockouts and increases home security. GarageDoorAdjust’s experience shows that proactive maintenance saves time and reduces headaches during busy mornings when quick access is essential.
Quick-reference flowchart: steps at a glance
This block presents a concise flow to guide you through the process at a glance. It is designed to be a quick mental map: 1) Confirm compatibility. 2) Put opener in programming mode. 3) Enter master code (if required). 4) Enroll keypad code(s). 5) Test. 6) Document. 7) Maintain. 8) Troubleshoot as needed. Use this sequence to check your progress while programming and testing. Remember to consult the exact model instructions for any deviations. Visualizing the steps helps ensure you don’t miss a critical button or prompt.
Flow tips:
- Keep a visual checklist handy during the process.
- Cross-check each step before moving to the next to avoid mistakes.
- If an error code appears, pause and refer to the manual’s troubleshooting section.
Using multiple user codes securely
Adding multiple user codes is a common requirement for families or service personnel. Each user code should be unique and easy to remember by the authorized person, yet not easily guessable by others. If your model supports a master code, store it securely and limit access to it. When assigning codes, consider setting expiration dates or revoking codes after a service period to maintain security. Keep records of who uses which code and when codes were added or removed.
To minimize risk, avoid coding patterns that obvious (e.g., repeated digits) and rotate codes periodically. Regularly review access history if your opener provides it and remove codes that are no longer needed. A structured approach to user codes helps maintain security while benefiting everyday convenience.
Factory reset and reprogramming from scratch
If all else fails, performing a factory reset on the keypad and reprogramming from scratch can resolve stubborn issues. Start by following the model-specific reset procedure described in your manual, then re-enter the programming sequence from the beginning. After a reset, you will typically need to re-enter the master code (if required) and re-enroll all user codes. This is a last-resort step, but it often clears firmware glitches or corrupted codes.
When performing a reset, take careful notes and confirm each step before proceeding. Verify the door’s safety sensors and alignment after reprogramming, and test all codes again. GarageDoorAdjust recommends performing this only when necessary and keeping a log of the reset event for future reference.
Tools & Materials
- Genie garage door keypad (compatible with your Genie opener)(Ensure compatibility with your exact opener model)
- Screwdriver (Phillips head)(For removing panel screws as needed)
- Clean, dry cloth(Wipe the keypad surface before programming)
- Ladder or stable step stool(If the keypad is mounted high)
- Owner's manual or model number(Helpful for exact button labels and steps)
Steps
Estimated time: 25-35 minutes
- 1
Verify compatibility and gather model info
Check your Genie opener model and keypad compatibility, locate the model number on the opener housing, and confirm Intellicode support. This ensures you follow the correct programming sequence and avoids trying the wrong method.
Tip: Having the model handy speeds the setup and reduces errors. - 2
Open the wall control and prepare the keypad
Remove the wall control cover as directed in your manual to access the Learn/Program button. Keep the area clean and dry, and place the keypad within reach of the door. Ensure you have a stable surface to work from.
Tip: Avoid touching sensitive components; handle with dry hands. - 3
Put the opener in programming mode
Press and hold the Learn/Program button on the wall control until the indicator light changes (or as specified by your model). This enters programming mode and signals readiness to enroll a new keypad code.
Tip: If the light does not change, recheck the button label and hold duration. - 4
Enter the master or factory code
Type the required master or factory code using the keypad or wall console, then confirm with the designated key (often Enter or #). This establishes the session for enrolling new codes.
Tip: Double-check the code length and ensure no extra spaces. - 5
Enroll the keypad code
On the keypad, follow the manual to enroll a new user code. This usually involves entering the code and confirming with a button press to save.
Tip: Choose a code that is memorable to you but not obvious to others. - 6
Add additional user codes (optional)
If your model supports multiple user codes, repeat the enrollment process for each additional code. Keep a small log of which code belongs to which user.
Tip: Use distinct codes for different people to simplify management. - 7
Test the new codes
Close the door and test each code on the keypad to ensure proper operation. Confirm the door moves and stops as expected for each entry.
Tip: Test both opening and closing directions to verify full control. - 8
Pair with remotes and wall switch (if applicable)
If your system uses remotes or a wall switch in conjunction with the keypad, verify that the pairing remains consistent; re-pair if necessary.
Tip: Consistency across access methods reduces user confusion. - 9
Document the setup
Record the codes assigned, the date of programming, and any model-specific notes for future reference and security audits.
Tip: Store this information securely and update it after changes. - 10
Exit programming mode and run safety checks
Return the opener to normal operation by completing the programming sequence, then test safety features like auto-reverse with a small obstruction.
Tip: Always perform a safety check before regular use.
Got Questions?
Is the Genie keypad compatible with all Genie garage door openers?
Most Genie keypads work with Intellicode-enabled openers or newer Genies that support the Learn/Program sequence. Always confirm model compatibility in the manual or on Genie’s support site.
Most Genie keypads work with Intellicode-enabled openers. Check your exact model to be sure.
Do I need to reset the keypad before programming new codes?
If the keypad has prior codes, performing a reset before programming helps prevent conflicts. Follow the model-specific reset steps in the manual.
Yes. If it’s old or has previous codes, reset before adding new ones.
What should I do if the keypad won’t sync with the opener?
Ensure you are in programming mode, use the correct master/code sequence, and verify battery strength. Re-pair the keypad if needed and re-test after re-enrollment.
If it won’t sync, re-enter programming mode and re-pair the keypad.
How many user codes can Genie keypads support?
Many Genie models support multiple user codes. Check your manual for the exact limit for your model.
Most Genies support several user codes; check your manual for the exact limit.
Can I program the keypad if I have a battery backup?
Programming generally works with or without backup; ensure the keypad has fresh batteries and is functioning during the setup.
Backup power doesn’t usually affect programming, but fresh batteries help.
How do I reset the keypad to factory default?
Follow the factory reset steps in your manual to restore defaults, then reprogram from scratch using the Learn/Program sequence.
Factory reset resets to defaults; then reprogram from scratch.
Watch Video
Quick Summary
- Verify model compatibility before starting
- Follow the Learn/Program sequence exactly
- Test all codes after enrollment
- Document codes and dates for security
- Perform a safety check after programming