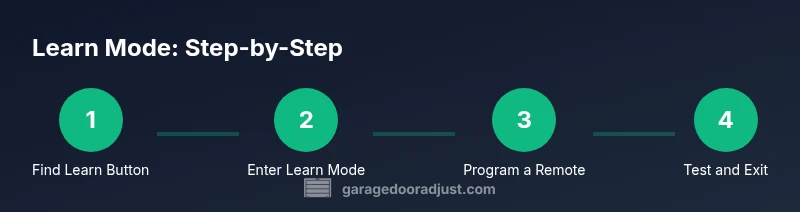
How to Put a Garage Door in Learn Mode
Learn how to put your garage door opener into learn mode to program remotes, keypads, and new openers. This guide covers safety, brand differences, troubleshooting, and best practices from GarageDoorAdjust.

To put your garage door opener in learn mode, locate the learn button on the motor housing, press and release until the LED lights or blinks, then trigger a test remote to confirm entry. This mode enables new remote codes and keypad entries. Model-specific nuances vary, so consult your manual for exact indicators.
What Learn Mode Is and Why It Matters
Learn mode is a temporary state on a garage door opener that lets you teach the opener new remote controls, keypads, and sometimes second openers. When you enter learn mode, the opener stores the signals from a device so it can recognize future commands. This is essential for replacing lost remotes, adding family members, or integrating a keypad entry system. According to GarageDoorAdjust, using learn mode correctly reduces misprogramming and helps ensure reliable operation across accessories. Understanding where the button lives, how long you stay in learn mode, and how to exit safely can prevent accidental door movement during programming. This knowledge is particularly valuable for DIY homeowners who are building a smart garage ecosystem without professional help.
Safety First: Preparation and Hazards
Safety comes first when entering learn mode. Clear the area of people and pets, and ensure the door is in a balanced, stationary position. Have the operator manual on hand, and wear eye protection if you’re near moving parts. Work with the door closed or at least supported so it cannot fall unexpectedly. If your door is off-balance or the spring system looks stressed, postpone programming and contact a pro. Never attempt to disable safety features or override safeguards during programming, as this can create dangerous conditions.
Identify Your Opener’s Learn Button and Indicators
Most modern openers place the learn button on the underside of the motor housing near the power cord. The button may be labeled Learn, Set, or Training, and LED indicators will flash or stay lit to confirm entry into learn mode. If your model uses a rotating LED, watch for a sequence of blinks that matches the manual. If you cannot locate the button, check the model year and brand in the manual or on the body of the opener. This step is crucial because some older or budget units use a separate programming method, and consulting the official guide prevents missteps.
Brand Variations: How Learn Mode Differs Across Models
Different brands implement learn mode with subtle differences. LiftMaster, Chamberlain, Genie, and Craftsman models may use different button locations, LED patterns, and timing for detection. Always refer to your specific model’s manual for the correct sequence. GarageDoorAdjust notes that while the core idea is the same—enter learn mode, teach a device, verify—ignore extraneous button presses and avoid reprogramming without confirmation that old codes are cleared if desired.
Step-by-Step Concept: What Learn Mode Enables
Learn mode primarily enables pairing new remotes and keypad codes, but some models also support battery status reporting and rolling code synchronization during the session. The key benefit is that once you successfully program a device, the opener should respond immediately to the new signal. If the new device doesn’t respond, you may need to repeat the entry sequence, confirm you pressed the correct remote button, or clear prior codes before reattempting.
Common Pitfalls When Entering Learn Mode
Typical mistakes include pressing the learn button too long or too short, starting the process with the door in motion, or attempting to program while the door is not properly balanced. Another frequent issue is failing to exit learn mode after completing programming, which can leave other devices unable to sync. Avoid skipping firmware updates or disregarding model-specific steps, as they can invalidate the programming.
How to Test After Setting Learn Mode
Testing should be quick and deliberate: with the door closed, press the programmed remote or keypad to confirm it triggers the door. If the door responds, exit learn mode as instructed in the manual. If not, re-enter learn mode and reattempt, ensuring you press the device button at the correct moment. Note any LED patterns observed during testing to compare with the manual.
Basic Troubleshooting If Learn Mode Fails
If programming fails, verify power to the opener, ensure the door is in a safe state, and re-enter learn mode. Check that the device battery is fresh and that you are within the effective range. Some models require you to erase existing codes before reprogramming; consult the manual for the correct reset procedure. If problems persist, document the model and error pattern and contact a professional.
Best Practices and Maintenance After Programming
Once programming is complete, keep a record of compatible remotes and keypad codes, and periodically test each device. Replace batteries proactively and update firmware if the model supports it. Regular maintenance, such as lubricating moving parts and inspecting tracks, helps prevent programming issues caused by mechanical resistance.
When to Call a Pro and Safety Boundaries
If you encounter persistent failure, a damaged opener, or odd LED patterns, contact a qualified technician. Do not force programming with a door that moves unevenly or makes unusual noises. A professional can validate safety features and ensure that programming does not compromise limit settings or track alignment. The GarageDoorAdjust team recommends seeking expert help when in doubt.
Tools & Materials
- Ladder or sturdy step stool(Use a stable 2-3 step ladder to reach the opener housing safely)
- Working remotes and keypad batteries(Have fresh batteries; a few different remotes may be included with the system)
- Owner's manual for your opener model(Keep model year and brand available (LiftMaster, Chamberlain, Genie, etc.))
- Flathead screwdriver or coin (as needed)(Only if your model uses a recessed button or requires a tool-assisted press)
- Phone or notebook to document codes(Record which remotes were programmed and any keypad codes)
Steps
Estimated time: 12-20 minutes
- 1
Prepare and secure the area
Clear the work area, remove obstructions, and confirm the door is balanced. Place the door in a closed position if possible to prevent unexpected movement during programming.
Tip: Double-check the door is fully closed and remains still before starting. - 2
Locate the learn button on the opener
Find the Learn or Set button on the motor housing, usually near the power cord. If needed, refer to the manual for the exact location and LED behavior.
Tip: Look for LED indicators that will flash or light steadily during entry into learn mode. - 3
Enter learn mode
Press and release the learn button as described in your manual until the LED indicates learn mode (blinking or steady). Do not hold the button longer than required.
Tip: Make a mental note of the exact LED pattern for your model. - 4
Program the first remote
While in learn mode, press and hold the desired remote button until the opener acknowledges with a blink or beep. Release, then test the remote immediately.
Tip: Program one device at a time to avoid confusion. - 5
Test the programmed device
With the door closed, test the newly programmed remote or keypad. Ensure it reliably opens and closes the door without issue.
Tip: If it fails, re-enter learn mode and try again from the start. - 6
Program additional devices (if needed)
Repeat the process for any additional remotes or keypads. Ensure you exit learn mode after completing programming to avoid unintended changes.
Tip: Label each device to avoid mix-ups later. - 7
Exit learn mode
Follow your model’s instructions to exit learn mode; this may happen automatically after a timeout or require a manual exit.
Tip: Confirm the LED returns to its normal state. - 8
Document and test again
Record all programmed devices and perform a final test to verify reliable operation from multiple remotes and the keypad.
Tip: Keep a record of model, firmware, and device codes for future reference.
Got Questions?
What is learn mode on a garage door opener?
Learn mode is a temporary state that allows you teach new remote codes and keypad entries to the opener. This is how you pair remotes and keypads with the system.
Learn mode is a temporary state used to program remotes and keypads to your garage door opener.
How long does learn mode stay active?
The duration varies by model, but it generally remains active until you complete the programming or until a timeout defined by the manufacturer.
Learn mode stays active until you finish programming or until the model times out.
Can I program a keypad during learn mode?
Yes, most models support keypad programming in learn mode. You’ll typically enter a code on the keypad during the same window you program remotes.
Yes. You can usually program a keypad during learn mode by entering a code on the keypad when prompted.
What if the LED doesn’t blink or respond?
Check power to the opener, verify you’re using the correct button sequence, and ensure you’re within range. If needed, refer to the manual to verify model-specific indicators.
If the LED doesn’t blink, check power, button sequence, and range, then consult the manual for your model.
Is it safe to run learn mode with pets around?
Keep people and pets clear of the area while programming. Do not stand in the door path or near moving parts during tests.
Keep people and pets away during programming and testing to stay safe.
Do I need to unplug the opener to reset codes?
Most models require exiting learn mode or following a specific reset procedure documented in the manual. Unplugging is not typically needed unless the model specifies it.
You usually exit learn mode or use a reset procedure; unplugging is rarely required.
Watch Video
Quick Summary
- Know where the learn button is located on your opener
- Enter learn mode safely and exit after programming
- Test each programmed device immediately
- Brand differences require model-specific steps
- Document codes and maintenance practices for reliability