Where is the Learn Button on LiftMaster Garage Door Opener
Learn where LiftMaster’s Learn button is located, how to identify model variations, and how to pair remotes safely. Clear steps, tips, and maintenance guidance from GarageDoorAdjust to help homeowners quickly locate and use Learn mode.

In most LiftMaster garage door openers, the Learn button sits on the motor housing—often on the back or side near the antenna and light. It’s labeled Learn or Training. Briefly press and hold to enter learn mode, then follow your remote’s pairing steps. Some models hide the button behind a light cover, so check there if you don’t see it.
Where to look for the Learn button on LiftMaster openers
Locating the Learn button is the first, most frustrating step for many homeowners. In most LiftMaster models, the Learn button is mounted directly on the motor head or housing and positioned so you can reach it from below the opener. It is often near the antenna and the light socket. The label will read Learn or Training, and the button is typically small and recessed to prevent accidental presses. According to GarageDoorAdjust, starting with a quick locate saves you hours of model-specific digging and keeps you from accidentally triggering other functions on the unit. Knowing the general geography—motor housing, back or side panels, and proximity to the LED indicator—helps you press in the right spot without removing large covers.
This section also previews the common variations you’ll encounter. While the exact look varies, most models share a few hallmark locations: behind a small plastic cover on the end of the unit, under a removable light assembly, or directly on the back face of the housing. If you’ve got a newer unit with a more compact design, the Learn button might be tucked behind a cover that snaps away with light pressure. The key is to identify the label and the LED behavior that signals you’re in learn mode. GarageDoorAdjust’s experience with LiftMaster units confirms that model-specific positioning is the exception, not the rule, but you’ll still find the button in one of these familiar places.
Identify your model family and variations
LiftMaster has multiple model families, and while the Learn button’s function is consistent, its placement and LED cues can differ. Start by locating the model number on the opener itself (usually on a label near the back or underside of the motor head). Cross-check that information with the user manual or the manufacturer’s online support page. Commonly, older models place the Learn button on the back of the motor head; newer designs may hide it behind the light cover or at the side panel. The presence of an LED indicator that blinks or glows during Learn mode is another reliable signal that you’ve found the right control. If your model uses a smart home interface, there may be a secondary method to initiate pairing through the app, but the physical Learn button remains the standard route for remotes.
When in doubt, take a quick photo of the area around the motor head before you begin. This gives you a reference point if you need to reassemble or describe the setup to a technician. GarageDoorAdjust recommends documenting button location and LED behavior for future troubleshooting.
Safety first: power and precautions
Before you touch anything on the opener, ensure safety by cutting power to the unit. Unplug the opener at the wall control if possible, or turn off the circuit breaker serving the garage door opener. Keep hands away from moving parts and never attempt to operate the door while you’re working on the motor head. Use a stable ladder and wear eye protection if you anticipate any cover removal that could expose sharp edges or wiring. Power down helps prevent accidental activation during the Learn button inspection or remotes pairing, reducing the risk of injury and damage to the door or opener.
Accessing the Learn button: practical steps
To reach the Learn button, start by popping off the light cover gently. In many LiftMaster designs, the cover snaps off with light pressure; in others, you may need a small flat-head screwdriver to pry a shallow clip. If you must remove a panel, do so slowly to avoid breaking plastic housings. Once the cover is removed, you should see the Learn button on the motor head, often accompanied by an LED indicator. Some models place the button behind a small recessed tray or near the antenna; in those cases, you’ll need to tilt or shift the housing slightly to access it. Keep the power off during this step to avoid any unexpected movement of the door sensor or rails.
Entering Learn mode and pairing basics
Learn mode is the gateway to remotes and accessories. After you locate the button, press and hold it until the LED on the opener activates—this may be a blink, a glow, or a steady light, depending on the model. Release the button when you see the LED respond in a way that signals learning is active. Many units will blink once or twice to indicate they are ready to learn a new remote. This signal provides the green light for you to press a remote button to pair. If the LED remains steady or behaves differently, consult the manual for the exact LED pattern, as some models use color-coded indicators to signify different statuses.
GarageDoorAdjust notes that learn mode can have a different duration depending on the hardware and firmware version. If you don’t see a response after your first attempt, re-enter Learn mode and retry the pairing sequence with the remote held near the opener.
Remotes and pairing essentials: what you’ll need
You’ll need at least one working remote you intend to pair, and ideally a second remote to test. Some LiftMaster remotes use different frequencies or have labeled pairing steps, but the general method remains consistent: enter Learn mode, press the remote button within a short window, and observe the opener’s LED response. If you’re adding a second remote, repeat the Learn process for that device after the first has been successfully programmed. If you’re pairing a keypad or smart device, follow the manufacturer’s app-based steps after Learn mode is active. Always test by standing a few feet away and operating the door to confirm reliable operation.
Common issues and quick fixes
If Learn mode doesn’t appear to activate, verify the button you pressed is indeed the Learn button and not another control (like a light or reset button). Ensure you’re on the correct terminal or section of the motor head—some designs place an auxiliary set of controls near the end of the housing. If the LED doesn’t blink or light up, double-check that power is on, and that there is no obstruction or damaged wiring. In some cases, re-seating the light cover or resetting the opener through the wall control can restore Learn mode capability. If issues persist, consult LiftMaster support or a professional technician.
Maintenance and best practices for reliability
Maintain a clean, dry environment around the opener to prevent dust buildup that could affect the Learn button’s operation. Regularly inspect the antenna for wear or loose connections and ensure the LED indicator remains visible when Learn mode is active. Keep the area around the motor housing free of clutter and lubricants that might interfere with button travel. If you use multiple remotes or smart devices, track which ones are paired and remove any that are no longer in use. Routine checks help ensure your Learn button remains responsive over time.
Model-specific notes and documentation access
Because LiftMaster models vary, always cross-reference with the user manual for your exact model family. If the manual is not readily available, you can search the LiftMaster support site for your model number and view the Learn button instructions, LED indicators, and pairing steps. For older units where the Learn button is less intuitive to locate, you may need to remove more of the housing to access the button; in such cases, proceed with caution and avoid forcing components. GarageDoorAdjust recommends keeping a digital copy of the manual for quick reference during future maintenance or remotes replacement.
How to reset remotes or reprogram after a failure
If a remote won’t pair after entering Learn mode, you may need to reset the opener’s memory and start the programming sequence again. Enter Learn mode, and instead of pairing a remote, hold the Learn button until the LED stops blinking or disappears, signaling a reset. Then re-enter Learn mode and attempt pairing again. If you are adding a keypad or app-based device, ensure you follow the manufacturer’s pairing order precisely after entering Learn mode. Consistency in button presses and proximity to the opener improves success rates.
Tools & Materials
- Ladder (stable)(Use on level ground; have a spotter if possible)
- Flashlight(Improve visibility behind light cover)
- Remotes to pair(At least one working remote for testing)
- Small flat-head screwdriver (optional)(For stubborn light covers)
- Pen and notebook(Jot down model info and LED patterns)
- Power source access(Power off the opener before touching components)
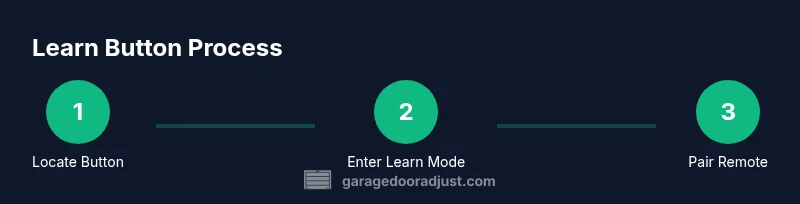
Steps
Estimated time: 10-15 minutes
- 1
Locate Learn button location
Power off the unit and inspect likely spots (motor head, back, side, or behind light cover). Verify you are looking at a label that says Learn or Training.
Tip: If needed, use a photo to capture the region for future reference. - 2
Open the light cover safely
Gently pop off or pry the cover to access the Learn button. If a tool is needed, use a small flat-head screwdriver and unplug the unit first.
Tip: Do not force the cover; a slight snap is usually enough. - 3
Enter Learn mode
Press and hold the Learn button until the LED on the opener responds (blink or glow). Release once you observe the indicator.
Tip: LED response timing varies by model. - 4
Prepare the remote
Bring the remote you want to pair within a few inches of the opener.
Tip: Remove any protective casings if they block the signal. - 5
Pair the remote
Press and hold the remote button while the opener is in Learn mode until you see the LED indicate success.
Tip: If the LED doesn’t respond, re-enter Learn mode and retry. - 6
Test the remote
Close the cover and test the door from several feet away to confirm reliable operation.
Tip: Test from multiple positions to ensure coverage. - 7
Finish and reseal
Replace the light cover and secure any clips. Note down the model and remote pairing results for future reference.
Tip: Record the successful remote IDs.
Got Questions?
Where is the Learn button located on LiftMaster models?
The Learn button is usually found on the motor head, either on the back or side, and might be hidden behind the light cover. Look for a button labeled Learn or Training and check the nearby LED indicator to confirm Learn mode.
The Learn button is typically on the motor head, often behind the light cover, labeled Learn or Training. Look for an LED cue to confirm Learn mode.
Why won’t my remote pair after pressing Learn?
Possible reasons include not entering Learn mode correctly, proximity issues, or using a remote that’s not compatible with the opener. Re-enter Learn mode, hold the remote near the opener, and retry pairing.
If pairing fails, re-enter Learn mode, hold the remote near the opener, and try again with a compatible remote.
Can I program without a physical remote?
Yes, some LiftMaster models support app-based or keypad pairing after Learn mode is active. However, you still typically need a remote to verify the process.
You can sometimes use an app or keypad after Learn mode, but you’ll usually need a remote to confirm pairing.
Is the Learn button in the same place for all LiftMaster models?
There is variation across models. The Learn button is commonly on the motor head, but exact placement and LED behavior vary—consult the manual for your specific model.
Placement can vary by model; the manual will confirm exact location and LED cues.
What safety steps should I follow when working with the opener?
Power down the unit before accessing the motor head, keep hands clear of moving parts, and use a stable ladder. Return power and re-test after any adjustment.
Power off before touching the unit, stay clear of moving parts, and test after adjustments.
Watch Video
Quick Summary
- Learn button sits on the motor housing near the antenna
- LED indicators guide Learn mode entry and success
- Test each paired remote from multiple distances
- Document model activity to simplify future maintenance
- Power safety is essential for all steps