LiftMaster 371LM Remote: Pairing, Programming, and Troubleshooting
Learn how to program, pair, and troubleshoot the LiftMaster garage door opener remote 371LM. This expert homeowner guide covers Learn button pairing, memory management, battery basics, and common issues for reliable operation.

By the end of this guide you will be able to pair and test a LiftMaster 371LM remote with your garage door opener, erase existing codes if needed, and troubleshoot common pairing issues. You’ll need the remote, access to the opener’s Learn button, and a safe workspace with the door closed during setup. The steps are written for homeowners and emphasize reliable operation and safety awareness.
Introduction to the LiftMaster 371LM and Compatibility
The LiftMaster 371LM remote is a compact, rolling-code device designed to pair with many LiftMaster openers produced in the last two decades. For homeowners troubleshooting garage door issues, understanding compatibility between the 371LM and your opener helps minimize frustration. The GarageDoorAdjust team has found that most pairing issues stem from using the wrong model, an out-of-range remote, or an opener memory full of codes. In this section we explain what the 371LM does, how it communicates, and how to verify your opener can accept it. You will learn how to confirm compatibility before starting the pairing process, saving time and avoiding unnecessary steps. When you confirm compatibility, you can proceed with confidence to the Learn button pairing steps.
Prepping for Pairing: Safety and Workspace
Safety is essential when working with garage doors. Before you begin, make sure the opener is powered and the door is fully closed. Clear distractions and create a safe workspace with a direct path to the opener's Learn button. If you have a helper, assign them to observe LED indicators and the door’s response. Remove any metal objects or reflective surfaces that might interfere with the remote signal. Gather your Tools & Materials, and keep a labeling plan for remotes so you can track which one was paired and when. This preparation reduces repeated tries and makes the process safer and faster.
Understanding the Learn Button and Memory on LiftMaster Openers
The Learn button on LiftMaster openers is the entry point for programming new remotes and managing memory. It typically sits on the front panel and is accompanied by an indicator LED that signals the pairing state. When you press the Learn button, the opener enters a short window during which it will accept a new remote’s code. The 371LM uses a rolling-code signal that changes with each use, contributing to better security. Memory on the opener can hold several remotes, but over time, old codes can cause confusion or conflicts. Knowing how memory works helps you decide when to erase all codes or simply add a single new remote. This knowledge also informs you when to seek help if the Learn button or LED behavior seems abnormal.
Step-by-Step Pairing Concept and Best Practices
Pairing a 371LM remote follows three core actions: enter Learn mode on the opener, transmit the remote’s code, and confirm the pairing. Do this in a quiet, unobstructed space with the door in a stable state. Avoid pairing while the door is moving or under load. If you have multiple remotes, pair them individually to prevent signal interference in memory. Keep a clear record of which button on the remote corresponds to which function (open/close/stop) and which remotes you’ve paired with the opener. Finally, test the new remote from multiple positions in the garage to confirm reliable operation at typical distances.
Common Issues and Quick Fixes When Pairing
If your remote fails to pair, common causes include a weak battery, being outside the pairing window, incorrect Learn button timing, or obstructions between the remote and opener antenna. Start by replacing the remote battery, then retry within the pairing window. Ensure you press the remote button firmly and only within the window while the LED is blinking. If the LED does not blink, verify the opener's Learn button is functioning and that you are using the correct remote model for that opener.
Battery and Replacement Considerations for the 371LM
Battery health is a fundamental factor in successful pairing. A weak or dying battery reduces range, slows response, and may prevent the remote from transmitting a recognizable code. Always replace the battery with a fresh, compatible type before starting pairing. If you notice the LED on the remote is dim or flickers, perform a battery change and test again. Keep spare batteries on hand and label them for easy replacement. After a successful pairing, monitor the remote’s range and responsiveness over the first few days to catch any indicator of aging hardware.
Maintaining Security: Managing Remotes and Memory
Security should evolve with your home's needs. After you pair the 371LM remote, label it and keep it in a secure spot known to all household members. Regularly review the opener’s memory and remove remotes that are lost, stolen, or no longer in use. If you replace the remote, erase all codes from the opener to ensure that old remotes can no longer operate the door. When possible, keep a spare remote in a different area or with a trusted contact as a backup. These practices reduce the risk of unauthorized access while preserving convenience.
Authority Sources and Safety Standards for Garage Doors
In this guide we reference established safety resources to inform best practices. The U.S. Consumer Product Safety Commission provides general garage door safety guidelines; university extension services offer practical maintenance tips and model-specific steps; and industry safety standards guide proper handling of openers. For detailed, up-to-date recommendations, visit these sources: https://www.cpsc.gov/safety-guides/garage-door-safety; https://extension.illinois.edu; https://www.osha.gov. Always follow the manual for your specific LiftMaster opener and remote.
Practical Tips for Long-Term Reliability
To keep your LiftMaster 371LM remote operating smoothly over time, schedule periodic checks, avoid introducing interference sources, and store remotes securely. Clean the remote’s housing and ensure the battery contacts are free of corrosion. If you upgrade to a new opener, re-check compatibility with the 371LM and re-pad codes as needed. Maintaining a simple record of pairing dates and remote labels helps you stay organized and reduces confusion during future maintenance.
Tools & Materials
- LiftMaster 371LM remote(Have a spare compatible remote for comparison and verification.)
- Garage door opener access(Ensure the unit is powered and the door is in a stable position during pairing.)
- Flathead screwdriver or tool for opening panel (optional)(For accessing the Learn button if it is recessed.)
- Clear workspace(Free of obstructions and with a direct path to the Learn button.)
- Extra batteries(Have fresh batteries on hand for the remote and life test.)
- Labeling materials(Tape or markers to label paired remotes for future reference.)
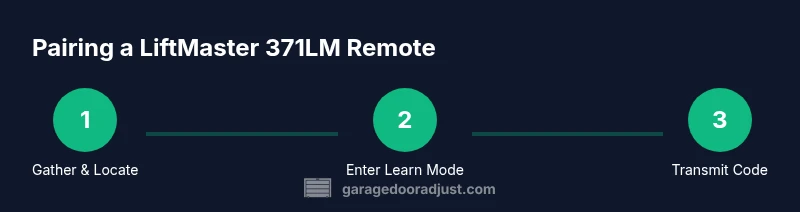
Steps
Estimated time: 10-20 minutes
- 1
Gather the remote and locate the Learn button
Collect the 371LM remote and locate the Learn button on your opener. Confirm you can see the indicator LED and the button is accessible within a clear area. This initial step sets the stage for a smooth pairing.
Tip: Keep the door closed and avoid touching the door while locating the Learn button. - 2
Put the opener in Learn mode
Press and hold the Learn button until the indicator LED blinks or glows steadily, typically for a few seconds. Release when you see a blinking pattern or a steady light indicating the window to accept a remote code.
Tip: If there is no LED response, verify the opener is powered and you’re using the correct Learn button for your model. - 3
Transmit the remote’s code
Within the Learn window, press the button on the 371LM remote to send its code to the opener. A successful pair is usually indicated by a beep or a specific LED pattern.
Tip: Use a single, firm press rather than multiple taps to ensure the code is transmitted correctly. - 4
Confirm pairing
Observe the opener’s LED or hearing a confirmation beep to verify that the remote has paired successfully. If confirmed, you can proceed to test the remote at the door.
Tip: If pairing fails, restart at step 2 and ensure battery health before retrying. - 5
Test the remote from the doorway
Move a few steps away and press the remote to ensure the door responds consistently. Check both opening and closing actions and test from different positions.
Tip: Interference near metal shelves or bright lighting can affect performance; adjust position if needed. - 6
Optional: erase and re-pair other remotes
If security is a concern or you replaced remotes, erase all codes from the opener and re-pair remotes one at a time to prevent code conflicts.
Tip: Consult your opener manual for exact erase steps to avoid unintended resets. - 7
Label and store
Label the remote with owner or room metadata and place it in a known, secure location. Re-test after a few hours to confirm long-term reliability.
Tip: Keep a spare in a different location for backup.
Got Questions?
Can I pair the LiftMaster 371LM remote with older or non-LiftMaster openers?
Compatibility depends on the opener’s learning protocol. The 371LM is designed for LiftMaster openers that support standard learning. If the opener is very old or uses a different code system, the remote may not pair. Check the model number and consult the manual or GarageDoorAdjust's compatibility guidance.
Compatibility depends on your opener’s learning protocol; if unsure, check the model and manual before attempting pairing.
What should I do if Learn button doesn't respond?
First, verify the opener is powered and the button is accessible. Ensure you’re within range and not interfering with signals. If there is still no response, reset the opener or consult the manual for model-specific troubleshooting.
Make sure the opener is powered and you’re within range; if it still reacts, reset or check the manual for steps.
Do I need to replace the remote’s battery before pairing?
If the remote’s LED is dim or the button feels weak, replace the battery before attempting pairing. A fresh battery is essential for a clear signal and successful coding.
Replace the battery if the LED looks dim or the remote feels weak during testing.
How far can the 371LM remote operate from the opener?
Range depends on the environment and interference. If you notice reduced performance, move closer to the opener, check the antenna, and ensure there are no large metal objects between the remote and the receiver.
Distance varies with walls and interference; test from different spots to verify reliability.
Is erasing all codes safe?
Erasing all codes resets memory and requires re-pairing all remotes you want to use. This is useful after security concerns or after losing remotes.
Erasing codes clears access and requires re-pairing your remotes.
Watch Video
Quick Summary
- Pair with the Learn button using the correct sequence
- Test range and reliability from multiple spots in the garage
- Erase codes if security concerns arise or remotes are lost
- Label remotes and keep a simple pairing log
- Maintain battery health to ensure successful pairing