How to Program a LiftMaster Garage Door Opener Using YouTube
A homeowner-focused guide to programming LiftMaster garage door openers with YouTube references, covering Learn button sequences, remote pairing, keypad setup, safety checks, and troubleshooting.

Fact: You can program a LiftMaster garage door opener by locating the Learn button on the motor, pairing your remote or keypad, and testing the door’s travel limits, with a YouTube tutorial providing model-specific button sequences. This guide covers common variants, safety checks, and troubleshooting to help homeowners complete the task without hiring a technician.
Why You Might Use a YouTube Program LiftMaster Garage Door Opener Guide
Using YouTube as a visual reference can help homeowners understand the exact button sequences and model variations for LiftMaster garage door openers. The LiftMaster family uses Learn buttons that vary in color by model, and a video walk-through often clarifies which remote or keypad to press. According to GarageDoorAdjust, cross-referencing a reputable tutorial with your opener’s model number reduces confusion and increases your chances of a successful programming session. Always verify the model number on the rating label the moment you start so you are following the correct steps. The goal is to achieve reliable remote operation while maintaining safety and door balance. For those who search specifically, many readers look up phrases like "youtube program liftmaster garage door opener" to find model-accurate visuals that match their unit.
Understanding Learn Button Variants on LiftMaster Openers
LiftMaster models use Learn buttons that can appear in different colors and positions on the motor housing. Some units have a purple, amber, or green Learn button, while others use a small recessed pin-hole. The exact sequence to program a remote or keypad varies by model, so a video tutorial saved on your phone or tablet should be consulted alongside the owner’s manual. GarageDoorAdjust notes that model-specific guidance helps prevent mis-programming or accidental erasure of other remotes. Always power down if you notice sparks or a burning smell during any test step.
Preparing Your Setup: Safety Checks and Essentials
Before you begin, gather your opener model number, remote controls, and any keypads you plan to program. Ensure the door is balanced and moves smoothly without obstruction. Clear the area beneath the door and away from the path in case it moves unexpectedly during testing. If the door is heavy or binding, contact a professional—do not proceed with programming until the issue is resolved. This pre-check reduces the risk of injury and prevents repeated programming attempts that could cause confusion. Have a trusted video nearby and confirm it aligns with your model; the goal is a safe, reliable program on the first attempt.
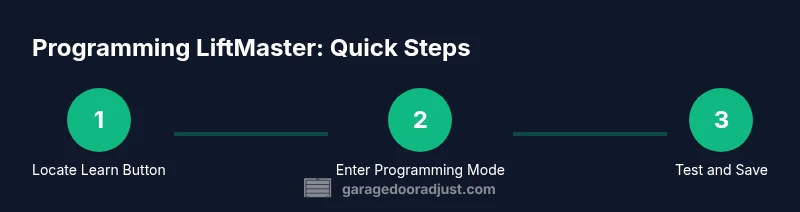
Step-By-Step Method: Programming with Learn Button and Remote
- Locate the Learn button on the motor housing and confirm the model’s color and location. 2) Put the remote into programming mode by holding the Learn button until the LED blinks or goes off, then press the remote button you want to assign. 3) Initiate the pairing by pressing the remote button and then the Learn button again if required; wait for a confirmation light. 4) Repeat for additional remotes or keypads. 5) Test the door’s travel limits and reversing safety: the door should reverse if it hits a block. 6) If your model supports keypad programming, enter your code on the keypad and test.
Troubleshooting Common Issues After Programming
If the remote doesn’t operate the door, recheck the Learn button sequence and ensure you’re within range of the opener. Check for interference from other wireless devices and consider reprogramming after a full power cycle of the opener. For keypads, confirm the code matches and that the keypad connection is secure. If required, erase all remotes and reprogram from scratch using the Learn button sequence. Avoid forcing buttons, which can damage the circuitry.
Verifying Operation: Final Safety Checks and Routine Maintenance
Once you’ve programmed the remotes, test from multiple locations in your garage and outside the door. Verify that the door closes completely and reverses on obstruction. Re-test after a week to ensure no unintended loss of programming. Consider lubricating tracks and rollers as part of ongoing maintenance to keep the system quiet and responsive. Regular checks ensure the Learn button and remotes stay synchronized across seasons and use.
Model-Specific Considerations and Where to Find Official Resources
LiftMaster uses distinct programming steps across model lines such as 8550, 8960, and 8550W. Always consult your specific model manual and the official LiftMaster support site for the most accurate button sequences. For a visual reference, a trusted YouTube program LiftMaster garage door opener video can complement the official instructions, especially if you’re a visual learner. GarageDoorAdjust emphasizes cross-referencing model numbers and using reputable channels to minimize the risk of missteps.
Tools & Materials
- LiftMaster garage door opener model number(Find on the opener's label; note model family.)
- Remote control(s) to program(Ensure fresh batteries; multiple remotes may be paired.)
- Keypad (optional)(If you plan to add keypad access.)
- Ladder or step stool(Needed to reach the motor housing if mounted high.)
- Flashlight(To inspect the Learn button area.)
- Model-specific manual(Consult for exact button sequence.)
Steps
Estimated time: 25-35 minutes
- 1
Locate Learn Button
Find the Learn button on the motor housing of your opener. Confirm its color and exact location according to your model's manual.
Tip: Have the manual handy or photograph the label to verify the color code. - 2
Prepare Remote for Pairing
Choose the remote you want to program and ensure its battery is fresh. Hold the remote within a few feet of the opener.
Tip: A weak battery can prevent successful pairing; replace if dim. - 3
Enter Programming Mode
Press and hold the Learn button until the LED indicator blinks or goes solid, depending on the model.
Tip: Some models require the Learn button to blink twice; pay attention to the LED behavior. - 4
Press the Remote Button
While the Learn light is blinking, press the desired button on the remote to pair it with the opener.
Tip: Only press one button per remote to avoid cross-signal pairing. - 5
Test the Remote
Close and reopen the door using the programmed remote to confirm reliable operation.
Tip: If the door doesn’t respond, repeat steps 3 and 4 or check range. - 6
Program Keypad (Optional)
If you have a keypad, follow the same Learn button sequence to sync your code.
Tip: Choose a code that’s easy to remember but difficult for guests.
Got Questions?
Will remote programming work on all LiftMaster models?
Most LiftMaster models support remote programming, but the exact button sequence varies by model. Always consult your model’s manual and a model-specific YouTube guide to ensure compatibility.
Most LiftMaster models support remote programming, but check your manual for model-specific steps.
What if the Learn button won’t blink?
If the Learn button doesn't blink, verify the power to the opener and ensure you are using a compatible remote. Some models require a different LED behavior; consult the manual for the exact indicator pattern.
If the Learn button doesn’t blink, check power and compatibility, then consult the manual.
How long does the programming take?
Typical remote programming takes about 15-30 minutes, depending on the number of remotes and keypad options. Follow the model-specific steps closely to avoid retakes.
Most people finish in about 20 minutes when following the steps carefully.
Do I need to disconnect power while programming?
Power can usually remain connected; you only need to interact with the Learn button and remote. If you smell smoke or see sparks, unplug and contact a technician immediately.
No need to unplug the opener, unless you detect a safety issue.
Can I program a keypad as well?
Yes, most LiftMaster keypads can be programmed using the same Learn button sequence. Follow the keypad manual for code setup and test from outside the garage.
Yes, you can program a keypad by following the same Learn button sequence for a code.
Watch Video
Quick Summary
- Verify model before starting
- Follow model-specific button sequences
- Test safety reversal after programming
- Keep remotes within range during pairing
- Cross-reference with official LiftMaster resources