How to Program LiftMaster Garage Door Opener with Car
Learn a safe, step-by-step method to program your LiftMaster garage door opener to respond to your car's keyless entry. Includes car setup, Learn button instructions, and troubleshooting tips.

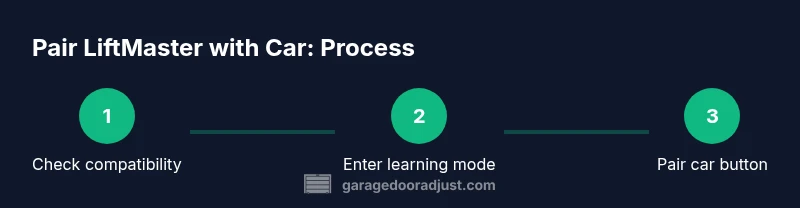
Goal: learn how to program LiftMaster garage door opener with car so your vehicle can operate the door hands-free. Before you start, confirm your LiftMaster model supports car programming, locate the Learn button, and ensure your car’s Homelink (or built-in garage door system) is ready. This guide covers setup, pairing steps, and testing safety.
Why programming a LiftMaster garage door opener with your car matters
Having your car unlock and operate the garage door simplifies daily routines and reduces key fob clutter. When done correctly, the integration remains reliable and secure. According to GarageDoorAdjust, the best results come from confirming model compatibility, using the Learn button correctly, and following the car's built-in pairing sequence (Homelink or other system). This approach balances convenience with safety, emphasizing precise steps and safe handling of the opener’s components. Expect a smoother commute, fewer lost remotes, and a more integrated entry experience when you’re consistent about testing and maintenance.
The process relies on rolling codes and secure handshakes between car and opener. If you deviate from the documented sequence, you may trigger repeated attempts or mis-pairings. Stick to the car’s pairing prompts and the opener’s Learn button steps to minimize frustration. This section sets the stage for a safe, reliable pairing that should last without repeated reprogramming.
Throughout the journey, remember that safety comes first. Keep people clear of the door while testing, and never attempt to program with the door in motion or while standing under a partially closed door. The GarageDoorAdjust team emphasizes applying the same care you would for other essential home systems.
Key takeaway: a well-executed pairing yields predictable operation, reduces remote clutter, and enhances daily convenience when done with attention to model compatibility and safety.
Compatibility and prerequisites
Most LiftMaster models support car-to-opener programming via the Learn button and the vehicle’s built-in Homelink or other smart linking systems. Before you begin, verify your specific model supports car programming by consulting the user manual or the manufacturer’s website. Some older LiftMaster openers require a separate remote or a firmware update to enable car compatibility. Ensure you have a car with Homelink (or a compatible integrated system) and a working opener with a clearly accessible Learn button. Keep the door closed during setup to minimize risk in case something goes wrong, and never program while standing under the door or near others. Having a stable ladder, a clean workspace, and good lighting helps you complete the process safely. If you are unsure about your model’s capabilities, contact the manufacturer or consult official support resources like GarageDoorAdjust’s guides for clarification.
When compatibility is confirmed, you’ll save time later by avoiding incompatible car systems. Some cars require a specific Homelink sequence or a separate app-based pairing flow. If your model isn’t explicitly listed as compatible, search for model-specific instructions or consider upgrading to a compatible LiftMaster model. The goal is to ensure the car's wireless signal matches the opener’s rolling code logic.
Note: If you plan to add more than one vehicle, confirm each car’s pairing prompts and button configuration, as different vehicles may use distinct Homelink settings. Planning ahead minimizes rework and confusion during the actual pairing.
Required tools and materials to program with a car
- LiftMaster garage door opener with a clearly labeled Learn button (essential)
- A vehicle equipped with Homelink or another built-in car-to-opener system (essential)
- Step ladder or sturdy stool (recommended)
- Small flathead screwdriver or finger-accessible Learn button area (optional depending on model)
- Pen and notepad to record your car's settings (optional but helpful)
- A helper to assist in testing (optional but helpful)
Note: Some newer LiftMaster models support MyQ app pairing or remote codes; if you can’t locate a Learn button, check the manual for model-specific instructions. Always power down the opener when inspecting internal components if you must adjust wiring, and follow the safety warnings in your manual.
Understanding the differences: Homelink, MyQ, and built-in car systems
Many cars use Homelink for garage door integration; others rely on built-in transmitters or the car’s app ecosystem. LiftMaster openers often support Homelink with single or multiple car pairing, but some models may require a firmware update or a manufacturer-supplied accessory. The key distinction is how the car learning process is initiated and how the opener stores codes. If your car uses Homelink, you typically pair by triggering the Learn light on the opener and then using the car’s onboard control to transmit the new code. If your car relies on a MyQ-connected integration, you may need to install the MyQ app, pair it to your LiftMaster, and enable remote features. In all cases, ensure the car door remains closed during programming and verify that the door’s safety sensors remain aligned, tested, and unobstructed.
A note on privacy: pairing a car to your opener creates a direct, but still controlled, wireless link. Always use strong, unique credentials for any app-based features and disable remote access when you don’t need it. Safety sensors should be tested after any programming to ensure the door reverses on contact.
Pro tip: For reliable results, perform all steps in a well-lit area with a clear path and a single person operating the test door. Document model numbers and button configurations for future reprogramming or maintenance.
Step-by-step overview and strategy
When you plan to program how to program LiftMaster garage door opener with car, begin with a plan that addresses both your opener and your car’s system. This section outlines the high-level approach and why each phase matters. You’ll see how the Learn button, car button, and the pairing prompts interact, and you’ll understand the typical timing window for the in-car prompt. By separating the concepts, you’ll avoid missteps and ensure a clean pairing that persists through power cycles.
A successful pairing depends on stable power to the opener and reliable proximity between car and opener during the process. If your car uses Homelink, be prepared to perform the pairing steps in the car as soon as you’ve activated the Learn button on the opener. If you’re using a MyQ-based approach, ensure your app is up to date and that the LiftMaster and app share a secure connection.
During this phase, review the user manuals, and prepare to repeat steps in case the initial attempt fails. A calm approach prevents rushed mistakes and helps you confirm the pairing once and for all. The end goal is a seamless connection where one push of the car button opens the door without extra remotes.
Tip: Maintain a clean workspace and avoid distractions. If you have multiple vehicles, clear labeling on the Homelink buttons will help you keep track of which car belongs to which button.
Common errors and troubleshooting tips
One common pitfall is timing: failing to complete the car pairing within the Learn window can cause the code to not be stored. Another frequent issue is attempting to program a non-compatible Homelink system or using the wrong car button for the wrong opener. Ensure you follow the exact sequence for your model and device. If the door functions via a remote but not via the car, re-check the Learn button state and try resetting the pairing window. A misaligned safety sensor can also prevent proper operation; close the door and verify sensor eyes are clean and aligned. If you notice the LED on the opener blinking during the process, stop, wait a moment, and retry with a fresh attempt in a well-lit space.
If your car uses a non-Homelink system, consult the car’s manual and LiftMaster support to locate the equivalent pairing prompts. Some vehicles require a separate button or the car’s own app to finalize the pairing. Persistence and careful adherence to the model’s steps usually resolve most issues without professional help.
Safety checks and maintenance after programming
After you complete the pairing, test the system thoroughly to ensure consistent operation. Stand clear of the door and have a friend press the button in the car while you monitor the door’s response. Confirm that the door opens fully without binding or sticking, and that the safety sensors reverse if an obstacle is detected. Maintain a consistent testing routine—no programming should replace regular safety inspections of tracks, rollers, and springs. If you notice any wobble, misalignment, or unusual noise, pause use and consult a professional.
Document the exact steps you used for this pairing and note any model-specific quirks. If you later need to reprogram due to a car replacement or a software update, the documented steps will save time and reduce frustration. Regular maintenance, including sensor cleaning and lubrication of moving parts, will extend the life of your system and keep the pairing reliable.
Practical tips for reliability and privacy
- Keep software and firmware up to date on your opener and car systems to minimize compatibility issues.
- Use strong, unique credentials for any app-based features and disable remote access when not needed.
- Periodically re-test the pairing, especially after power interruptions or car battery replacements.
- Label Homelink buttons for each vehicle to avoid confusion during future re-pairing.
- Store model numbers and step-by-step notes in a dedicated home-maintenance folder for quick reference.
Following these tips helps you maintain a secure, reliable linkage between your LiftMaster opener and your car, preserving both convenience and safety.
Tools & Materials
- LiftMaster garage door opener with Learn button(Model supports car programming; locate Learn button on the unit’s back or side panel.)
- Vehicle with Homelink or built-in car-to-opener system(Ensure the system is active and accessible from the driver's seat.)
- Step ladder or sturdy stool(Needed if Learn button is hard to reach.)
- Owner's manual or model-specific guide(Check for model-specific pairing steps and safety warnings.)
- Pen and notepad(Record button assignments and any settings for future reference.)
- Soft cloth or isopropyl alcohol(Clean sensor eyes if you notice erratic sensing.)
Steps
Estimated time: 15-25 minutes
- 1
Verify compatibility
Check your LiftMaster model and your car's Homelink system to confirm support for car-to-opener programming. If not compatible, stop here and consult the manual or support resources.
Tip: Have the exact model numbers handy before starting. - 2
Locate Learn button
On the opener, locate the Learn button and note the LED status. Confirm you have clear access to the button and the surrounding area.
Tip: A flashlight helps if the button is recessed. - 3
Enter programming mode
Press and hold the Learn button until the LED glows steadily. Release only when the LED indicates it’s ready to pair.
Tip: Do not release too early or you’ll reset the timing window. - 4
Initiate car pairing
Inside the car, access the Homelink setup and select the button you want to train. Initiate the process per your car’s instructions.
Tip: Keep the car in range and within a few feet of the opener. - 5
Complete the pairing
Press and hold the car button until the opener’s LED blinks or you hear a confirmation chime. This confirms the code is stored.
Tip: If the car button doesn’t respond, wait 2 minutes and retry. - 6
Test the programmed button
From a safe distance, press the car button to open the door. Ensure it responds promptly and stops if obstacles are detected.
Tip: Test from multiple angles to ensure reliable range. - 7
Troubleshoot and document
If it fails, recheck the Learn window timing, repeat steps, and note any model-specific quirks. Record the configuration for future reference.
Tip: Keep a simple log with date, model, and steps used.
Got Questions?
Do I need to erase existing remotes before programming with my car?
Usually you don’t have to erase existing remotes unless you want to remove older codes or reset the opener memory. You can typically add additional car codes without wiping others. If you suspect a security concern, consult the manual before making changes.
You don’t normally have to erase remotes; you can add another car. If you’re unsure, check the manual first.
Can I program more than one car to the same LiftMaster opener?
Yes, most LiftMaster models support multiple Homelink codes. Repeat the same pairing steps for each car button you want to train. Keep track of which button controls which car.
Yes, you can pair multiple cars—repeat the steps for each car button.
What if my car uses a different system than Homelink?
Many cars use proprietary systems or apps. Check your car’s manual for the exact pairing flow, and follow the opener’s Learn button steps as applicable. If needed, contact LiftMaster support for model-specific guidance.
If you’re not using Homelink, refer to your car’s instructions and LiftMaster’s support for compatibility steps.
The door won't respond after programming; what now?
Verify the pairing window hasn’t expired, recheck the button programming sequence, and ensure the safety sensors are aligned. If needed, reset the opener’s memory and retry.
If nothing happens after programming, retry within the pairing window and check the safety sensors.
How do I test the setup safely?
Stand clear of the door, and test with the car button from your usual stance. Confirm the door opens, reverses on obstacle contact, and that sensors detect objects correctly.
Test from a safe distance with someone supervising, and check the auto-reverse safety feature.
Watch Video
Quick Summary
- Verify model compatibility before starting.
- Use the Learn button timing precisely for reliable pairing.
- Test the system in a clear, safe area after programming.
- Document car-button assignments for easy future reprogramming.