LiftMaster Garage Door Opener Programming: Step-by-Step Guide
Learn how to program LiftMaster garage door openers, remotes, keypads, and MyQ devices with a safe, step-by-step approach. This guide covers compatibility, troubleshooting, and best practices for reliable operation.

Learn how to program a LiftMaster garage door opener and its remotes, touchpads, and MyQ devices. This guide covers model-agnostic steps, safety checks, and testing to ensure reliable operation. By following official steps and avoiding shortcuts, you’ll improve door security and convenience. According to GarageDoorAdjust, proper programming is essential for dependable opener performance.
Understanding LiftMaster Programming Basics
LiftMaster garage door opener programming is about teaching the opener to recognize signals from remotes, keypads, and smart devices. The basic idea is simple: the Learn button on the motor tells the unit to enter a mode where it will accept a new code. As you go through liftmaster garage door opener programming, you’ll encounter terms like rolling code, button press sequence, and memory clearing. For homeowners, the goal is to ensure that only authorized remotes can operate the door and that the keypad or app can trigger actions reliably both inside and outside the garage. According to GarageDoorAdjust, most modern LiftMaster models use a standard Learn procedure, but you should still check your model’s manual because details can vary. Start by locating the model number on the opener housing or in the user guide; this helps you confirm compatibility and identify the correct Learn sequence and LED indicators. Safety first: keep hands away from the moving door and keep children away during testing. The process is typically quick: enter programming, press a button on the device you want to pair, watch the LED flash or blink to confirm success, and test to verify operation from different locations in the driveway. This foundational knowledge will reduce frustration and save time when you extend programming to additional remotes.
LiftMaster Models and Compatibility
LiftMaster offers several families of openers, and while the overarching programming concept stays the same, some steps differ by model. Older chain-drive units may present Learn button positions differently than belt-drive or jackshaft units, and some models require using a specific sequence to enter programming mode. When liftmaster garage door opener programming, always verify your opener’s exact model and serial number before starting, and consult the manual to confirm the LED behavior during Learn mode. In practice, most remotes that were designed for LiftMaster use a short Learn pulse and a button-press confirmation; keypads require you to enter a PIN after initiating Learn. GarageDoorAdjust analysis shows that the general workflow remains consistent across models, but the order of actions and timing windows can vary. If your unit is connected to a MyQ account, you may also need to complete an app-based pairing after the mechanical programming step to ensure remote and online control are synchronized. Don’t skip the app pairing if you rely on smartphone control.
Tools and Safety You Need Before You Start
Before you begin liftmaster garage door opener programming, gather the essential tools and safety gear. A stable ladder, a small flashlight if the garage is dim, and fresh batteries for remotes and keypads ensure smooth operation. The Learn button is often recessed; use a small screwdriver or the pointed end of a pen to press it, but never use metal objects that could short the circuit. Keep everyone away from the door while you test, and unplug the opener if you must work near exposed wiring in extreme cases (only if you need to inspect wiring safely) - note: DO NOT unplug during normal programming; instead, ensure the door is supported and the chain or belt is stationary. With all tools on hand, you’ll minimize back-and-forth and keep the workflow efficient. If you have multiple remotes, consider labeling each one with a brief note to avoid confusion later.
Step-by-Step Scenarios: Remote, Keypad, and MyQ
In practice, liftmaster garage door opener programming has three common scenarios: remote programming, keypad programming, and app-based MyQ pairing. Remote programming usually requires entering Learn mode, then pressing a button on the remote within a short window; keypad programming involves entering a PIN after Learn; MyQ pairing is done via the mobile app and may require the opener to be connected to your home Wi-Fi. Sequence details matter; always follow the manufacturer’s timing guidelines for each action. When you complete each pairing, test the device at the door to confirm that a button press triggers the correct action (open/close) reliably from different distances. If you encounter interference, move the router or remove other devices that use the 2.4 GHz band, which can sometimes affect the pairing process. The goal is to produce a simple, repeatable process you can follow for all the devices you want to control with your LiftMaster system.
Troubleshooting Common Programming Issues
If the LED on the opener blinks rapidly but the remote still doesn’t respond, verify you pressed the correct button sequence and that you did not skip the step of clearing previous codes. Interference from metal shelving or other devices can cause a failed learn; move away or relocate the opener or remotes temporarily during programming. Check the battery life of remotes and keypad; low power can lead to missed signals. If codes must be cleared and reprogrammed, use the Learn button as described in the manual and ensure the door is stationary. For MyQ pairing, ensure your home Wi-Fi is stable and the door sensor is properly connected. If you still encounter issues, reset the opener’s memory and start the process again. In most cases, a careful, methodical approach resolves the problem.
Aftercare: Testing, Record-Keeping, and Maintenance
After liftmaster garage door opener programming, test the system across several times: morning, afternoon, and with the door in different positions. Document the serial numbers, compatible remotes, and their assigned functions; this helps with future maintenance or if you get a replacement remote. Regular maintenance basics including lubrication and track alignment will reduce the need to reprogram due to hardware issues. If you rely on MyQ, maintain the app and update firmware when available. Safety reminder: always test after changes and ensure sensors are aligned.
Quick Tips for a Smooth Setup
Pro tip: Label each remote and keypad with a short identifier so you know which device controls which opener. Warning: Avoid programming devices near metal shelves or large metal objects that can create interference during the Learn step. Note: Keep a written log of the codes you program and the date of each change for easy reference.
Bonus: Final Checks and Next Steps
After completing programming, perform a final door test at multiple distances and angles to ensure consistent operation. If you plan to add more remotes later, keep the original Learn steps handy and repeat in the same order. Consider scheduling a periodic review of your opener’s settings to catch drift in performance before issues arise.
Tools & Materials
- LiftMaster remote control(Ensure it's compatible with your specific opener model)
- Keypad (optional)(If you plan to use a wall keypad, keep it available)
- Ladder (stable, long enough for reach)(Stay on a level surface; do not stand on the door or track)
- Small screwdriver or pointed tool(To press recessed Learn button safely)
- Fresh batteries (remote and keypad)(Avoid programming with dying batteries)
- Owner’s manual or model reference(Helps confirm exact Learn sequence and LED indicators)
- Marker or label tape(Label each device after programming)
Steps
Estimated time: 30-60 minutes
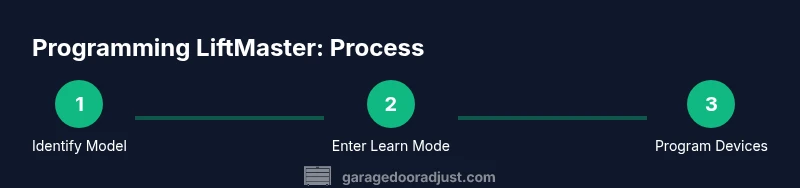
- 1
Identify model and prepare
Locate the opener’s model number and inspect the workspace. Gather your remote(s), keypad if used, and the owner's manual. Confirm you have a clear path to the sensor and the Learn button. This ensures you follow the correct procedure for liftmaster garage door opener programming.
Tip: Have the exact model number handy to avoid model-specific mistakes. - 2
Ensure safety and close gaps
Disengage the door’s manual lift by pulling the emergency release cord so the door won’t move during programming. Clear the area of pets and children. Verify that the door is closed or in a safe position before starting.
Tip: Never stand under the door while testing a new code. - 3
Enter Learn mode on the opener
Locate the Learn button on the motor unit and press it until the LED starts to blink. Some models require you to hold the button for a few seconds. This places the opener in programming mode and ready to accept a new code.
Tip: If the LED doesn’t blink, consult the manual for the exact Learn sequence for your model. - 4
Program the remote
Within the Learn window, press and hold the desired button on the remote until the LED confirms by a single blink or long blink pattern. Release the button and wait a moment to confirm the code is stored.
Tip: Program one remote at a time to avoid confusion. - 5
Program the keypad (if applicable)
Enter a four- or six-digit PIN on the keypad, then press the Learn button or follow the model-specific sequence. The keypad should confirm its memory by a LED blink. Test by entering the PIN and pressing the open/close button.
Tip: Choose a PIN you can remember but others cannot guess easily. - 6
Pair MyQ or app-based control
If your system uses MyQ, open the LiftMaster app and follow the prompts to pair the opener after the mechanical programming. Ensure the Wi-Fi connection is stable and the device is linked to the correct account.
Tip: Keep your router and phone close to reduce interference during pairing. - 7
Test all devices
Test each remote and keypad from multiple locations. Confirm the door responds correctly, and that the status LED behaves as expected when you command open or close.
Tip: Test with the door both near and far from the opener for reliable range. - 8
Document and label
Record which device was programmed, its function, and the date. Label remotes and keypads to prevent mix-ups later.
Tip: Keep a simple log for future maintenance or replacements.
Got Questions?
Can I program multiple remotes to a LiftMaster opener?
Yes. You can program more than one remote to operate a LiftMaster opener. Repeat the remote programming steps for each device, ensuring you complete the Learn sequence for every remote.
Yes, you can program multiple remotes. Just repeat the remote pairing steps for each device.
How do I reset a LiftMaster opener's memory?
To reset memory, press and hold the Learn button until the LED goes out or blinks in a specific pattern per model. This clears existing codes so you can start fresh.
Hold the Learn button until the LED turns off to reset memory.
Why won't my remote program?
Possible causes include weak batteries, incorrect Learn sequence, interference from nearby devices, or attempting to program while the door is moving. Verify battery power and retry with the correct sequence.
Check batteries and follow the exact Learn sequence for your model.
Is programming different for MyQ-enabled openers?
MyQ-enabled systems typically require an app-based pairing after hardware programming. Ensure your Wi‑Fi is stable and follow the app prompts to complete integration.
Yes, MyQ usually needs app pairing after hardware programming.
Do I need to unplug the opener to reset memory?
No. Resetting memory is done via the Learn button sequence on the opener, not by unplugging power. Unplugging is not recommended during programming.
Usually, you reset using the Learn button, not by unplugging.
What if the Learn button is hard to reach?
If the Learn button is recessed or difficult to access, use a small tool or the tip of a non-conductive object to press it gently, following model-specific guidance. Do not force anything that could damage the unit.
Use a small tool to press a recessed Learn button, gently and per your model's guide.
Watch Video
Quick Summary
- Know the Learn button and model-specific steps before you begin
- Test each device from multiple locations after programming
- Document and label devices to prevent future confusion
- MyQ pairing may be required for app control
- Safety first: keep people away during testing