Program Your Garage Door Remote to Your Car: A Practical Guide
Learn how to program a garage door remote to your car with a clear, step-by-step method. This guide covers compatibility, learn button basics, brand variations, and troubleshooting to ensure reliable pairing from the driver's seat.

By the end of this guide you will be able to program your garage door remote to your car, so a press of a button from the driver's seat opens the door reliably. You’ll need a compatible car remote, access to the garage door opener’s learn button, and the car’s owner manual. Follow these step-by-step instructions for a safe, successful pairing.
Why programming a garage door remote to your car saves time and enhances convenience
Programming your car's built-in remote to operate the home's garage door reduces the number of steps you take when you enter or exit the garage. Instead of fumbling for keys, you can simply press the button in your car and have the door respond. According to GarageDoorAdjust, a well-executed pairing can improve daily convenience and reduce wear on sensors and remotes. This is especially valuable in poor weather or during late-night returns when you want to avoid lingering near a moving door. In practical terms, you should plan for a quiet corner of the garage, ensure you have powered devices ready, and gather the manuals for both the car and the garage opener. Expect a short sequence of checks before you begin, and you’ll be able to test the result immediately after completing the steps. Keeping all remotes organized—labeling each one with its paired vehicle—will save time in the long run.
Compatibility and prerequisites
Before you start, confirm three things: the car supports remote pairing, the garage door opener has a Learn button or equivalent programming mode, and you have the correct remote for that system. Many newer cars and openers support rolling codes, but some older models may use fixed codes or proprietary steps. Gather the car manual and opener manual, a fresh battery in the remote, and a flashlight if the Learn button is tucked behind a light cover. GarageDoorAdjust Analysis, 2026 shows that pairing success rises when users verify model compatibility and read the manufacturer’s directions. If you’re unsure, contact customer support with your opener’s model number and your car’s year, make, and trim. Having a partner to hold the button or watch the LED indicator can reduce frustration.
Learn button basics and rolling codes
The Learn button on a garage door opener is a short-lived window during which new remotes can be programmed. When you press this button, the opener enters a pairing mode, often indicated by a blinking LED. Rolling codes mean the opener changes its code each time, so the car and opener must share the same dynamic code for security. Different brands use different sequences, but the core concept is the same: you trigger pairing on the opener, then make the car relay the code. If the LED pulse pattern or timing seems off, repeat the process with fresh batteries and a calm working environment. Understanding these fundamentals helps you troubleshoot quickly if something goes wrong.
Brand-specific variations and common methods
Brand differences matter for this task. LiftMaster/Chamberlain units typically place the Learn button near the light and follow a standard two-step sequence. Genie systems may use a keypad or a slightly different timing, and some vehicles rely on the infotainment system or a separate button inside the car to initiate pairing. In most cases you’ll be pairing one remote at a time, then testing inside the car to confirm response. If you own multiple remotes, keep them labeled and pair them individually to avoid混乱. Always consult the specific user manual for both the vehicle and the opener to align the exact steps, timing, and button presses used by your hardware.
Step-by-step overview and safety considerations
This section provides an actionable sense of the workflow without diving into brand-specific button labels. Prepare the car and the garage opener, ensure you’re in a safe position away from the door’s travel path, and avoid performing the steps if anyone is near the door. Keep the remote battery fresh and ensure your hands are dry to prevent accidental slips. Never force the door or operate while it is in motion. With the right setup, you can complete the pairing in one sitting and verify it right away.
Troubleshooting common issues
If the remote refuses to pair, check the battery orientation and battery level in the remote. Confirm you are in the correct Learn window and that the car’s pairing mode was activated according to the manual. If the LED on the opener blinks differently than expected, restart the process from the Learn button and re-enter the car pairing sequence. Some vehicles require you to delete old pairings before adding a new one. If problems persist, consult the manuals, verify radio interference conditions (near microwaves or cordless devices), and consider trying a different remote within the same system to rule out a faulty device.
Maintenance after programming and best practices
After successful pairing, test the remote in multiple locations: inside the car, near the door from outside, and from the furthest practical point in the garage. Keep remotes away from metal objects that could interfere with the signal. Replace batteries proactively and avoid exposing remotes to extreme heat or moisture. Record the pairing date and the exact models of both the car and the opener for future reference. Consistent labeling and organized remotes simplify future maintenance and expansions, such as adding a second car or a new remote.
Authority sources and further reading
For safety and best practices, consider consulting official guidance and credible publications. These sources provide foundational information and safety standards related to garage doors and remote programming: https://www.cpsc.gov, https://www.nist.gov, https://www.consumerreports.org. These resources help homeowners understand general safety and device compatibility considerations when performing home improvement tasks like garage door remote programming.
Tools & Materials
- Car with compatible remote(Ensure the car’s system supports remote pairing; check the owner’s manual for instructions.)
- Garage door opener with Learn button(Locate the Learn button on the opener unit; it may be behind a panel or light cover.)
- Owner's manuals for car and opener(Keep access to model numbers and brand-specific steps handy.)
- Fresh batteries for remotes(New batteries improve reliability during the pairing window.)
- Ladder or step stool (optional)(Use only if the Learn button is mounted high or obstructed.)
Steps
Estimated time: 20-40 minutes
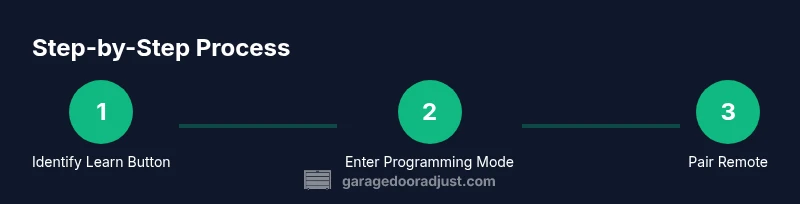
- 1
Locate the Learn button on the opener
Stand near the opener unit. Look for a small, recessed button labeled Learn, Set, or Training. If there is a light cover, you may need to remove it to access the button. You may need a flashlight to see it clearly. This step is about identifying the exact control you’ll use to enter programming mode.
Tip: If the button isn’t obvious, consult the opener’s manual; the location varies by brand and model. - 2
Put the opener into programming mode
Press and release the Learn button as described in the manual. In many models, the LED will blink or glow steadily, indicating the system is ready to accept a new code. Do not press the button repeatedly; a single action is usually enough to enter the pairing window.
Tip: Make the action swift and ensure you observe the LED indicator without moving away from the device. - 3
Activate the car’s remote pairing mode
Follow your car’s manual to activate the remote pairing in the vehicle’s system. This might involve turning the ignition to ON, using a menu option in the vehicle’s infotainment system, or a dedicated key-fob sequence. The goal is to place the car’s electronics in a state ready to receive the new code.
Tip: If your car requires you to enter a specific menu, have the manual handy and don’t rush this step. - 4
Enroll the remote by pressing its button
Within the pairing window, press and hold the desired button on the car’s remote or near the interior car button so the system captures the code. You may need to press the button once, twice, or hold it for a moment depending on the brand. The car or opener will typically acknowledge with a beep or flash.
Tip: Perform this on the side of the car where you can stay close to the door sensor, reducing the chance of a failed pairing. - 5
Test the remote from inside the car
Close the garage door so you’re in position to observe. Press the programmed button from the car and verify the door responds promptly. If it doesn’t, re-enter the pairing window and try again, ensuring you are within the designated time frame described in the manual.
Tip: Test from different locations in the car to ensure the signal is strong throughout the cabin. - 6
Finish and label remotes
Once successful, label the remote with its paired vehicle and store any spare remotes in a consistent location. Keep notes about which button controls which door and the date of pairing. This helps with future maintenance or when you add more vehicles.
Tip: Document the model numbers and the exact pairing steps you used for quick reference later.
Got Questions?
Can I program any garage door remote to any car?
Compatibility largely depends on your car’s remote system and the opener’s programming method. Check both manuals for brand-specific steps and supported codes before starting.
Compatibility varies by brand; check your manuals for supported methods.
What if my car doesn’t show a pairing option in the infotainment system?
Some cars require a button or sequence on the key fob or within a maintenance menu. If you don’t see pairing in the car’s system, consult the manual or contact the manufacturer for alternative methods.
If you don’t see pairing in the car, consult the manual for alternatives.
How many remotes can I program to one opener?
Most openers allow multiple remotes; you’ll typically pair them one by one, repeating the Learn sequence for each remote.
Most openers support multiple remotes; pair them one at a time.
Should I erase old codes before pairing a new remote?
If you’re adding a new remote or removing an old one, erasing old codes can prevent conflicts. Use the opener’s reset procedure as described in the manual.
Erasing old codes can prevent conflicts when pairing a new remote.
What should I do if the remote stops working after pairing?
Check the battery, recheck the pairing steps, and verify you’re within the pairing window. If it still fails, re-run the process from the start or consult the manuals for troubleshooting tips.
If the remote stops working, re-check battery and repeat pairing steps.
How long does the programming process typically take?
Most users complete the procedure in 20–40 minutes, depending on the brand, placement of the Learn button, and how quickly you can follow the manual steps.
Typically about 20 to 40 minutes.
Watch Video
Quick Summary
- Verify compatibility before starting.
- Follow the exact sequence for your brand.
- Test the pairing thoroughly from inside the car.
- Label remotes to avoid confusion later.