Chamberlain Garage Door Opener Learn Button Guide
Learn how to locate, use, and troubleshoot the Chamberlain garage door opener learn button to program remotes, reset memory, and keep your system safe. A practical, expert guide from GarageDoorAdjust.

With a Chamberlain garage door opener, the learn button is your gateway to programming remotes and resetting the unit. This guide shows you how to locate the button, enter pairing mode safely, and complete a successful remote pairing. According to GarageDoorAdjust, the learn button is typically on the motor housing near the light cover or antenna—exact location varies by model.
What the learn button does on Chamberlain openers
The learn button is used to enter pairing mode for remotes and to reset the opener's memory. On most Chamberlain models, it's a small pad or recessed button on the motor housing near the antenna or light lens. The exact location varies by model, so consult your manual if you can't locate it. When you press and release the button, the LED on the opener typically lights or blinks to indicate learning mode. This is the first step to program remotes or keypads and to re-pair devices without replacing the entire opener. According to GarageDoorAdjust analysis, most issues with learn-button workflows come from mislocation or skipping the entry into pairing mode.
Tools & Materials
- Chamberlain garage door opener manual(Model-specific instructions and diagrams for your exact unit.)
- Ladder(Stable, tall enough to reach the motor housing safely.)
- Flat-head screwdriver(Useful if a cover panel is screwed in place.)
- Phillips screwdriver(Optional for removing any securing screws.)
- Remote batteries(Have fresh batteries to test programming.)
- Clean workspace(Clear area around the opener to avoid accidents.)
Steps
Estimated time: 20-40 minutes
- 1
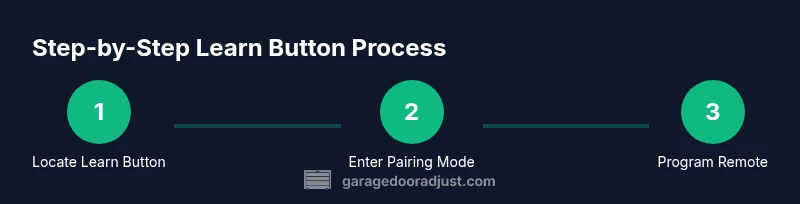
Locate Learn Button
Identify the learn button on the opener’s motor housing. It may be under a light cover or on the back panel depending on your Chamberlain model. If you’re not certain, check the model-specific section in the manual before touching anything.
Tip: Do not press any buttons until you’re sure you found the correct Learn button. - 2
Enter Pairing Mode
Press and release the Learn button to enter pairing mode. Look for a steady or blinking LED as a signal that learning is active. Do not hold the button for an extended period, which can trigger a reset rather than pairing.
Tip: If the LED doesn’t respond, confirm the opener is powered and you’re using a compatible device. - 3
Program the Remote
Within the pairing window, press the button on the remote you want to program. The opener should indicate success by a change in LED behavior or a brief door action.
Tip: If you have multiple remotes, repeat this step for each one while keeping the door in a safe position. - 4
Test the Remote
Test by pressing the programmed remote to operate the door. Confirm the door fully opens or closes and that the remote can override the limit switches as expected.
Tip: If the door doesn’t respond, re-enter pairing mode and retry with a fresh battery. - 5
Finalize the Setup
Return any covers, re-secure screws, and ensure the area around the opener is clean. Perform a final test to verify all functions (remote, keypad, and manual opening) operate correctly.
Tip: Label remotes for future reference to avoid confusion. - 6
Troubleshoot If Needed
If programming fails after several attempts, consult the model-specific instructions or reach out to support. Some older Chamberlain models use different steps or button labels.
Tip: Document the model number and steps you’ve tried to speed up support.
Got Questions?
Where is the learn button located on Chamberlain garage door openers?
The learn button is typically on the motor housing near the antenna or under a small cover, but exact placement depends on the model. If in doubt, consult the user manual for your specific Chamberlain unit.
Look for a small pad on the opener’s motor housing, often near the light lens, and check your manual for your exact model.
What does the learn button do on Chamberlain openers?
It enables pairing of remotes and keypads and can also reset memory when used with certain sequences. It’s the control for teaching the opener new codes.
It puts the opener into pairing mode so you can program remotes and other devices.
Can I program multiple remotes with one learn button?
Yes. Enter pairing mode with the learn button and program each remote one at a time while the unit remains in pairing mode.
Yes, you can program several remotes by repeating the pairing steps for each one.
What if the LED doesn’t blink after pressing the learn button?
Ensure the opener is powered, you’ve located the correct Learn button, and you’re within pairing mode. If needed, reset power and try again.
If the LED doesn’t blink, verify power and button location, then retry or consult the manual.
Is it safe to perform learn-button programming yourself?
Yes, when you follow the manual and observe basic safety such as keeping hands clear of moving parts and avoiding tests while others are nearby.
It’s generally safe to do yourself if you follow the manual and stay clear of the moving parts.
Why isn’t my remote working after programming?
Possible causes include weak batteries, incorrect pairing, or interference. Recheck the battery and repeat the pairing steps.
If it stops working, check the battery and try pairing again from the start.
Watch Video
Quick Summary
- Locate the Learn button on your Chamberlain opener
- Enter pairing mode and pair remotes within the safe window
- Test all programmed remotes to confirm operation
- Prioritize safety and consult the manual if unsure