Chamberlain Learn Button Guide: Step-by-Step Troubleshooting and Pairing
Learn how to locate, use, and troubleshoot the learn button on Chamberlain garage door openers. This guide covers pairing remotes, keypads, and smart devices safely for homeowners.

Using the learn button on Chamberlain garage door openers lets you pair remotes, keypads, and smart devices. Locate the learn button on the motor housing, usually near the rear or side panel, then press and hold until the LED blinks or changes color. Power should be on, and use a compatible remote or keypad. If the LED blinks, you’re ready to pair.
Understanding the Learn Button on Chamberlain Openers
The learn button on Chamberlain garage door openers is a small control used to train new remotes, keypads, and smart devices to talk to your opener. It is not a power switch; it is a programming interface. According to GarageDoorAdjust, understanding this button is a foundational skill for troubleshooting and routine maintenance. The button sits on the motor head of the opener unit, tucked behind a lift-cover or near the rear panel in many models. The color and shape vary by model, but its role is the same: to place the opener into a pairing mode for a short window of time so your new device can be recognized.
Different Chamberlain families—traditional screw-drive, belt-drive, and chain-drive openers—share this feature, though the exact timing and LED indicators might differ. If you’ve moved into a new home with a Chamberlain system, take a moment to identify whether you have a single-sensor Learn button or a dual-button setup used for older remotes. In most cases you’ll use the Learn button only for adding devices.
Where to Find the Learn Button on Common Chamberlain Models
Location varies by model, but you’ll typically find the Learn button on the opener’s motor head. Look for a small, recessed button behind a removable cover, or on the back edge of the housing near the power cord. On newer models, the Learn button may be labeled “Learn,” “Set,” or a small circular icon. If you can’t see it, check your model’s manual or the Chamberlain support site—many guides include a labeled diagram. Access might require you to lift a weather cover or remove a small panel, so have a flashlight handy and avoid forcing any plastics.
What the Learn Button Does: Pairing and Re-Pairing Devices
When you press and release the Learn button, you’re telling the opener to enter pairing mode. In this window (usually a few tens of seconds), new remotes, keypads, or smart devices can be taught to talk to the unit. Each successful pairing is indicated by a blink or a steady LED, depending on model. If you’re upgrading to a newer remote or adding a keypad, you’ll repeat the Learn sequence, then press the device button to complete the transfer. Remember that batteries in remotes should be fresh and the device should be within range.
Step-by-Step Context and Variations Across Models
Most Chamberlain openers use a similar workflow, but some features differ by model year. Start by confirming the unit is accessible from the garage and that you have the correct remote or keypad at hand. If your model uses a dual-button approach (older remotes), you may need to press and hold a secondary button after the Learn sequence to finalize enrollment. In all cases, keep the original remote handy until you verify a successful pairing, then label the device for future reference.
Troubleshooting Common Learn Button Issues
If the Learn button light does not respond, power on the unit and try again. A non-responsive LED can indicate a dead battery in the new device, an out-of-range sensor, or a memory limit being reached. If multiple remotes won’t pair, reset the opener to clear existing pairings and repeat the process with freshly charged batteries. For MyQ integrations, ensure the app pairing is completed after local pairing. If the door operates normally without any paired remotes, check for interference sources like power tools or garage lighting circuits nearby.
Safety, Maintenance, and Warranty Considerations
Always unplug or switch off power before removing the opener cover or touching internal components. Wear eye protection when removing covers and use a stable ladder. Regularly inspect the antenna, wiring, and mounting hardware for loose screws or frayed cables. If something seems off—unusual noises, jerky movement, or persistent LED errors—contact a professional. Modifying the opener’s electrical components can void warranties; respect the manufacturer’s guidelines and consult the warranty terms.
Practical Tips for Pairing Remotes, Keypads, and Smart Home Integrations
- Keep a simple inventory of paired devices and their pairing dates. This helps you manage memory and avoid conflicts.
- Test each remote at the car or entry point to ensure reliable operation from typical distances.
- If you’re adding a keypad, place it in a convenient, weather-protected location and reset it if needed.
- For smart-home integration, use the official Chamberlain/MyQ app steps to complete setup after local pairing.
- Always replace remote batteries before pairing to improve success rates.
Tools & Materials
- Flat-head screwdriver(For removing the opener cover screws)
- Phillips-head screwdriver(If model uses Phillips screws on the cover)
- Ladder(Stable, tall enough to reach the opener without overreaching)
- Fresh batteries for remotes/keypads(Use correct size; test fresh before pairing)
- Flashlight(Helpful for locating the Learn button behind covers)
- Clean cloth(Wipe dust from housing before reassembly)
Steps
Estimated time: 15-25 minutes
- 1
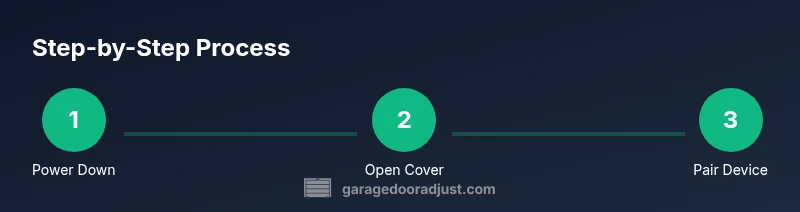
Power down the opener
Unplug the garage door opener from the outlet or switch off the circuit to ensure no motion occurs while you work.
Tip: Always cut power before touching internal components. - 2
Open the cover to access the Learn button
Use the appropriate screwdriver to remove the cover screws and gently lift the panel to reveal the button.
Tip: Note screw positions for reassembly. - 3
Identify the Learn button
Look for a small recessed button labeled Learn, Set, or with a circular icon on the housing.
Tip: If you can’t locate it, check the manual or model diagram. - 4
Enter pairing mode
Press and hold the Learn button until the LED changes color or begins blinking, then release.
Tip: Don’t release too soon; you must wait for the indicator to respond. - 5
Reconnect power and wait
Plug the unit back in and allow the LED to stabilize, indicating the opener is ready for pairing.
Tip: Give it a moment—some models need up to 30 seconds. - 6
Train the device
Within the pairing window, press the device button (remote or keypad) and hold until the LED confirms the enrollment.
Tip: Repeat if needed for multiple devices.
Got Questions?
What is the Learn button on a Chamberlain opener?
The Learn button is a pairing control used to train remotes, keypads, and smart devices to the opener. It activates the openers’ pairing mode for a short window.
The Learn button is used to pair remotes and keypads with your Chamberlain opener.
Where is the Learn button located?
Location varies by model but is typically on the opener's motor head, rear panel, or behind a small cover near the power cord.
It's usually on the motor head near the back of the unit.
Why won’t my remote pair after using Learn?
Possible causes include a dead battery, being out of range, existing paired devices occupying memory, or not exiting pairing mode properly. Replace batteries and retry within the pairing window.
Check batteries and range; retry during the pairing window.
How do I reset to factory settings for my opener?
Unplug the opener and follow the manufacturer’s reset steps for your model to clear all paired devices, then start from the Learn button again with fresh batteries.
Power off, then perform the factory reset per your model’s guide.
Is Learn needed for MyQ smart home integration?
Local pairing via Learn is usually required first. After that, complete the smart-home setup in the MyQ app to finish enrollment and enable remote features.
Yes, you typically pair locally first, then finish setup in the app.
What should I do if the LED doesn’t blink during pairing?
Check power, ensure you are within range, and verify you are using fresh batteries. If needed, try a different remote or keypad and retry with a fresh battery.
Make sure power and batteries are good, then retry.
Can I pair multiple devices at once?
Yes. Start with the primary device, then repeat the Learn sequence for each additional remote or keypad within the pairing window.
You can pair several devices by repeating the process for each one.
Watch Video
Quick Summary
- Locate the Learn button correctly and identify the indicator signals.
- Use power-off precautions and model-specific steps for safe pairing.
- Test each device after pairing and document locations.
- If issues arise, consult the manual or a pro to avoid warranty issues.