How to Reset a Garage Door with a Remote
Learn how to reset garage door with remote to re-pair your opener, fix miscommunication, and restore reliable operation. This educational guide, from GarageDoorAdjust, covers safety, tools, steps, and troubleshooting.

You will learn how to reset garage door with remote to re-sync your opener. This quick guide covers when to reset, what you’ll need, and the exact steps to re-pair your remote with the opener. By the end, your remote should operate your door reliably.
Why resetting the garage door remote matters
Resetting a remote is sometimes required after new batteries are installed, after a power outage, or when multiple remotes stop syncing with the opener. When remotes fall out of sync, the door may not respond reliably, operate only from a distance, or refuse to close. According to GarageDoorAdjust, re-pairing remotes and resetting the opener's learning memory restores reliable, immediate control. A clean reset also improves security by ensuring only paired remotes can operate the door. This section explains when to reset, what to expect, and how the process fits into overall garage door maintenance. Clear instructions help homeowners complete the task safely and confidently, reducing the need for costly service calls.
In many models, resetting is a routine maintenance step you’ll perform after replacing batteries, moving to a new home, or when the remote seems to lose connection more often than usual. The goal is to restore a direct, fast link between the remote and the opener while ensuring any previously paired remotes are correctly recognized. A deliberate, methodical approach reduces frustration and minimizes risk to people or property.
Safety first: understand the risks and plan accordingly
Working with garage door openers carries potential hazards if you bypass safety features or operate unlabeled controls. Always ensure the door is in good operating condition before attempting a reset. Keep bystanders clear, especially children and pets, and stand to the side rather than in the door’s path. Do not use excessive force on buttons or panels, and avoid letting the door move while you are near the tracks or sensors. If the door doesn’t respond after a reset, stop and reassess; a malfunctioning opener can present a serious safety risk. The GarageDoorAdjust approach emphasizes controlled steps, clear testing, and a readiness to pause if something doesn’t feel right.
What you’ll need: a quick checklist of tools and supplies
Before you begin, gather the items you’ll use during the reset procedure. Have fresh batteries on hand for the remote, ensure you can access the opener’s control panel, and have a sturdy step stool if needed to reach the Learn button. A small notebook or your phone is helpful to record which remotes are paired. If your door has a rotary safety sensor or a keypad near the entry, verify those components are functioning and unobstructed. Following a prepared checklist reduces the chance of missing a critical step and speeds up the process.
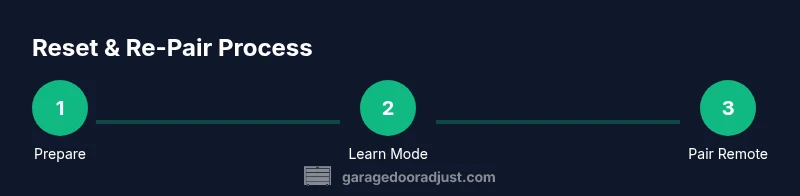
Step-by-step overview: how the reset process fits together
Resetting and re-pairing remotes is a sequence: (1) put the opener in learn/reset mode, (2) clear existing remote memories if your model supports it, (3) pair the primary remote, (4) repeat for additional remotes, and (5) verify door operation from all paired devices. This structure keeps the memory clean, avoids cross-pairing, and delivers reliable control. Different opener brands have slightly different button patterns and LED indicators, so reviewing your manual can help avoid confusion. Throughout this section you will see practical, model-agnostic guidance designed for common homeowners’ garage door setups.
Common pitfalls and how to prevent them
A few frequent mistakes can derail a reset: spraying lubricant on electrical components, attempting to reset while the door is in motion, or attempting to pair remotes from far away when the Learn indicator is blinking. Another pitfall is pairing a remote before putting the opener into Learn mode, which will fail to store the new remote’s code. The fix is to pause, re-enter Learn mode, and then try again. Keeping remotes and buttons in the same room helps prevent radio interference from outside devices. If you’ve followed the steps and still experience issues, a professional inspection may be warranted to check for damaged sensors or wiring.
When to call a pro: recognizing limits and safety concerns
If the door moves unexpectedly, makes grinding noises, or if safety sensors fail to respond during tests, stop and seek professional help. A misaligned photoeye, broken torsion springs, or worn tracks are not safe to repair without proper equipment and expertise. In these cases, GarageDoorAdjust recommends consulting a licensed technician to diagnose and correct mechanical problems before attempting another reset. Safety should always take priority over speed when dealing with garage doors and openers.
Tools & Materials
- Remote(s) to re-pair(Have spare remotes ready for simultaneous pairing)
- Fresh batteries(Use the correct battery type for each remote)
- Access to opener control panel(Usually on the motor unit mounted on the ceiling)
- Ladder or step stool(Needed to reach high-mounted Learn button)
- Owner’s manual or model information(Helpful if Learn button sequence varies by model)
Steps
Estimated time: 20-40 minutes
- 1
Prepare workspace
Clear the area beneath the door. Ensure pets and bystanders stay clear of the doorway. If you’re using a ladder, position it securely on a flat surface and have a helper hold it steady. This setup minimizes distraction and reduces the risk of injury during testing.
Tip: Keep a flashlight handy to read small indicator lights on the opener. - 2
Access the opener’s Learn button
Find the Learn or Home button on the opener motor housing. It’s usually near the hanging rail or on the back panel. If you don’t see a button, consult the model manual or search the plate for a recessed button.
Tip: Before pressing anything, make sure the door is fully closed. - 3
Put the opener in Learn/Reset mode
Press and hold the Learn/Reset button until the indicator light blinks or goes off, depending on the model. Some units require a held press of 6–10 seconds. This step clears previous pairings and prepares the system for new remotes.
Tip: If the light doesn’t behave as described, pause and retry after 5 seconds. - 4
Reset existing remote memories (if applicable)
If your opener supports clearing remote memory, perform that action now according to the manual. Not all models require this step, but clearing helps avoid cross-pairing with old codes.
Tip: Use the manual’s exact sequence; a wrong step can leave the opener unable to learn new remotes. - 5
Pair the primary remote
While Learn mode is active, press and hold the remote’s button near the opener. Watch for the opener’s LED to blink or a confirm beep, indicating successful pairing. Release once confirmed.
Tip: Pair one remote first to establish a baseline, then add others one at a time. - 6
Pair additional remotes
Repeat the previous step for each additional remote you want to use. Ensure you observe the same confirmation signal for each pairing.
Tip: Avoid crossing remotes with different models; keep to the same brand family if possible. - 7
Test door operation from all remotes
With the door closed, test each remote to confirm opening and closing commands respond promptly. If any remote fails, repeat the pairing sequence for that device.
Tip: Test both close and stop functions to ensure full control is restored. - 8
Finalize and safety check
Close any panels, remove tools, and re-test safety sensors by interrupting the beam with a small object. Ensure the door stops and reverses as intended. Document the steps for future maintenance.
Tip: Keep a quick-access note with the paired remotes and their buttons labeled.
Got Questions?
Do I need to reset every remote after a power outage?
Not always. Some models retain memory after outages, but others may require re-pairing. If you notice a loss of sync after a outage, perform a quick reset and re-pair the remotes you use most.
Power outages may reset some remotes. If you notice lost sync, re-pair the remotes you use most.
Why won’t my remote pair after reset?
If pairing fails, confirm you are in Learn mode, hold the remote button close to the opener, and ensure you are within the recommended range. Check batteries and LED indicators on both devices. If issues persist, consult the manual for model-specific steps.
If pairing fails, confirm Learn mode and proximity, then check batteries. If it still fails, consult your model’s manual.
Can I reset the opener without a remote?
Yes. Use the Learn/Reset button on the opener itself to reset the memory. This is useful if a remote is missing or unresponsive. After resetting from the opener, you’ll need to re-pair any remotes you want to use.
You can reset the opener using its Learn button. Then re-pair your remotes as needed.
How long does the reset process take?
Most resets take about 20 to 40 minutes, depending on how many remotes you’re pairing and your model’s specific steps. Plan for a calm, undisturbed session.
Most resets take around 20 to 40 minutes, depending on remotes and model.
Is it safe to test the door after resetting?
Yes, but perform tests from a safe position and ensure the door reverses when it contacts an obstacle. Verify the safety sensors respond to light beams. If anything feels off, stop and reassess.
Yes, test safely and ensure doors reverse on obstacles and sensors work.
Do I need to re-pair the wall control after a reset?
In most cases, the wall control remains paired. If the wall control ceases to control the door after a reset, re-pair it following your model’s instructions. Check for user manual guidance.
Wall controls usually stay paired; re-pair only if they stop working after a reset.
Watch Video
Quick Summary
- Begin with Learn mode and confirm the LED signal.
- Pair remotes one at a time for reliability.
- Test all remotes from multiple distances.
- Document paired remotes and any model notes for future maintenance.