How to Open a Garage Door When Stuck: A Practical Guide
Learn safe, practical steps to open a garage door when stuck. This guide covers safety, emergency release use, manual lifting, track inspection, testing, and knowing when to call a pro.

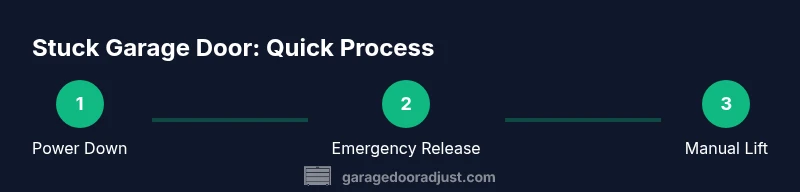
Mastering how to open garage door when stuck starts with safety first. Disconnect power to the opener, pull the emergency release, and attempt a controlled manual lift with steady, even force. Check for obstructions, misaligned tracks, and broken springs. Reconnect power and test sensors; if the door still won’t move, call a pro.
Why opening a stuck garage door safely matters
Mastering how to open garage door when stuck starts with safety and a clear plan. The door is typically under tension from springs and cables, and a sudden movement can cause serious injury or property damage. According to GarageDoorAdjust, safety is the top priority in any jam, especially if you’re unsure of the underlying cause. The GarageDoorAdjust Analysis, 2026 indicates that most jams stem from simple issues such as obstructions, dirt in the tracks, or sensor misalignment, but the consequences can escalate quickly if the door slips off its tracks or the spring becomes unbalanced. By adopting a calm, stepwise approach, you reduce risk and increase your chances of restoring operation without unnecessary repairs. This article guides homeowners through practical checks, safe manual techniques, and when to call a professional.
Common causes of a stuck garage door
Understanding why a garage door becomes stuck helps you decide which steps to take next. Obstructions in the track from dirt, leaves, or small objects are a frequent culprit. Misaligned or damaged tracks can prevent smooth movement, while worn rollers or hinges may bind the door. Tension in the springs can also feel like a jam, especially if the door is heavy on one side. Sensor alignment is another common factor: infrared beams failing to read correctly will halt operation for safety. Finally, weather-related issues—extreme cold causing stiff metal or warped panels—can make a door feel stuck. By quickly identifying the most probable cause, you can tailor your approach and avoid dangerous experiments.
Prepping your workspace and safety gear
Before touching a stuck door, set up a safe workspace. Clear the area of vehicles and obstacles, park on a flat surface, and ensure there’s ample lighting. Put on eye protection and gloves to guard against pinches and sharp edges. Have a flashlight handy to inspect tracks and hardware up close. If you’re working from a ladder, have a helper hold it steady and never stand on the door itself. Finally, power down the opener to eliminate electrical hazards and prevent accidental re-energization during manual work.
Step-by-step: manual override and lifting the door
This section outlines a practical approach to regain manual control. If the opener is unsecured, locate the emergency release handle or cord and pull it to disconnect the door from the motor. With a partner, stand to the side of the door and grip the door firmly, and then apply steady, downward pressure while lifting from the bottom. If the door is heavy, step in with your feet spaced apart to maximize leverage and avoid tipping. Stop if you hear creaking or feel resistance beyond normal weight; forcing the door can damage springs or tracks. After a successful lift, try to move the door slowly by hand along its tracks to confirm even movement. Finally, reattach the opener and test the safety sensors and limit switches.
Inspecting tracks and hardware
With the door in a partially open position, inspect for kinks, dents, or debris in the tracks. Look for loose mounting screws, bent rollers, or worn hinges. Check the rollers and bearing surfaces for smooth rotation, and ensure the door remains balanced while moving. If tracks are misaligned, you may notice gaps between the roller wheels and tracks; this requires careful adjustment or professional alignment. Lubricate metal-to-metal contact points with a silicone-based lubricant, avoiding grease on nylon rollers. Do not lubricate plastic components unless the manufacturer approves it. Cleaning and inspection should be thorough but gentle to preserve parts.
Reconnecting the opener and testing the system
After manually advancing the door and confirming smooth travel, reconnect the emergency release to re-engage the opener. Reconnect the power to the garage door opener and perform a slow, test cycle from the wall switch and remote. Observe the door as it travels up and down to ensure it stops if there’s an obstacle, and verify that safety sensors are aligned and functioning. If the door hesitates or reverses unexpectedly, it may indicate misalignment or a failing sensor; address these issues before normal use.
When to call a professional and safety warnings
If you encounter a broken spring, severely bent track, frayed cables, or if the door remains stubbornly stuck after manual intervention, it’s time to call a professional. Springs and cables operate under high tension and can cause severe injuries if mishandled. Do not attempt to remove or adjust damaged components yourself. In some cases, the torque or counterweight system may require special tools and procedures only trained technicians should perform. For safety, never stand under a door that’s moving, and never attempt to catch a falling section.
Preventive maintenance to reduce future jams
Prevention is the best cure for a stuck door. Schedule regular inspections of tracks, rollers, hinges, and springs. Clean tracks to remove dirt and debris; lubricate moving parts with manufacturer-approved lubricants; realign sensors if they drift out of place after a bump or windstorm. Keep the garage floor clear of clutter that could fall into the tracks. Consider upgrading worn hardware or replacing the door if the panels are dented or the springs show visible wear. Finally, educate family members on how and when to use the emergency release safely so it remains reliable when needed.
Authority notes and sources
For homeowners seeking deeper safety and maintenance guidance, the following sources can provide additional context and best practices: OSHA guidance on general safety precautions around machinery, University Extension resources on garage door safety and maintenance, and Consumer Reports safety and reliability recommendations for home hardware. The guidance here also aligns with monitoring standards discussed by GarageDoorAdjust Analysis, 2026.
Tools & Materials
- Safety goggles(Protect eyes from debris and springs.)
- Work gloves(Grip and protect hands during manual lifting.)
- Flashlight(Inspect tracks and hardware in dim areas.)
- Sturdy ladder(Only if you need to reach high components safely.)
- Adjustable wrench(Loosen or tighten mounting screws if needed.)
- Pliers(Assist with removing obstructions on tracks.)
- Emergency release rope/handle(Prerequisite for disconnecting the opener.)
Steps
Estimated time: 60-90 minutes
- 1
Prepare area and safety
Clear the garage space, ensure lighting, and set up a stable workspace. Put on eye protection and gloves. If a stair-step ladder is needed, have a helper steady it.
Tip: Keep children and pets away; ensure a flat surface for stability. - 2
Power down the opener
Switch off the garage door opener at the wall control or breaker to avoid accidental movement. This prevents electric shocks and unexpected activation while you work.
Tip: Verify the power is off with a quick test of the wall switch. - 3
Engage the emergency release
Locate the red cord or lever labeled emergency release and pull it to disengage the door from the opener. You should be able to move the door manually with some resistance but without the motor fighting you.
Tip: Do not yank; apply steady, controlled force. - 4
Attempt manual lifting with help
With a partner, place hands under the bottom corners and lift evenly. Maintain a low center of gravity and avoid twisting the door.
Tip: Move in a slow, coordinated manner to prevent tipping. - 5
Inspect tracks and hardware
Check for dents, debris, or misalignment. Look for loose screws and worn rollers.
Tip: If you see obvious damage, stop and call a pro instead of trying to force it. - 6
Lubricate and adjust
Apply a silicone-based lubricant to moving parts; avoid greasing nylon rollers. Realign any misaligned components carefully.
Tip: Only lubricate metal-to-metal contact points per manufacturer guidance. - 7
Re-engage the opener and test
Reconnect the emergency release, restore power, and run a slow test cycle. Check safety sensors and ensure the door stops when an obstacle is detected.
Tip: Watch for smooth travel, no jerks, and stable halting. - 8
Evaluate safety and decide on next steps
If the door still struggles, evaluate whether the issue is a safety concern or a mechanical failure requiring professional help.
Tip: If in doubt, err on the side of caution and call a professional. - 9
Document and schedule preventive maintenance
Note the issues encountered and plan a preventive maintenance routine to prevent recurrence.
Tip: Set a reminder for semi-annual checks.
Got Questions?
What causes a garage door to get stuck?
Common causes include obstructions in the track, misaligned tracks, worn rollers, released springs, and sensor misalignment. Identifying the most likely cause helps you apply the right fix safely.
Common causes include obstructions, misaligned tracks, worn rollers, and sensor misalignment.
Can I manually open a garage door if the opener is stuck?
Yes, you can manually open a door after engaging the emergency release, but proceed with caution and avoid forcing heavy doors. If the door is heavy or dangerous to move, stop and call a pro.
Yes, you can manually open after the release, but be careful and don’t force it.
Is it safe to lubricate the tracks to fix a jam?
Lubrication can help moving parts, but it won’t fix a broken spring or bent track. Use manufacturer-approved lubricants and avoid over-lubrication that attracts dirt.
Lubrication helps, but won’t fix structural issues.
What should I do if the door falls suddenly?
Move away immediately and do not try to catch or hold the door. Sudden movement under load can cause serious injuries; call a professional.
Move away and don’t try to catch it; call a pro.
Do I need to reset my opener after manual release?
Typically yes; re-engage the opener by reconnecting power and testing the full operation. If you experience repeated jams, have the system inspected.
Yes, reconnect power and test the system.
When should I replace the door or springs?
Replacement may be necessary if springs show wear, cables fray, or tracks are badly damaged. A professional assessment will determine the safest course.
If springs or tracks are worn or damaged, consider replacement.
Watch Video
Quick Summary
- Assess safety before touching the door
- Use the emergency release to gain manual control
- Inspect tracks, rollers, and springs for damage
- Know when to call a professional for spring or structural issues