How to Make Garage Door Open Higher: A Step-by-Step Guide
Learn how to safely raise your garage door opening height with a structured, home-friendly approach. This guide covers measurements, limit switches, track alignment, and safety checks. Includes tools, step-by-step actions, tips, and when to call a pro.

Goal: Learn how to make garage door open higher by safely increasing travel height through limit switch adjustments, track alignment, and opener settings. You’ll need to verify clearance, disconnect power, calibrate the opener, and test safety sensors after every adjustment. If your door uses torsion springs or you’re unsure, stop and seek professional help.
Why you might want to increase your opening height
If you need more clearance for tall vehicles, storage above the door, or bulky items, you may search for how to make garage door open higher. Increasing the opening height isn’t just about extra space; it can improve door operation and storage flexibility when done safely. According to GarageDoorAdjust, many homeowners underestimate how much travel height their opener already has and can safely gain with small, deliberate changes. The key is to balance height with proper safety devices and door balance. In this section we explore common use cases, potential constraints, and what you can realistically achieve without compromising safety or code compliance. We’ll also highlight how to measure your current opening, determine the target height, and identify components that control travel, such as limit switches, track brackets, and the door’s balance. Expect a careful, measured approach that respects safety and local code requirements while you plan the upgrade.
Safety prerequisites and risk awareness
Working on a garage door can be dangerous, especially when springs or heavy tracks are involved. Before you begin, disconnect power to the opener and test manual operation to ensure you can move the door safely by hand. Wear protective eyewear and gloves, and clear the area of children and pets. If you notice any unusual sounds, stiff movement, or binding, pause and reassess. The balance of the door is critical: a poorly balanced door can slam shut or slip off track when raised higher. If you encounter spring-related components or believe the balance is off, stop and seek professional evaluation. This section outlines the safety steps you must follow and why they matter for a successful, risk-aware height adjustment.
Key concepts: travel height, limit switches, and track alignment
Understanding how travel height is controlled helps explain why some doors can open higher with only small changes. Travel height is the distance the door travels upward before the opener stops. Limit switches or travel limits tell the opener when to stop. Track alignment ensures the door moves in a straight path without binding on uneven surfaces. When raising the opening height, you may need to adjust one or more of these elements: the up travel limit, the upper track height, and the alignment of the door relative to its jambs. Misadjustments can cause mis-tracking, sensor misalignment, or improper stopping points, leading to safety risks and potential damage. This section unpacks these concepts so you can diagnose what needs tweaking.
Methods to safely increase height: overview of approaches
There are several approaches to safely increase the opening height, often in combination. One common method is to adjust the opener’s up-travel limit to allow more movement before stopping. Another approach is to fine-tune the upper track height or brackets so the door travels a little higher without tilting or binding. Some systems also require minor hinge alignment or bracket shimming. Important: do not attempt any modifications to torsion springs or the cable drums unless you are trained and equipped. This overview explains safe, incremental methods, the typical signs of success, and the warning indicators that mean you should pause and seek professional help. The goal is a taller opening that remains safe, balanced, and compliant with local codes.
Troubleshooting and maintenance after height changes
After increasing height, recheck safety sensors, ensure the door returns to a fully closed position, and confirm there are no new obstructions in the doorway path. Recalibrate remotes and keypad entries if your opener stores travel data. Inspect the weather seal and track alignment again since changes can reveal minor gaps or misalignments that weren’t evident before. Document any measurements and adjustments so you can return to the original setup if needed. Regular maintenance, including lubrication of rollers and tracks and periodic balance checks, helps maintain reliability after height changes.
Tools & Materials
- Ladder or scaffold(Stable, tall enough to reach the top of the track without overreaching)
- Safety glasses(Protect eyes from debris and springs)
- Work gloves(Grip and protection during handling)
- Screwdriver set (flathead and Phillips)(For limit switch screws and brackets)
- Socket wrench set(For bolts on track brackets and hardware)
- Adjustable wrench(Hold nuts while turning bolts)
- Measuring tape(Accurate clearance and travel measurements)
- Level(Keep tracks plumb and brackets straight)
- Marker or chalk(Mark positions on brackets and tracks)
- Pliers(Gripping small hardware and clips)
- Drill with bits(If mounting new brackets or drilling for shims)
- Rubber mallet(Gentle nudges to reposition parts)
- Safety pins or clamps(Secure components when testing)
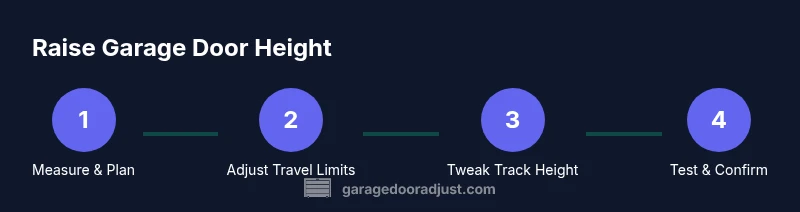
Steps
Estimated time: 60-120 minutes
- 1
Disconnect power and test manual operation
Unplug the garage door opener, then operate the door by hand to verify it moves smoothly along the tracks without binding. This ensures you can safely observe changes without power-assisted movement. Confirm there is no spring tension while manually lifting and lowering the door.
Tip: Always confirm manual operation before making any electrical changes or adjustments. - 2
Measure current travel height and desired clearance
With the door in the fully open position, measure the distance from the floor to the top of the door opening. Compare this to the header height and note how much additional height you’d like to gain. Record your baseline measurements for reference during testing.
Tip: Take multiple measurements at different points to account for sag or uneven floors. - 3
Inspect safety devices and track for obstruction
Check the safety sensors, track brackets, and roller assemblies for wear, corrosion, or obstructions. Clear any debris and ensure sensors align properly. A misaligned sensor can cause the door to stop unexpectedly or fail to reverse properly.
Tip: Do not bypass safety sensors to achieve more height. - 4
Adjust the opener's up travel limit
Locate the up-travel limit screw or dial on your opener’s control panel or motor unit. Turn it in small increments (typically 1/4 turn) and test the door’s travel in steps. Avoid over-travel that could cause the door to contact the header or ceiling.
Tip: Make the smallest adjustment possible and verify after each test. - 5
Raise the upper track height (if needed)
If the door still conflicts with the header or ceiling, slightly raise the upper track by loosening the mounting bolts and moving the track shims or brackets. Re-secure and re-check vertical alignment with a level. Ensure the track remains plumb and parallel to the door.
Tip: Only raise by small increments; major alterations can destabilize the door. - 6
Check door balance and spring safety
A door that isn’t balanced could bind or slam when travel height increases. If the door feels heavy, sticks, or sways, stop and reassess; incorrect spring tension can be dangerous. Do not adjust springs unless you’re trained and equipped for it.
Tip: If in doubt about springs, call a pro before continuing. - 7
Re-test, calibrate remotes, and document changes
Reconnect power and test the door’s full travel in multiple cycles, from fully open to fully closed. Re-sync remotes and keypad codes if your system stores travel data. Record the new travel height, track positions, and any sensor adjustments for future reference.
Tip: Keep a quick-change log in case you need to revert later.
Got Questions?
Is it safe to increase the opening height yourself?
DIY height increases can be safe if you strictly follow safety steps, measure accurately, and avoid adjusting springs. If you’re unsure about any component, stop and consult a professional.
You can do it safely if you follow steps, measure carefully, and skip spring adjustments. If unsure, get a pro.
How can I tell how much height I can safely gain?
Start by measuring current travel and clearances, then increase in small increments while testing after each change. Stop if you encounter resistance, binding, or sensor errors.
Measure current travel, increase slowly, and test after each step. Stop if you feel binding or sensor issues.
Will increasing height affect opener performance?
Potentially yes. You may need to reprogram travel limits and ensure sensors function. If the change is substantial, consult the opener’s documentation or a pro.
Yes, you might need to adjust limits and sensors. If in doubt, check the manual or call a pro.
Can I raise height without touching the springs?
Often you can gain height by adjusting limits and tracks, but significant changes or signs of imbalance should prompt professional evaluation of springs and hardware.
You can usually adjust limits and tracks, but if the springs seem off, call a pro.
How long does this process typically take?
For a typical non-professional, plan about 60-120 minutes, depending on door type and any required track adjustments. Complex setups may take longer.
Usually about an hour to two, depending on the setup. More time if extra adjustments are needed.
When should I call a professional?
If you encounter torsion springs, unbalanced balance, unusual noises, or if sensor alignment remains off after adjustments, stop and contact a licensed garage door technician.
Call a pro if you hit spring issues, balance problems, or sensor misalignment after adjustments.
Watch Video
Quick Summary
- Plan measurements before starting any height changes
- Only adjust what is necessary and keep safety devices aligned
- Do not touch springs or assume they’re safe to adjust
- Test thoroughly and document all changes