Garage Door High Lift Kit: A Homeowner's Guide to Safe Installation and Adjustment
Learn how to safely assess, plan, and install a garage door high lift kit with a practical, step-by-step approach. Includes tools, safety, and maintenance tips for homeowners.

You’ll learn how to assess compatibility, prepare the workspace, and safely install a garage door high lift kit, improving headroom for taller vehicles or storage. This guide covers planning, essential tools, step-by-step actions, safety checks, and post-install adjustments to keep the door balanced and reliable.
Understanding the garage door high lift kit and its purpose
A garage door high lift kit changes how far your door travels, increasing headroom and making space for tall vehicles, tall storage shelves, or attic access. The kit typically raises the door’s track height and modifies mounting brackets, requiring careful measurements and re-alignment of the opener, tracks, and sensors. According to GarageDoorAdjust, a high lift kit can deliver significant headroom gains when installed correctly, but it can also introduce safety risks if installed improperly. The GarageDoorAdjust team found that improper adjustments are a leading cause of mis-tracking, binding tracks, and sensor misalignment after an upgrade. This makes planning, precise measurement, and strict adherence to the manufacturer’s torque and fastener specs essential. In this guide, we’ll walk through compatibility checks, the planning phase, required tools, a step-by-step installation overview, and the post-install safety checks you should perform before using the system daily. We’ll also cover maintenance, common issues, and ways to revert if needed. If you’re a homeowner considering a higher lift, read on to determine whether a high lift kit is right for your door and what you should expect in terms of cost, time, and safety. In short, a high lift kit is not a one-size-fits-all upgrade; it requires a careful fit for door type, spring system, and ceiling clearance.
Assessing compatibility and planning
Before you touch any hardware, measure your current door height, track length, and the available headroom in the garage. A high lift kit can only work if there’s enough space above the door to accommodate the extended vertical track and new mounting brackets without hitting the ceiling or other obstructions. Check the door type (single vs. double), spring type (torsion vs. extension), and the existing opener model; and verify that the opener travel limits can be adjusted to accommodate the new travel distance. You’ll need to know whether the frame and ceiling structure can support the extra weight and whether the wall brackets have enough clearance for relocation. The GarageDoorAdjust analysis suggests that homeowners who map the required changes and create a written plan experience fewer surprises during installation. After you plan, create a budget, list all required hardware, and decide whether you’ll perform the upgrade yourself or hire a professional. A proper plan also includes contingencies for electrical wiring, sensor placement, and future maintenance access. This planning phase sets expectations for time, cost, and potential disruptions to daily use of the garage.
Tools, materials, and prep
To execute the upgrade, gather the following essential tools and parts, then set up a stable workspace. Accurate measurements are critical, so keep a tape measure handy and label all components as you remove them. A level helps ensure vertical accuracy, while a ladder or scaffold keeps you safely at the correct height. A drill with driver bits, a socket set, and a set of wrenches are necessary for securing brackets and tracks. Wear safety glasses and gloves throughout the job, and keep a helper nearby to hold tracks or brackets during mounting. The high lift kit components will typically include longer track sections, extended brackets, new fasteners, spacers, and potentially an upgraded opener mounting plate. If any part is out of spec, contact the manufacturer instead of improvising. Being organized reduces the risk of misaligned tracks or added friction that can damage the door or opener. Remember to verify compatibility with your specific door height, spring type, and ceiling clearance before purchasing parts.
Step-by-step overview
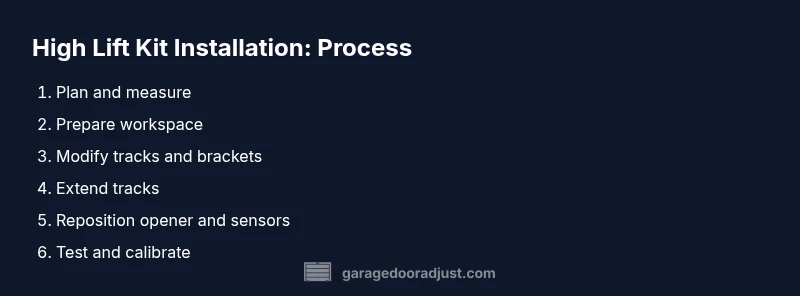
During installation, you’ll follow a sequence of precise actions designed to preserve safety and door balance. The steps cover securing the door, measuring the new travel height, swapping track sections, relocating brackets, aligning tracks, reprogramming the opener, and performing a safety test. Each action has a clear rationale and a defined time expectation. For best results, work with a helper for handling long track sections and guiding the door through its travel arc. After laying out the plan, you’ll proceed to adjust the vertical track height, extend brackets, and reassess track alignment to ensure smooth operation.
Safety, warnings, and common mistakes
High lift installations can be dangerous because they affect door balance, track alignment, and spring tension. Do not attempt any work on torsion springs unless you’re trained and equipped; these components store lethal energy. Ensure the door is securely clamped or bolted to the track before making changes. If you notice binding, unusual noises, or the door jumps during travel, stop and reassess alignment, torque, and sensor positions. A misaligned sensor can cause open/close reversals that compromise safety. Always disconnect the opener from power before adjustments. For DIY enthusiasts, a common mistake is underestimating the required ceiling clearance or misplacing brackets, which can result in binding or door derailment. A careful two-person workflow with proper bracing dramatically reduces risk.
Maintenance and tuning after installation
Post-install maintenance is essential to preserve safety and performance. Regularly inspect brackets, bolts, and track joints for looseness or wear. Lubricate moving parts with a light garage door lubricant, paying attention to rollers and hinges, and avoid over-lubricating tracks, which can attract dirt. Recheck sensor alignment after a few cycles, and verify that the safety reversal mechanism continues to function correctly. Seasonal checks—before winter and after extreme heat—help identify wear patterns caused by temperature fluctuations. The goal is to keep harmonized movement between door sections and tracks, ensure balanced spring tension, and prevent sagging or mis-tracking. If you notice persistent binding, track wear, or inconsistent travel, pause use and consult a professional.
Troubleshooting and revert options
If anything feels off after installation, stop using the system and revisit the alignment steps. Common issues include noisy operation, inconsistent travel distance, or sensor misreads. Start by rechecking the vertical track height and bracket positions, then verify the opener’s travel limits and force settings. If you decide the upgrade isn’t a good fit for your door, verify whether the manufacturer offers a factory-supported revert procedure or consider swapping back to the original track height using factory-approved components. Document the steps you took and any adjustments to help future maintenance or warranty discussions. In some cases, a professional adjustment or return to stock may be the safest course of action.
Tools & Materials
- Tape measure (8 ft or longer)(For accurate door height and track measurements)
- Safety glasses(ANSI Z87.1 compliant)
- Work gloves(Protect hands during handling)
- Sturdy ladder or scaffold(Stable access to ceiling height)
- Wrenches (assorted)(For bracket and track bolts)
- Socket set(Matching bolt sizes in kit)
- Power drill with bits(Driver bits for fasteners)
- Level(Keep tracks vertical)
- Marker or chalk(Mark new reference lines)
- Lubricant (garage-door oil)(Light lubrication on hinges and rollers)
- High lift kit components(Extended tracks, brackets, spacers, bolts)
Steps
Estimated time: Estimated total time: 3-5 hours
- 1
Prepare and secure the door
Clear the area, disconnect power to the opener, and clamp the door in place to prevent movement during work.
Tip: Use C-clamps on the track to prevent accidental door movement. - 2
Measure the new travel height
With the door closed, measure the desired top travel height and mark new reference points on the vertical tracks.
Tip: Double-check measurements against ceiling clearance to avoid interference. - 3
Remove or relocate existing track components
Loosen and move or replace sections that will interfere with the extended track height.
Tip: Take photos before removal to guide reassembly. - 4
Install extended brackets and spacers
Attach the new lift brackets and spacers per the kit instructions, keeping fasteners snug but not over-tightened.
Tip: Use a torque wrench if provided by the kit to meet spec. - 5
Extend or replace vertical tracks
Install the extended vertical track sections, ensuring they align straight with the existing horizontal section.
Tip: Check for smooth articulation with a dry run of the door a few inches up and down. - 6
Relocate opener mounting and sensors
Adjust the opener mounting plate and sensor brackets to accommodate the new door travel distance.
Tip: Reprogram travel limits and safety sensors after repositioning. - 7
Test operation and calibrate
Reconnect power, perform several open/close cycles, and fine-tune the travel limits and force settings.
Tip: Test with obstacle present to confirm safety reversal works.
Got Questions?
What is a garage door high lift kit and what does it do?
A high lift kit increases the door travel height by extending tracks and brackets, creating more headroom. It’s useful for tall vehicles or extra storage, but requires careful planning and proper alignment to avoid binding or sensor misalignment.
A high lift kit raises the door tracks to gain headroom. It helps with tall vehicles, but it needs careful planning and proper alignment for safe operation.
Can I install a high lift kit myself, or should I hire a pro?
Installing a high lift kit can be a doable DIY project for those with mechanical aptitude, but it involves lifting components with stored energy and potential safety risks. If you’re uncertain, hire a qualified technician to avoid injuries and ensure proper alignment.
You can DIY if you’re comfortable with garage door components, but it’s risky. If unsure, hire a professional for safety and accuracy.
Will a high lift kit affect my garage opener’s limits or sensors?
Yes. The travel limits, force settings, and sensor positions may need recalibration after installing a high lift kit. Verify and test these settings to ensure safe operation.
The limits and sensors usually need recalibration after a lift kit install to stay safe and functional.
Is ceiling clearance a major concern with high lift kits?
Absolutely. If the ceiling isn’t tall enough, the extended track could contact the ceiling or obstructions. Measure first and choose a kit compatible with your space.
Ceiling height matters a lot. Measure first to avoid track contact with the ceiling.
Can I revert to stock if the high lift kit doesn’t work out?
In most cases, you can revert by removing the kit and reinstalling the original tracks and brackets, but you should follow manufacturer instructions and consider professional help if you’re unsure.
Reverting is possible by reinstalling original parts, but follow the manual or hire a pro if unsure.
What maintenance is required after installation?
Regular inspection of tracks, brackets, and springs is essential. Lubricate moving parts, verify sensor alignment, and recheck safety reversal after the first few cycles.
Keep an eye on tracks and sensors, lubricate moving parts, and test safety reversals after installing.
Do high lift kits affect warranty coverage?
Modifications can impact warranty. Check the door and opener warranties and consult the manufacturer or a qualified technician to understand coverage implications.
Modifications can affect warranty; check with the manufacturer or a pro to be sure.
Watch Video
Quick Summary
- Plan thoroughly before starting any modification.
- Follow manufacturer specs for bolts, brackets, and track height.
- Test safety features after installation and calibration.
- Document changes for future maintenance and warranty records.